Working with Microservices
Microservices are small services that allow you to access data in the Session AI cloud server using APIs. A microservice can be available with public or restricted access. To create a microservice with restricted access, you should generate an API key that can be used for authentication.
For example, you can create a microservice to get the profile ID for a given key. Using the Microservices menu, you can write custom code, provide or restrict the accessibility of the microservice, set the REST endpoint, and save the microservice. The system generates the API URL to call the microservices that you created.
For more information about calling microservices API, refer to Call Microservices in Session AI Developer's Guide.
This section further describes how to:
Create a Microservice with Public Access
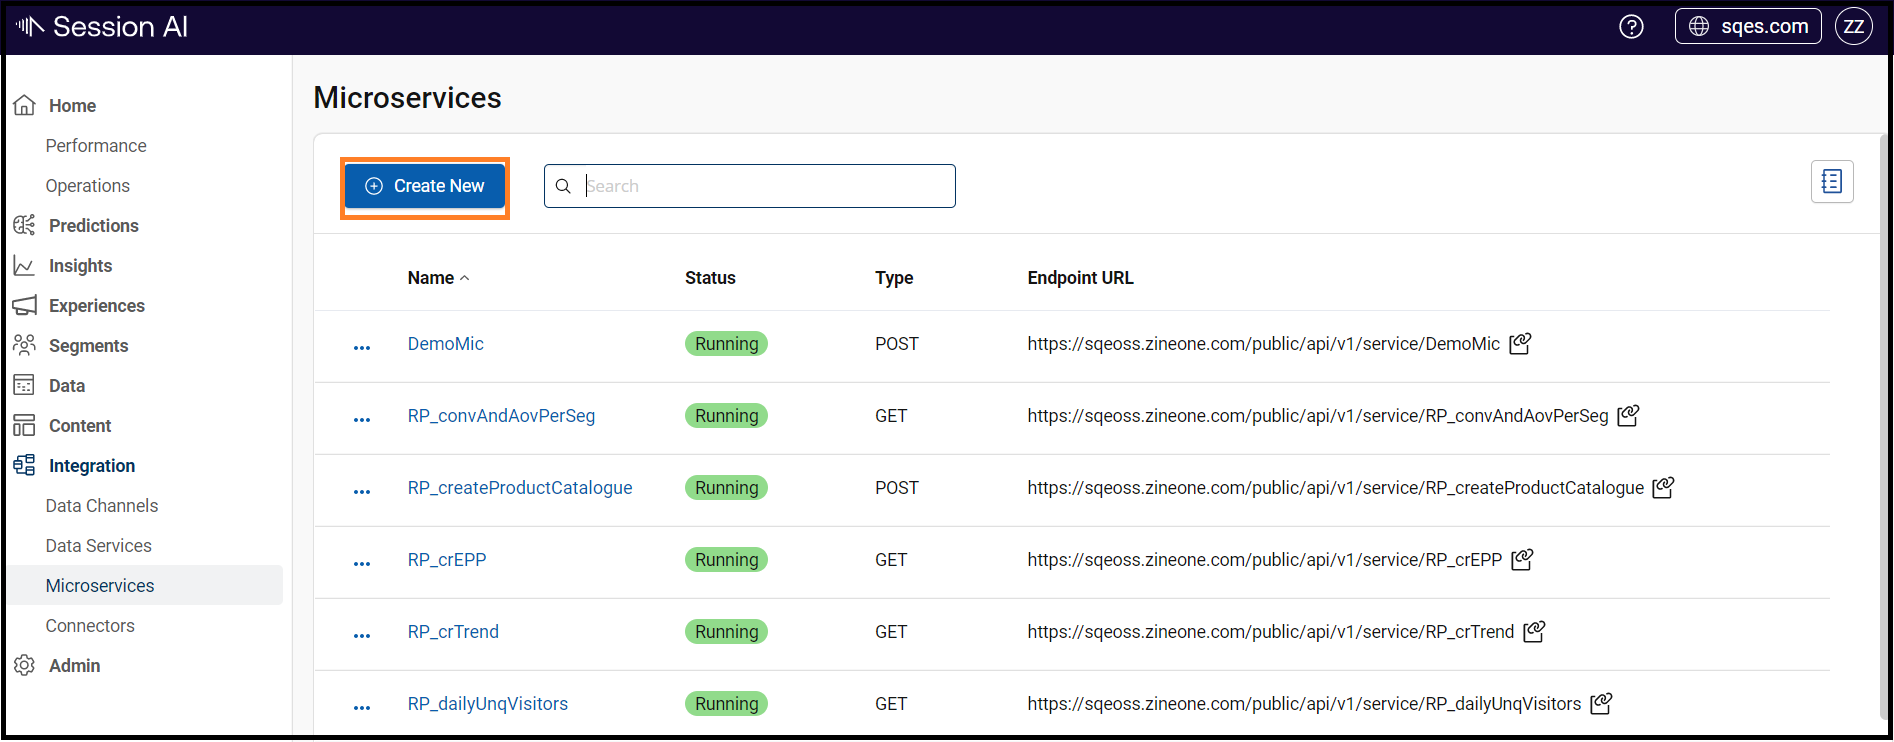
- In the Integration menu, click Microservices tab.
The Microservices screen appears. - On the Microservice screen, click Create New.
The Microservice screen appears.
- On the Microservice screen, perform the following:
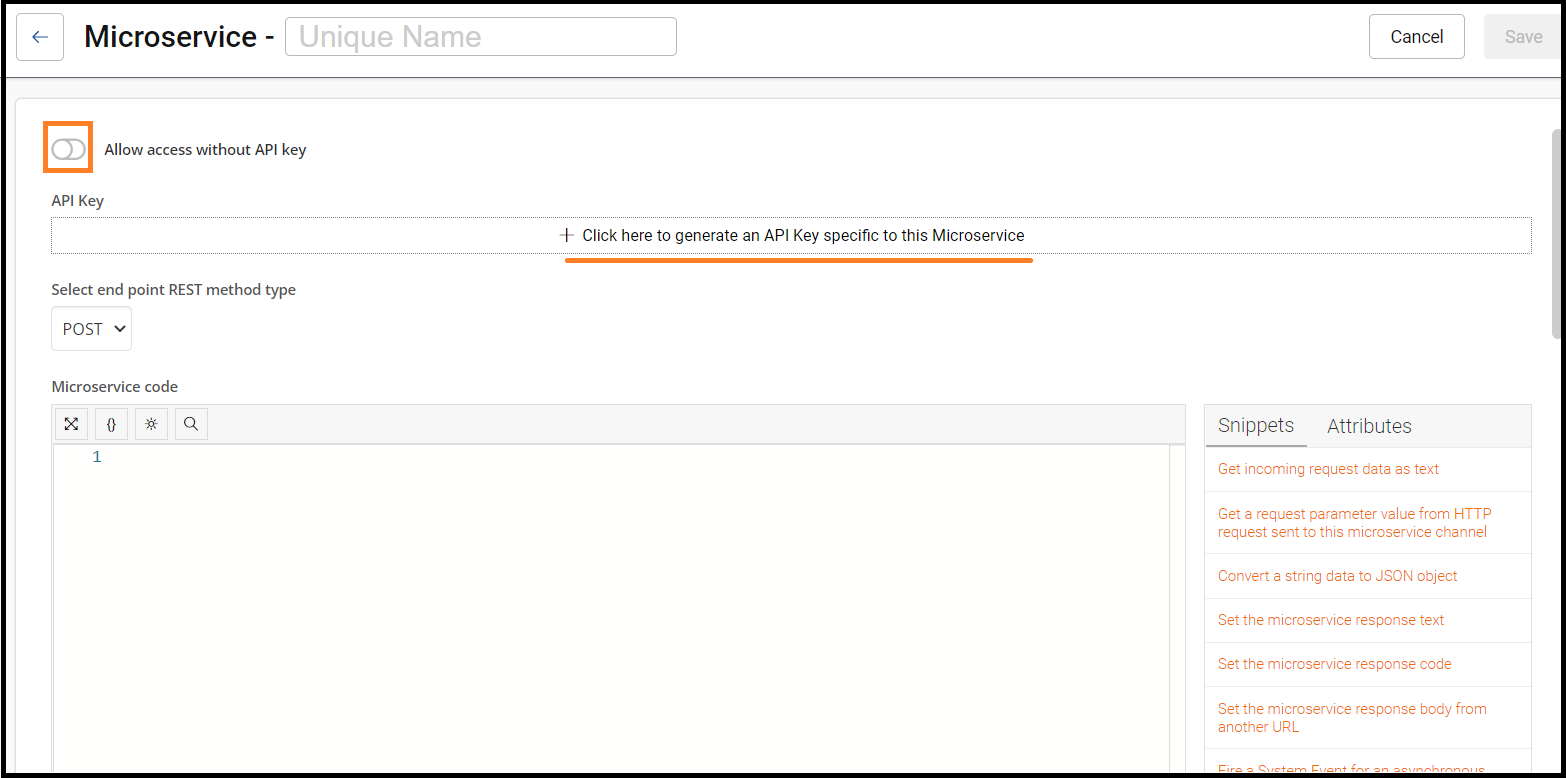
- Unique Name: Enter the appropriate microservice name.
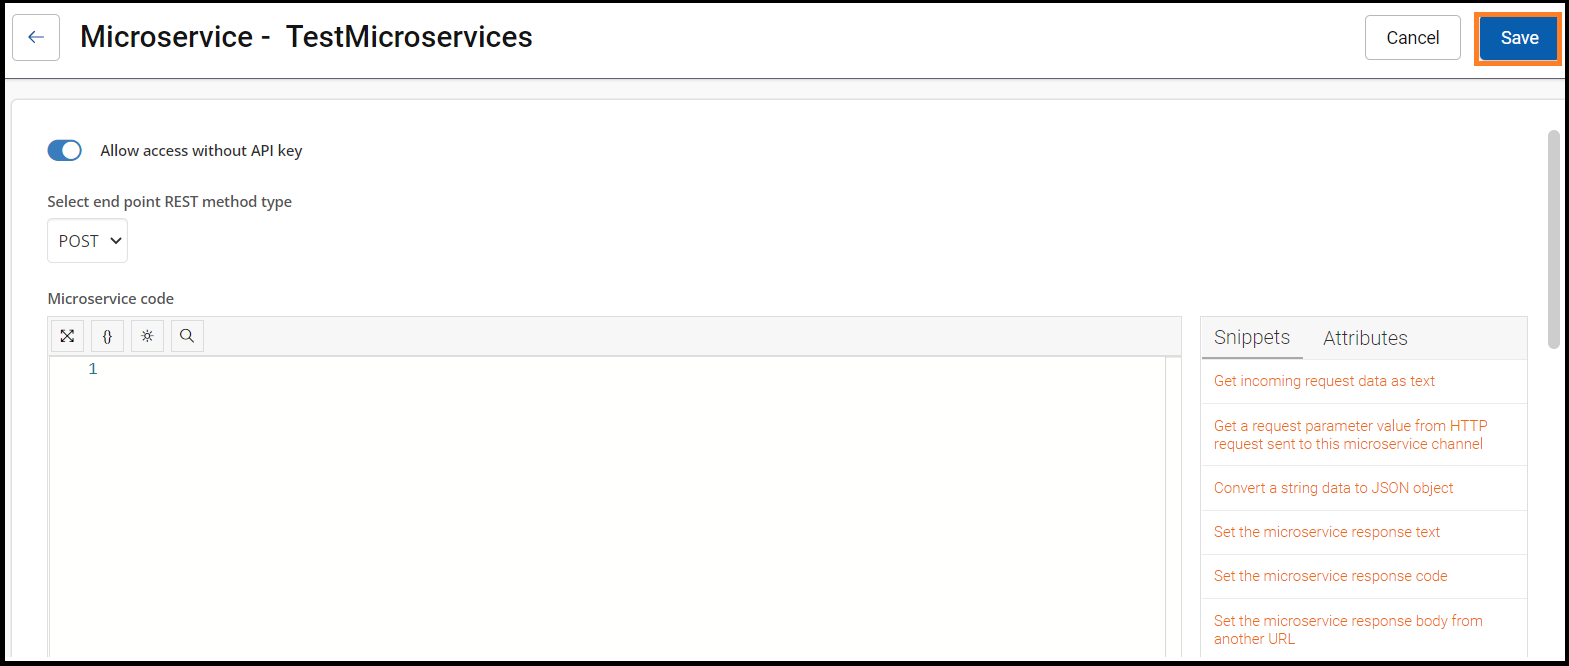
- Allow access without API key: Switch on the toggle to enable microservice for public access. The API Key option is disabled.
- Select end point REST method type: Select the desired endpoint option from the drop-down list. Session AI provides POST and GET endpoints.
- Microservice code: You can write your custom code to create the microservice. In addition, you can use the out-of-the-box snippets available in the Snippets and Attributes tabs.
- Click Save.
The Available Microservices list displays the Status, Type, and system-generated API URL. Use this API URL to call the microservices you created.
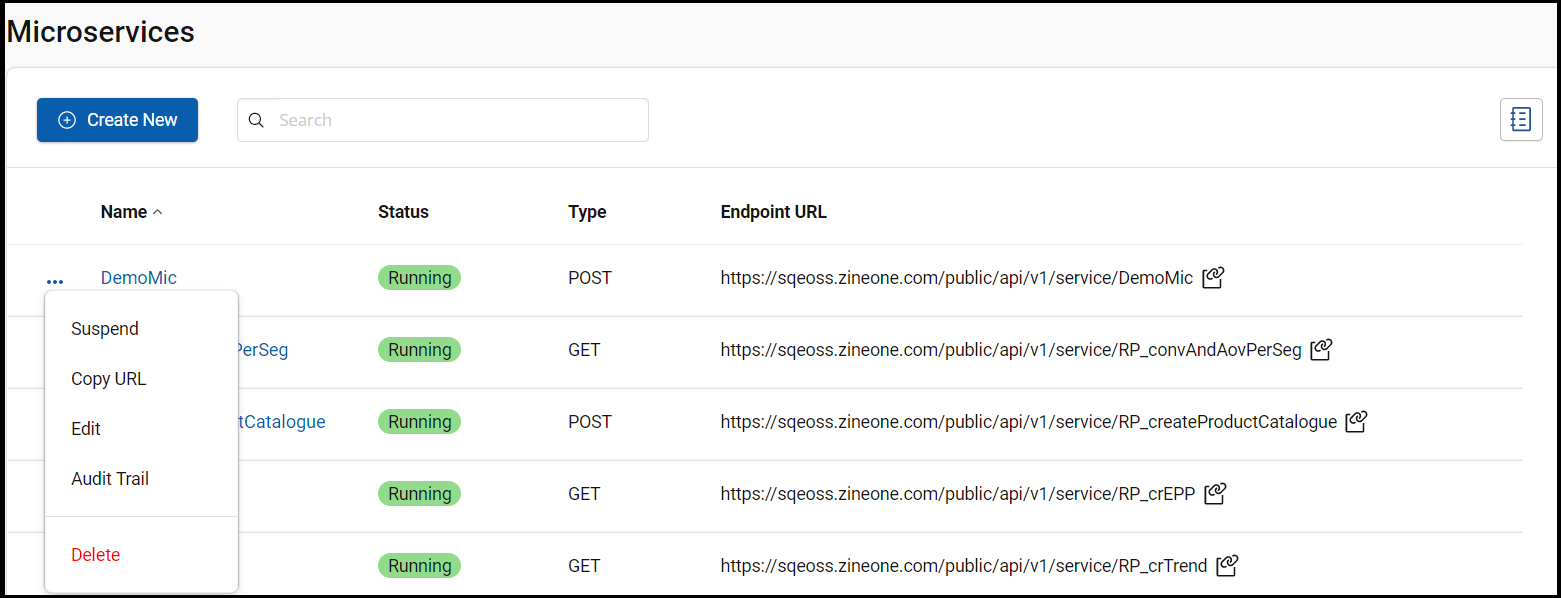
- Click
 icon to perform the following activity:
- a. To Suspend the microservice
- b. To Copy URL of the microservice
- c. To Edit the microservice
- d. Audit Trail to view the detailed information of the microservice
- e. To Delete the microservice
NamespaceTo use the publicly accessible microservices, which do not require an API key, the namespace should be a part of the URL in the following format:
http://<cloud>public/api/v1/service/<microservice_name>?namespace=<namespace>
For example, if the microservice name is "TestMicroService" and the namespace is "automation_com", then the URL format should be:
http://<cloud>public/api/v1/service/TestMicroService?namespace=automation_com
To know your namespace, contact your Session AI Cloud Administrator.
Create a Microservice with Restricted Access
- On the Microservices screen, click Create New from the top left corner.
The Microservice screen appears. - On the Microservice screen, perform the following:
- Unique Name: Enter the appropriate microservice name.
- Select end point REST method type: Select the desired endpoint option from the drop-down list. Session AI provides GET and POST endpoints.
- Microservice code: You can write your custom code to create the microservice. In addition, you can use the out-of-the-box snippets available in the Snippets and Attributes tabs.
- Click Save. The newly created microservice for public access appears in the Available Microservices list.
NoteTo generate an API key, you must first save the microservice.
- To create the API key, click the newly created microservice.
The Editing Microservices definition screen appears. - Click + Click here to generate an API Key specific to this Microservice.
The system generates an API key that is used to access this microservice. - Click Save.
The Available Microservices list displays the system-generated API URL. Use this API URL to call the microservices you created.
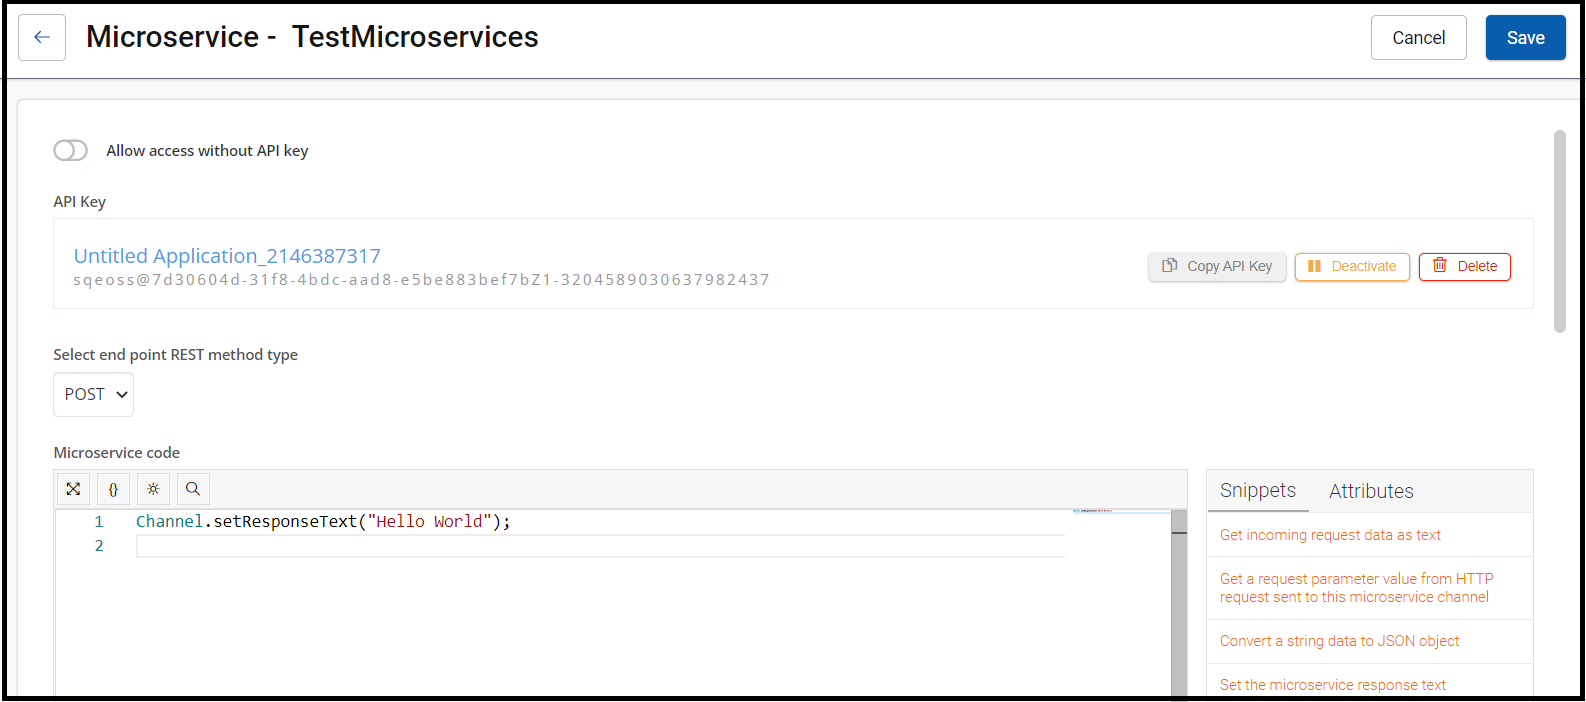
API KeyIn the API Key section, click the Deactivate and Delete button to deactivate and remove the generated API key, respectively.