Android SDK
This section describes:
- Downloading Android SDK
- Generating Android API Keys
- Configuring Android SDK
- Managing Android SDK Tags
- Configuring Android SDK Properties
Downloading Android SDK
Before performing any setup, download and integrate the SDK with your project.
To download the SDK, follow the steps given below:
- In the channel screen, click Android SDK.
The Android SDK screen will be displayed - Click the Download SDK tab and then click the Android icon.
The latest compatible Android SDK JAR file version will be downloaded.

- Integrate with your application with Session AI's Android SDK.
Generating Android API Keys
Android API keys are valid only for the selected channel.
To generate an Android API key, follow the steps given below:
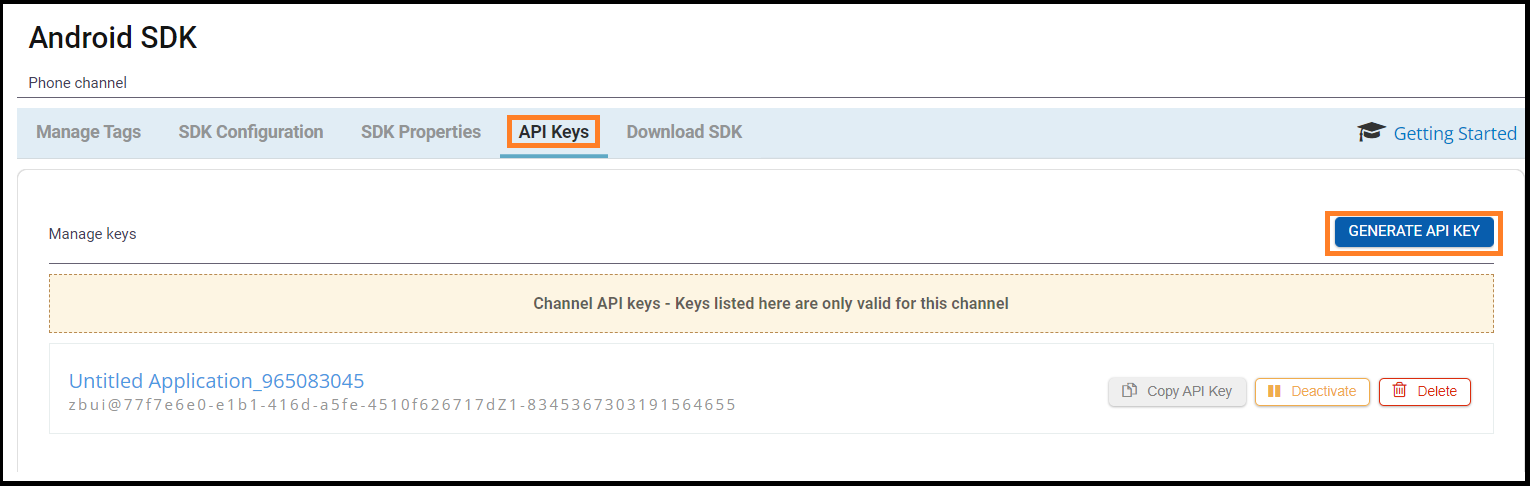
- In the Android SDK screen, click the API Keys.
- Click the GENERATE API KEY located in the upper-right corner.
A new API key with the system-generated name will be displayed.
Note:
- A newly created API key will be in an Active state.
- To deactivate the API key, click the Deactivate button.
- To delete the API key, click the Delete button.
- To copy the API key, click Copy API Key.
- To change the name of an API key, click the system-generated API name.
The API Key dialog box will be displayed. - Enter the unique name in the Application Namefield.
- Click OK. The API key will be renamed.

Configuring Android SDK
Configuring the SDK allows you to track the geolocations of the customers and return when they enter and exit the geofence that you defined in the Session AI platform.
For more information on how to set Geofence location, refer to Add and Manage a Location Channel section.
If the geofence locations have been defined in the Session AI platform, and settings are configured, then Google asks the user for location services permission. Once the app is given access to location services, the SDK starts the Google API client to track geofencing. When a customer enters or exits a geofence region (defined in the Session AI platform), SDK notifies the Session AI Cloud, and then the Session AI Cloud sets into motion any predefined rules for this event.
You can configure the following Geolocation services:
- Fine Location: Provides location services from GPS and network location providers available on the device with higher accuracy.
- Coarse Location: Provides location services using Google's GeoLocation API. If a customer has not been permitted to access the application's fine location, you can enable the coarse location permissions. The coarse location services work even if the location service is disabled on the Android device.
To configure the geolocation service, follow the steps given below:
- In the Android SDK screen, click the SDK Configuration.
- Enter an appropriate time in minutes for *How often should the SDK check for configuration changes?** to check for configurations made in Manage Tags, SDK Configuration, and SDK Properties.
- Enable the Allow SDK to collect user's location toggle to track the customer's fine location.
- Enable the Allow SDK to collect coarse location in case the user has not given permission to collect their fine location toggle to collect the coarse location even if the customer has not been allowed accessing their fine location.
- Enter your Google's GeoLocation API key in the Provide API key for Google Location API field.
- Enter appropriate time as per selected duration unit in How often should the SDK check the user's location.
-
Enable By default open my application when a user touches a push notification to launch the application using the application launcher activity. Enter the appropriate Application URL in the field.
-
Click Save.

Note:
- For more information on Android Location services, refer to the Android Location Services.
- SDK sends updates based on significant location changes provided by Android. Furthermore, an update is sent only if the time elapsed since the last update is more than the threshold set in the Session AI platform.
- If the Google API returns an error, then the SDK will send the next request only after the set interval time for the 'z1.location.coarse.timer' property has elapsed. The 'z1.location.coarse.timer' property is to be set (in seconds) in the sdkproperties file. Its default value is set as 10mins.
- Android SDK sends the coarse location only when app location permission is not granted, and the app is in the foreground.
Managing Android SDK Tags
Session AI platform provides the Tag Management feature that enables dynamic instrumentation of events in your channel application without having to change the application code or redeploy it.
A tag is a code snippet that is sent to the channel application and activated on a defined triggering event in the application, such as a page load/unload. When the event is triggered in the channel application, the tag defined for that trigger is executed, and it sends its event payload to Session AI Cloud.
To define a tag in the Session AI platform, you should provide the Tag Name, Tag Trigger, Tag Action, and a Tag Payload, which is the event associated with the Tag Action. To activate a newly created tag, it should be published in the Session AI platform.
To create Android SDK tags, follow the step given below:
- In the Android SDK screen, click Manage Tags.
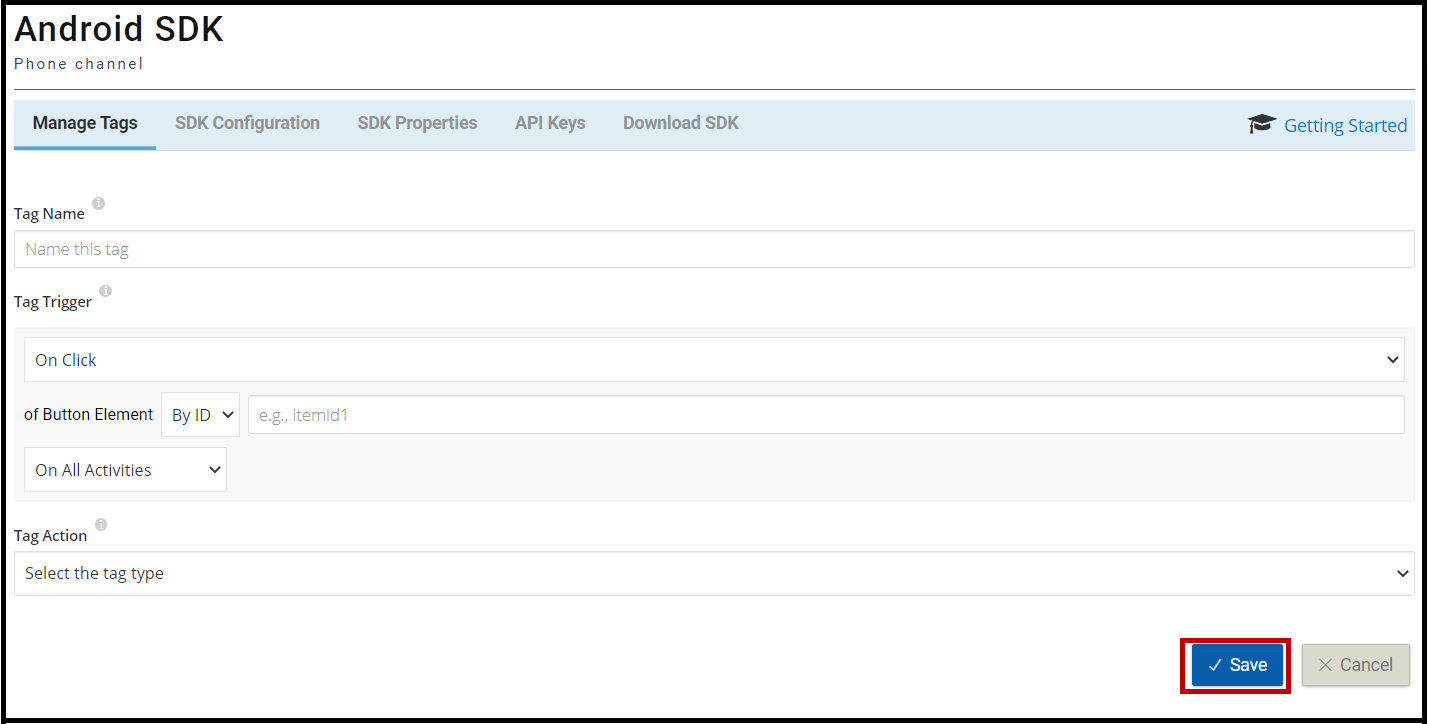
- In the Manage Tags tab, click the Create a new Tag.

The settings to create a new tag screen will be displayed.
- Provide the following details:
-
Tag Name: Enter the unique tag name which allows you to identify this tag.
-
Tag Trigger: It defines "when" the SDK should execute this tag on the device. The system allows you to create the following types of Tag Triggers:
- On Click: To be used when the developer wants to trigger the tag action with the click of a Button Element. The developer needs to provide the button id to identify the element and declare whether the button should be tracked on all activities, on one specifically named activity, or on any activity from a list of activities.
- On Value Changed: To be used when the developer wants to trigger the tag action on the value change of an EditText element. The developer needs to provide an ID to identify the EditText element and declare whether the button should be tracked on all activities, on one specifically named activity, or on any activity from a list of activities.
- On Activity Start: To be used when the developer wants to trigger the tag action on a load of a specific Activity or on all Activities used inside the application.
For example, given a class called LoginActivity.java in your project, the Activity name would be “LoginActivity”. - On Activity stop: To be used when the developer wants to trigger the tag action when a specific Activity is closed. There is also an option to select "All Activities" so that this tag will trigger on the close of any activity in the app.
For example, given a class called LoginActivity.java in your project, the Activity name would be “LoginActivity”. - On Call: To be used when the developer wants to trigger the tag action after some method call on a specific Activity or any activity from a list of activities.
For example, if we want to instrument an event after a method called "login" then the method name will be login and the developer has to provide the specific activity name (or list of names) in which this method is called. - On Value Changed in Data Layer: To be used when the developer wants to trigger the tag on change of a variable added to the Session AI data layer. This addition is done using the aforementioned API
Session AI.addData("param_name", "param_value")
For example, if the developer adds a variable called "loginTime" to the data layer and if this trigger is set up to track that variable then it will fire whenever that variable changes. To do this the developer has to provide the variable name "loginTime" while creating the tag. The developer can also track multiple variables with one tag by providing a pipe-separated list of variables, for example: "loginTime|logoutTime".
-
Tag Action: Select Send event to Session AI Cloud. The settings related to the selected tag action appear. In the Tag Payload section, enter the following details:
- Event Name: Enter the appropriate event name and click Add More to add the Event Parameters for the selected event. The event name entered here is sent by the SDK to the Session AI cloud server.
- Click Save.
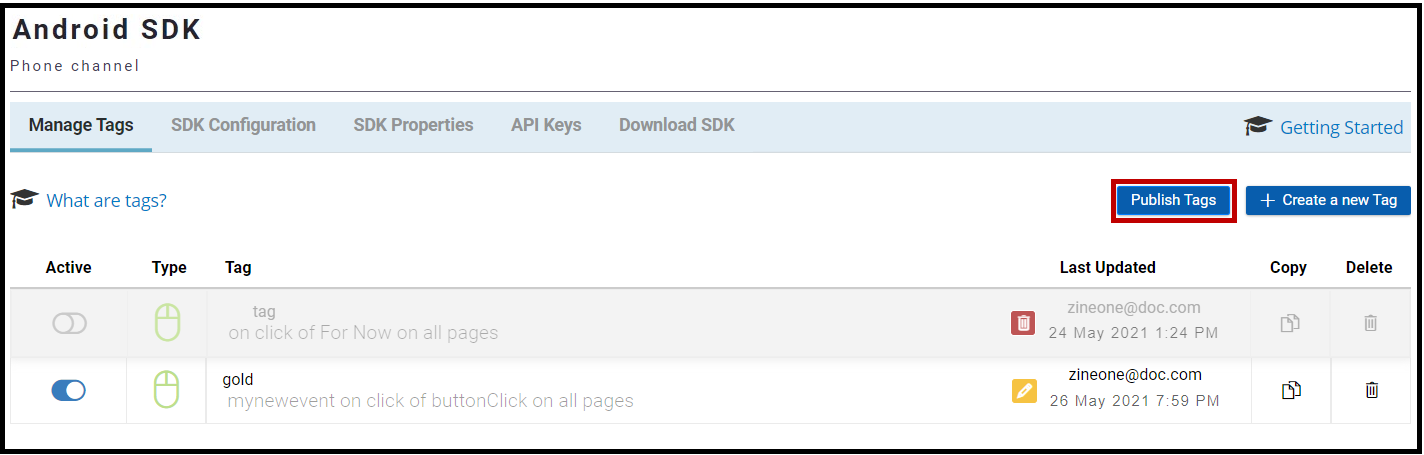
The newly added tag appears in the list of tags.
5. To publish all active tags, click Publish Tags located in the upper-right corner.
Once published, it's delivered to the native application whenever the SDK connects to the Session AI server.
Note:
- By default, the status of the newly created tag is Active.
icon indicates that the tag is not published. Publish a tag to deliver it to the integrated native application.
- To copy the content of a tag, click the Copy icon.
- Click the Delete icon to delete the tag permanently. Tags marked with this
icon are deleted tags. Click Publish Tags to remove the deleted tag from the system.
- For more information about the Android SDK tags, refer to the Android Tag Management topic in the Session AI Developer's Guide.
Configuring Android SDK Properties
Session AI provides various out-of-the-box properties that can be used to configure the Android SDK.
For more information about the Android SDK properties, refer to the Android SDK Properties section in Session AI Developer's Guide.
The Session AI platform allows you to set values for the desired properties of the Android SDK to match your app design and requirements.
To configure display settings for messages, follow the step given below:
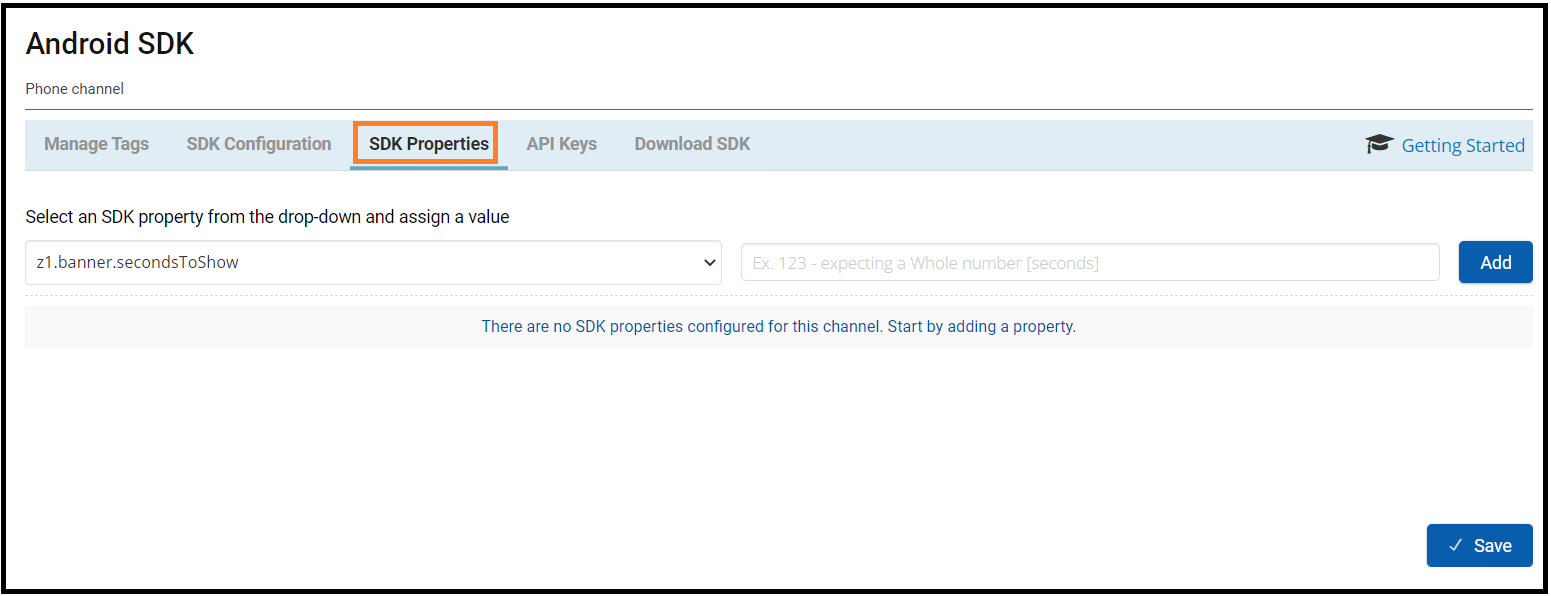
- On the Android SDK screen, click SDK Properties.
The screen displays the following settings. - Under Select an SDK property from the drop-down list and assign a value, perform the following:
- Property: Select the appropriate property name from the drop-down list.
- Property Value: Enter the appropriate property value.
- Click Add. The newly added property appears on the screen.
Note: You can add more than one property. - Click Save to set the changes.
Updated about 1 year ago