Creating Action Templates
The action templates allow you to quickly create actions using pre-configured content and layout. Choose from the available out-of-the-box templates or create custom templates that are used to configure actions while creating experiences.
- Understanding Out-of-the-box Action Templates
- Creating Actions
- Versioning Action Templates
- Deleting Action Templates
Understanding Out-of-the-box Action Templates
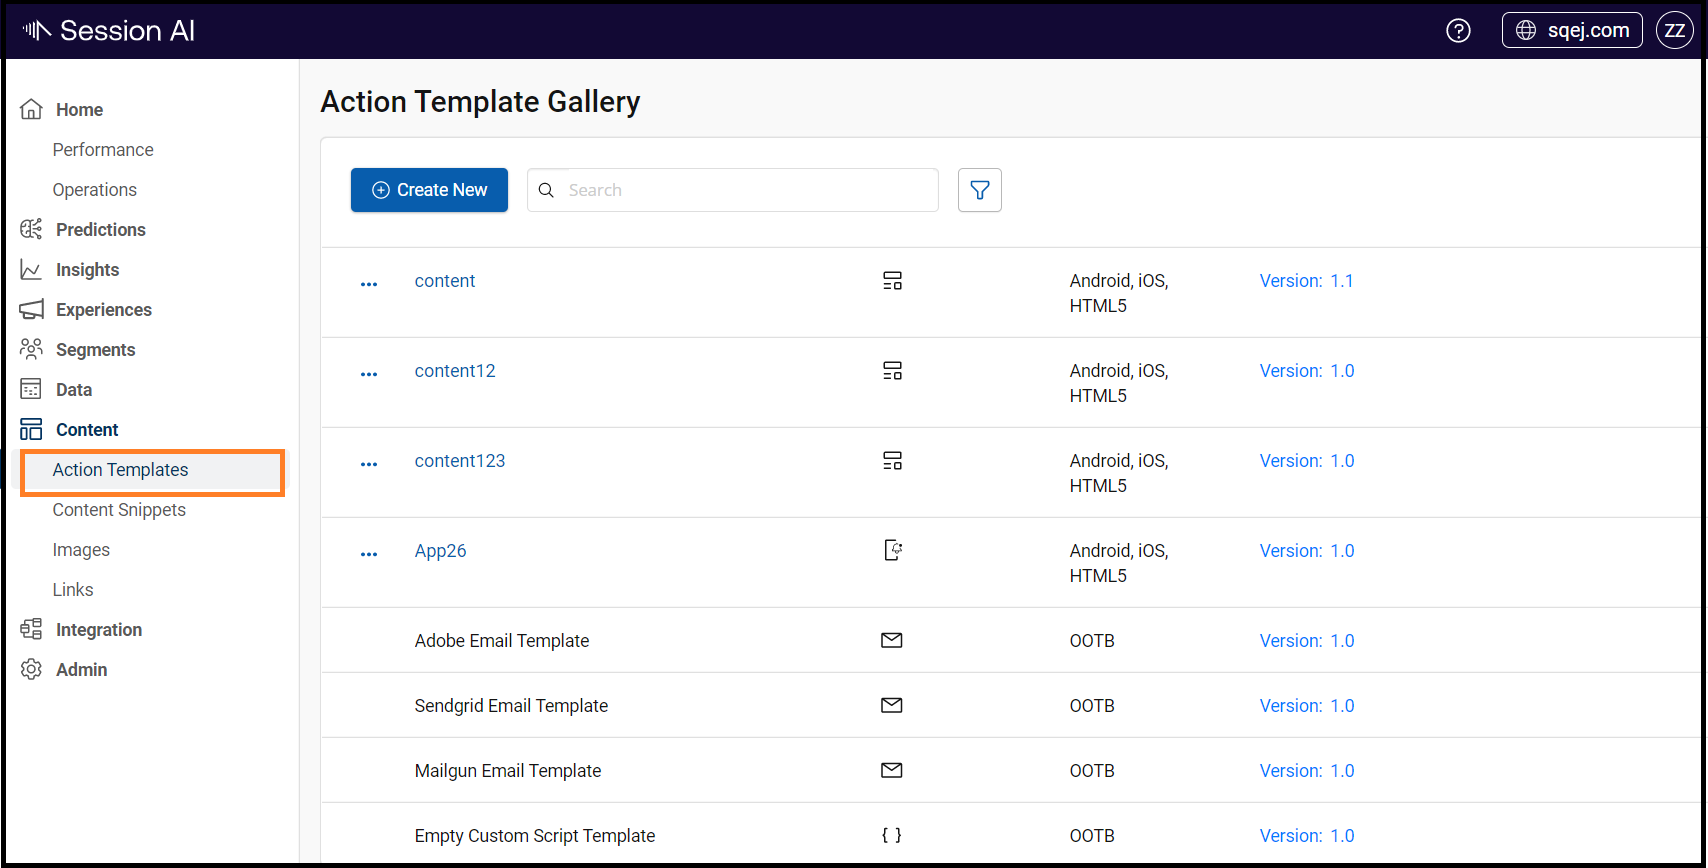
- In the Content menu and click the Action Templates tab.
The Action Template Gallery displays all the action templates.
Note:The OOTB label in orange color on the template card indicates it is an out-of-the-box template. These action templates on this screen are view-only and cannot be edited or deleted. You can use them during experience creation.
The following table describes the out-of-the-box actions templates:
| Action Template | Description |
|---|---|
| Adobe Email Template | Build custom email campaigns for customers using Adobe email services. |
| Sendgrid Email Template | Build custom email campaigns for customers using Sendgrid email services. |
| Mailgun Email Template | Build custom email campaigns for customers using Mailgun email services. |
| Empty Custom Script Template | Build custom campaigns using predefined syntax and elements. |
| REST Template | Build a custom action using RESTful API. |
| Blank Banner Template | Build a banner from scratch. |
| Tag Matched Banner Template | Build a banner template, which dynamically generates its content from the matching tagged content. You can select multiple attributes whose real-time value is used to identify and embed the content for the action. |
| Offer Banner (Modal) | Build a modal banner with promo code, description, date, and a close button. |
| Text and Logo Banner With Color | Build a simple banner featuring text and images with customizable font and background colors. |
| Text Banner With Color | Build a simple text banner with customizable font and background colors. |
| Ticker Tape Banner | Build banners featuring ticker tapes in the background with text and a CTA button. This template is recommended for the Desktop channel. |
| Video Banner Template (YouTube) | Build modal banners featuring embedded YouTube videos. |
| Blank Full Screen Template | Build full-screen messages from scratch. It provides a default close button. |
| Fullscreen With 1 Image | Build full-screen messages featuring one image. |
| Fullscreen Single Optimized Fit | Build full-screen messages featuring one optimized image. |
| Triple Image Full Screen Template Without Close Button | Build full-screen messages featuring three images. It does not provide a close button. However, you can add custom code to include the close button. |
| Triple Image Full Screen Template | Build full-screen messages featuring three images. It provides a default close button. |
| Blank Alert Template | Build alert messages from scratch. |
| Blank App Box Template | Build app box messages from scratch using inline CSS classes. |
| Push Notification Template | Build custom push notifications. |
Creating Actions
This section describes the following three use cases to create action templates and use them to build actions while creating Experiences:
Creating Banner Action
In this use case, we will create a banner to display loan offers using a custom Tag Matched Banner template based on the following customer attributes:
- Account Type
- Member Type
- Operating System (OS)
- Device Type
Following is the basic procedure to accomplish the above use case:
| Steps | Procedure | Description |
|---|---|---|
| 1 | Create Tagged Content for the Banner | Based on customer attributes, create tagged content that will be used in action creation. |
| 2 | Create a Custom Banner Action Template | For this use case, we will create a custom Tag Matched Banner Template that allows you to add multiple tag lists. |
| 3 | Define Banner Actions during Experience Creation | Use the newly created custom banner template during Experience creation. |
1. Create Tagged Content for the Banner
Click here to expand and see the detailed steps!
In Session AI, attributes are customer data classified into various data points that are used to filter and segment your customers. For example, phones, operating systems, etc.

Content tags, on the other hand, are the process of labeling a piece of information with tags, used to filter and identify the most relevant or matching content for the customer.

You want to display a banner that offers loans to customers based on the following attributes and the matching tagged content when they open the loan page in the app.

1. Log in to the Session AI platform, click **Content**
2. Click **Content Snippets** and create the following content tags:

| Attributes and Possible Values                                   | Tagged Content                                                                                                 |
| :--------------------------------------------------------------- | :------------------------------------------------------------------------------------------------------------- |
| **accountType**: Possible values are savings, checking, or null. | - **savings**: Loan offer with an interest rate of 4%. - **checking**: Loan offer with an interest rate of 1%. |
| **memberType**: Possible values are standard, gold, or platinum. | - **standard**: Loan offer with an interest rate of 2%.                                                        |
| **operating system (os)**: Possible values are Windows or macOS. | - **Windows**: This offer is for Windows users.                                                                |
| **deviceType**: Possible values are Android, iOS, or HTML5.      | - **Android**: This offer is for Android users. - **iOS**: This offer is for iOS users.                        |

To create a content tag, refer to the [Add a New Tagged Content](https://docs.zineone.com/docs/tagged-content#add-a-new-tagged-content) section.
2. Create a Custom Banner Action Template
Click here to expand and see the detailed steps!
In this use case, we will use a **Tag Matched Banner** template. Through this template, users can provide tags containing multiple customer attributes that provide the most matching tagged content, which appears on actions. The Tag Matched Banner template is of the following two types:
- **Tag Matched Banner Template (Single Tag List)**: This is an out-of-the-box banner template that allows you to provide a single tag.
- **Custom Tag Matched Banner Template (Multiple Tag Lists)**: This is a custom banner template that allows you to provide multiple tags.
In this use case, we will create the Custom Tag Matched Banner Template (Multiple Tag Lists), where the user can provide two tag combinations.
1. In the **Content ** menu, click **Action Templates**.
The **Action Template Gallery** screen is displayed.
2. Click **Create New** located in the upper-left corner of the screen.

The **Custom Action Templates** screen appears.
3. Click **Banners**.
<img
src={"https://files.readme.io/41f8e09-CreatingActionTemplateBanner.png"}
alt={"CreatingActionTemplateBanner.png"}
style={{
display: 'block',
margin: '0 auto',
border: '1px solid #ddd',
width: '1685px',
height: 'auto'
}}
/>
The following screen appears.
<img
src={"https://files.readme.io/a4a66e8-MultipleTags.png"}
alt={"MultipleTags.png"}
style={{
display: 'block',
margin: '0 auto',
border: '1px solid #ddd',
width: '1685px',
height: 'auto'
}}
/>
4. Enter the following details:
- **Name**: Enter Multiple Tagged Matched Banner Template.
- **Editor**: Enter the following code snippet containing UI Control tags:
| |
| :-------------------------------------------------------------------------------------------------------------------------------------------------------------------- |
| <div class="z1_b_box z1_b_box_style"><div class="z1_b_c2"><div class="z1_b_c2_1" >`?{z1_tags,0}`</div><div class="z1_b_c2_1">`?{z1_tags,1}`</div></div></div> |Displays two Match Tag(s) drop-down list that allows the user to select two tags containing attributes that provide matching tag content. In the case of ?{z1_tags}, the user can provide multiple tag lists. To display the first tag list, the user should insert ?{z1_tags, 0}, and for the second tag list, the user should insert ?{z1_tags, 1}, and so on.
- Click Save.
Save as Template dialog box will be displayed.
- Click the Save as an Offer Template toggle button to save the action as a template.
- Select the Device Type enter the Custom Tags and then click Save.
You can now use this template to create an Experience.
3. Define Banner Actions during Experience Creation
Creating Push Notification Action
In this use case, we will create a simple Push Notification, where the Solution Developer will create a Push Notification Template with the content, and Business User will use this template during Experience creation.
Following is the basic procedure to accomplish the above use case:
| Steps | Procedure | Description |
|---|---|---|
| 1 | Create a Push Notification Action Template | Solution Developer creates the Push Notification Template with the required content. |
| 2 | Simulate Push Notification | Solution Developer simulates the newly created push notification on a device integrated with the Session AI SDK. |
| 3 | Define Push Action during Experience Creation | Business User will use the Push Notification Template during Experience creation. |
1. Create a Push Notification Action Template
Click here to expand and see the detailed steps!
1. In the **Content ** menu, click **Action Templates**.
The **Action Template Gallery** screen is displayed.
2. Click **Create New** located in the upper-right corner.
The **Custom Action Templates** screen appears.
3. Click **Push Notifications**.
<img
src={"https://files.readme.io/c55a4fe-CreatingActionTemplate.png"}
alt={"CreatingActionTemplate.png"}
style={{
display: 'block',
margin: '0 auto',
border: '1px solid #ddd',
width: '1685px',
height: 'auto'
}}
/>
The following screen is displayed.
<img
src={"https://files.readme.io/27b66de-ActionPush.png"}
alt={"PushActionTemplate.png"}
style={{
display: 'block',
margin: '0 auto',
border: '1px solid #ddd',
width: '1750px',
height: 'auto'
}}
/>
4. Click the name text box. The **Message** dialog box appears. Enter the **Name** for the template and click **OK**.
5. In the **Content** tab on the right side, by default settings to configure an action template for the **English** language appears.
6. On the **Templates** screen, enter the following details.
- **Title**: Enter the title name.
- **Subtitle**: Enter a subtitle for the message. It is applicable for iOS version 10 or newer.
- **Message**: Defines the content style. Enter the language-specific text to show only a text push notification.
- **Insert Image or enter media URL**: User this text box to insert images or media URLs.
- **CTA Category**: Enter the appropriate CTA category name, which you want your customers to view in the push notification.
For more information about the CTA category, refer to the [Single CTA - Actions](https://devguide.zineone.com/v2.0/docs/push-enhancements-advanced#section-single-cta-actions) and [Multiple CTA - Push CTA Buttons](https://devguide.zineone.com/v2.0/docs/push-enhancements-advanced#section-multiple-cta-push-cta-buttons) topics.
- **Sound Name**: Enter the custom push notification tone (WAV, AIFF or CAF) files packaged in the customer’s app bundle. To use a custom push notification tone, the WAV files must be packaged under the **res/raw** folder of your application. If these files are available, then they can be referred by name when the push notification messages are created. When the push reaches the device, the SDK uses the named tone as long as it can find it in the res/raw folder.
- **Badge Count**: Displays the number of unread notifications in iOS application.
For more information about attaching badges to the push notification, refer to [iOS AppBox Messages](https://devguide.zineone.com/v2.0/docs/appbox-messages-ios).
- **Custom Data**: Custom Data is used to send extra JSON attributes that are sent along with push notifications. Enter the **Name** and **Value**. Use the **Add More** button to add more custom data. For more information about how to add custom data, refer to the [Sending Custom Data](https://devguide.zineone.com/v2.0/docs/push-enhancements-advanced#section-sending-custom-data) topic.
The below-shown image is the sample for the **Push Notification Template**.
7. Click the **Actions** tab, select the deep link option from the drop-down list, and then click **Save**.
<img
src={"https://files.readme.io/71573fc-SamplePushNotification.png"}
alt={"SamplePushNotification.png"}
style={{
display: 'block',
margin: '0 auto',
border: '1px solid #ddd',
width: '1645px',
height: 'auto'
}}
/>
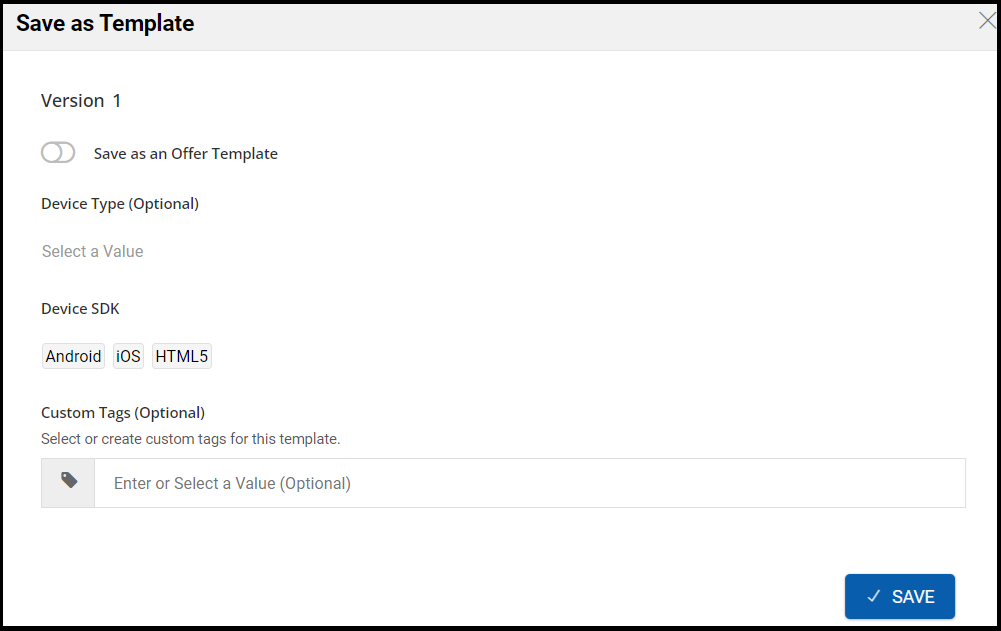
The **Save as Template** window appears.
8. On the **Save as Template** window, enter the following details:
An auto-increment version number feature will automatically show the version number in read-only format.
- Select **Save as an Offer Template**
- **Device Type (Optional)**: From the drop-down list, select one or more following device types:
- Phone
- Tablet
- Desktop
- **Device SDK**: From the drop-down list, select one or more following SDK types:
- iOS
- Android
- HTML5
- **Custom Tags (Optional)**: Type the tag name and press Enter. The tag appears in the text box.
9. Click **SAVE**. The newly created action template appears on the **Action Template Gallery** screen.
<img
src={"https://files.readme.io/4cd5e29-Pushtemplate.png"}
alt={"SaveAsTemplate.png"}
style={{
display: 'block',
margin: '0 auto',
border: '1px solid #ddd',
width: '1775px',
height: 'auto'
}}
/>2. Simulate Push Notification
Click here to expand and see the detailed steps!
Once the push action template has been created, the Solution Developer can test it before using it in the Experience. The **Test It** button allows you to simulate the push notification before using it in an Experience or Interaction. Ensure that the device ID or the customer ID is valid, and the app used for simulation is integrated with the Session AI SDK.

1. In the **Action Template Gallery** screen, click the **Edit** icon to open the newly created Push Notification action template.
2. Click the **Test it** button on the device image.
The **Send Push Notification** window appears.
3. In the **Send Push Notification** window, fill in the following fields:
- **enter Device ID:** Enter the appropriate device ID to send a test push to that device.
OR
- **enter Customer ID**: Enter the appropriate customer ID to send a test push to that device.
4. Click the** Send** button. The system searches for a device or customer based on this information and sends the push notification.
The search results indicate success or further steps that can be followed in the case of failure.
3. Define Push Action during Experience Creation
Click here to expand and see the detailed steps!
The Business User will use the Test Push Template created by the Solution Developer to create an experience.

1. While creating an experience, in the **Action Editor** window, select **Push** and click **NEXT**.
The **Select Template** section displays all the available templates in the Push category.

<img
    src={"https://files.readme.io/feeeda6-TestPushNotification.png"}
    alt={"TestPushNotification.png"}
    style={{
        display: 'block',
        margin: '0 auto',
        border: '1px solid #ddd',
        width: '1802px',
        height: 'auto'
    }}
/>


2. Select **Test Push Template**, and click **NEXT**.
The Action Editor skips to **Chain an Action** section since the Solution Developer already provided the content within the action template.
3. If required, choose a deep link and click **DONE**.
4. Perform the required configuration and publish the experience.
The Push Notification is delivered to the customer.
Creating AppBox Action
In this use case, we will create a simple AppBox action, where the Solution Developer will create a AppBox Action Template, and Business User will use this template during Experience creation.
Following is the basic procedure to accomplish the above use case:
| Steps | Procedure | Description |
|---|---|---|
| 1 | Create an AppBox Action Template | Solution Developer creates the AppBox Action Template with the required content. |
| 2 | Define AppBox Action during Experience Creation | Business User will use the AppBox Action Template during Experience creation. |
1. Create an AppBox Action Template
Click here to expand and see the detailed steps!
1. In the**Content ** menu, click **Action Templates**.
The **Action Template Gallery** screen appears.
2. Click **CREATE ACTION TEMPLATE** located at the upper-right corner.
The **Custom Action Templates** screen appears.
3. Click **App Box Messages**.
The following screen appears.

<img
    src={"https://files.readme.io/41abad2-AppBoxMessage.png"}
    alt={"AppBoxMessage.png"}
    style={{
        display: 'block',
        margin: '0 auto',
        border: '1px solid #ddd',
        width: '1654px',
        height: 'auto'
    }}
/>


4. Enter the following details:

- **Name**: Enter the name.
- **Editor**: Enter the required code snippet.
- **Expiration Time (Optional)**: Allows you to set the maximum length of time, in the YYYYMMDDhhmm format, before the App Box messages are expired.
- **Allow users to select an expiration time when using this template in an experience**: Select this checkbox to allow the Business User to set the expiration time while creating experience using this template.
- **Provide an expiration time**: Select this checkbox and enter the expiration time. Once a Solution Developer sets the expiration time in the template, the Business User will not see the option to select expiration time during experience creation.

5. Click **Save**.
2. Define AppBox Action during Experience Creation
Click here to expand and see the detailed steps!
The Business User can use the App Box Action Template created by the Solution Developer to create an experience.

1. While creating an experience, in the **Action Editor** window, select **App Box** and click **NEXT**.
The **Select Template** section displays all the available templates in the **App Box** category.
2. Select **Sample App Box**, and click **NEXT**.
3. Under **Select Template**, based on the template configuration, the following fields may appear:

- **Message Title**: Enter the message title.
- **Expiration time**: Enter the expiration time in the YYYYMMDDhhmm format.

<img
    src={"https://files.readme.io/d7b944a-ExpirationTime.png"}
    alt={"ExpirationTime.png"}
    style={{
        display: 'block',
        margin: '0 auto',
        border: '1px solid #ddd',
        width: '1791px',
        height: 'auto'
    }}
/>


> 📘 Note
>
> The **Expiration Time** field appears only if the Solution Developer has selected the **Allow users to select an expiration time when using this template in an experience** option while creating the App Box template. If the Solution Developer has already set the expiration time, this field is not available to the Business User.

4. Select the required content. If required, choose a deep link and click **DONE**.
5. Perform the required configuration and publish the experience.
The App Box Messages are delivered to the customer.
Versioning Action Templates
Session AI allows you to create new versions of your action templates in the following format: 1.0, 1.1, 2.0, and so on.
- In the Content menu, click Action Templates tab.
- Click the Edit icon on the action template for which you want to create a new version.
- Perform the required changes and click Save.
The Save as Template window appears. - Enter the following details:
- Version: Set the version of the template. It requires a major number and an optional minor version number separated by a period. (e.g. 2, 2.0, 2.1)
- Device Type (Optional): Enter the device type
- Device SDK: Enter the device SDK type.
- Custom Tags (Optional): Select or create custom tags for this template.
- Click Save.
The experience template, where the action template has been used, prompts the user when a new version is available.
Deleting Action Templates
- In the Content menu, click Action Templates.
The Action Template Gallery screen is displayed.
Action Template DeletionYou cannot delete out-of-the-box (OOTB) action templates.
- Click
 icon to perform the following activity:
- a. To Edit the Action Template
- b. To Delete the Action Template
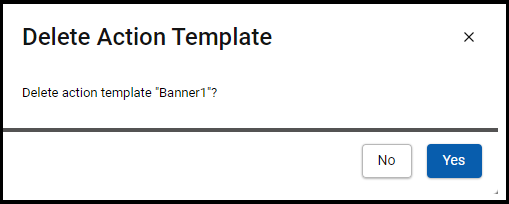
Confirmation message Popup :
- Click Yes to confirm the deletion of the action template.
Updated about 1 year ago