Publishing an Experience using Templates
Experiences menu facilitates business users with user-friendly UI to build and manage personalized experiences.
The Business User can configure and publish the template to deliver Experiences to the customers.
To publish an experience instance, follow the steps given below
- Log in to the Session AI Platform.
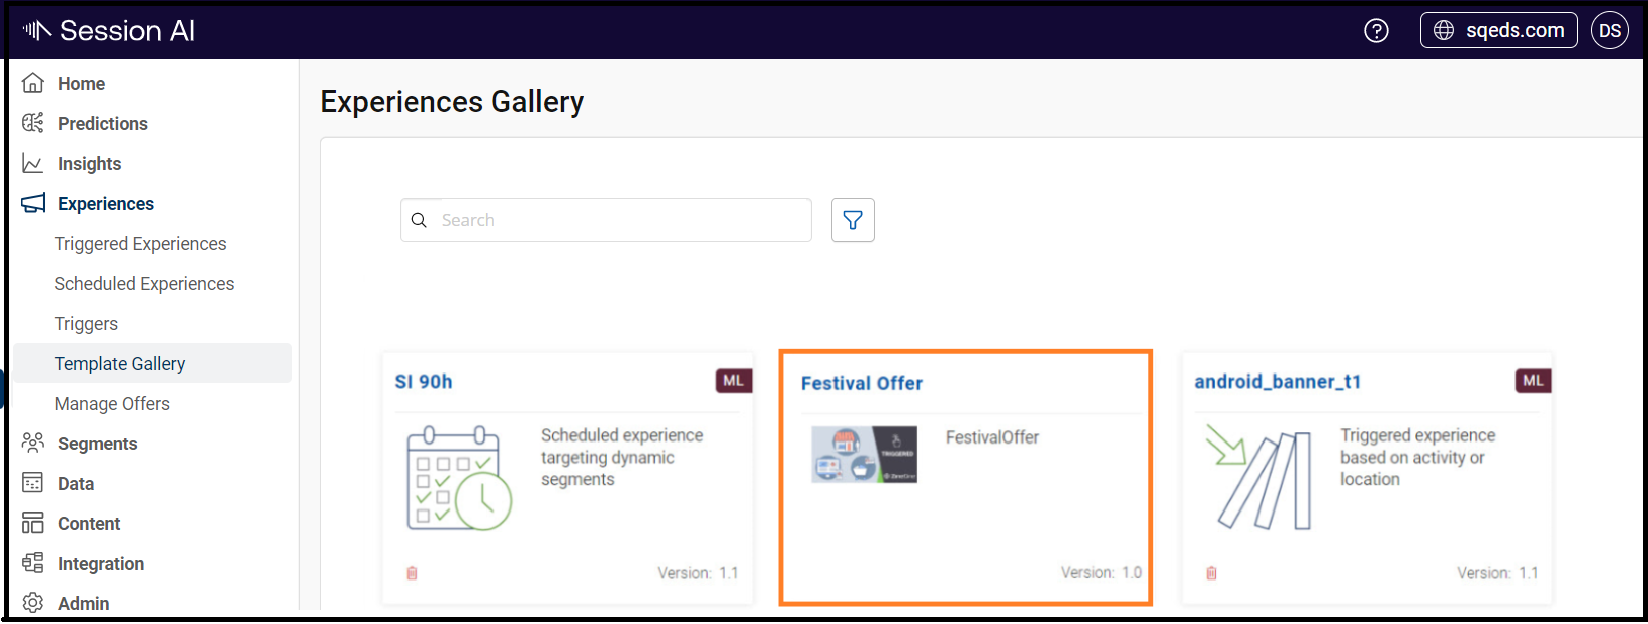
- In the Experiences menu, click the Template Gallery tab.
Experience Gallery screen is displayed. - Browse the gallery and click the desired template.
Note
- Template with
icon indicates that the template requires Event Mapping configuration. Without this configuration, the system does not allow you to utilize the template.
- Use the Filter
icon to filter experiences based on the various categories.
The template page displays the following information:
The template displays, an Overview of the template, Configuration details, Goals to achieve, Version details, and Pre-Built Components.
- Note: Click Version to view details of all the available versions for this template and all the instances created using each version.
- To trigger interaction, click CREATE EXPERIENCE.
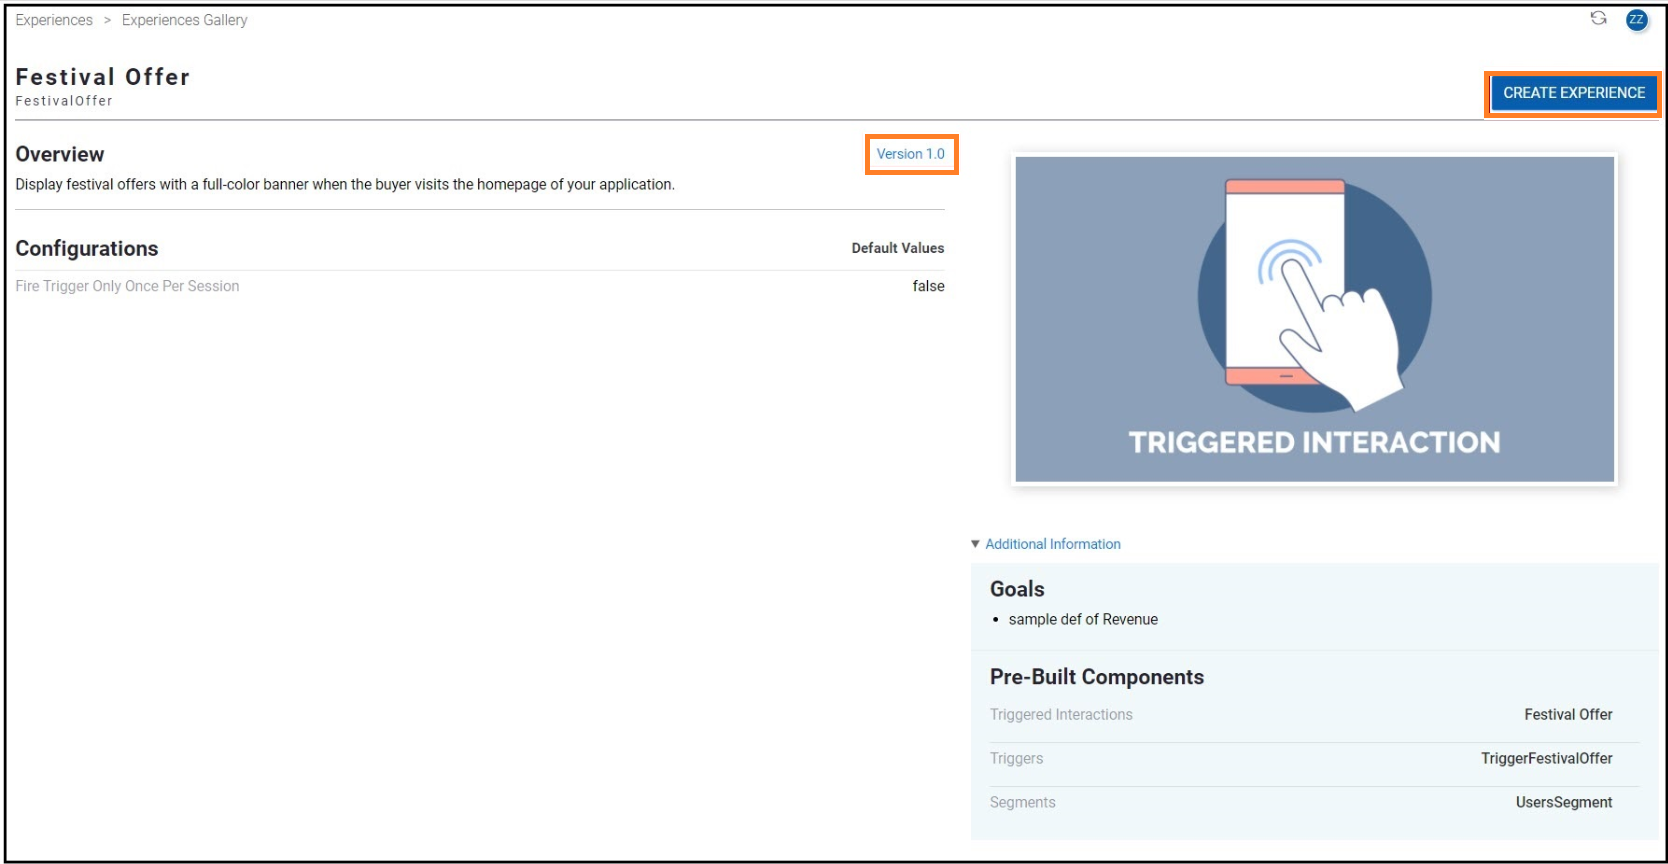
The New Experience: screen is displayed.
- In the CONFIGURE TEMPLATE section, all the configurational parameters set for that template will get displayed.
5. Provide all the necessary details, set for the templates.
- Name: Change the name of the experience, if required.
- Description: Enter the description of the experience.
- Source Channels: Targets the experience only to customers that send events from the selected source channel. (This field is mandatory.)
- Click NEXT
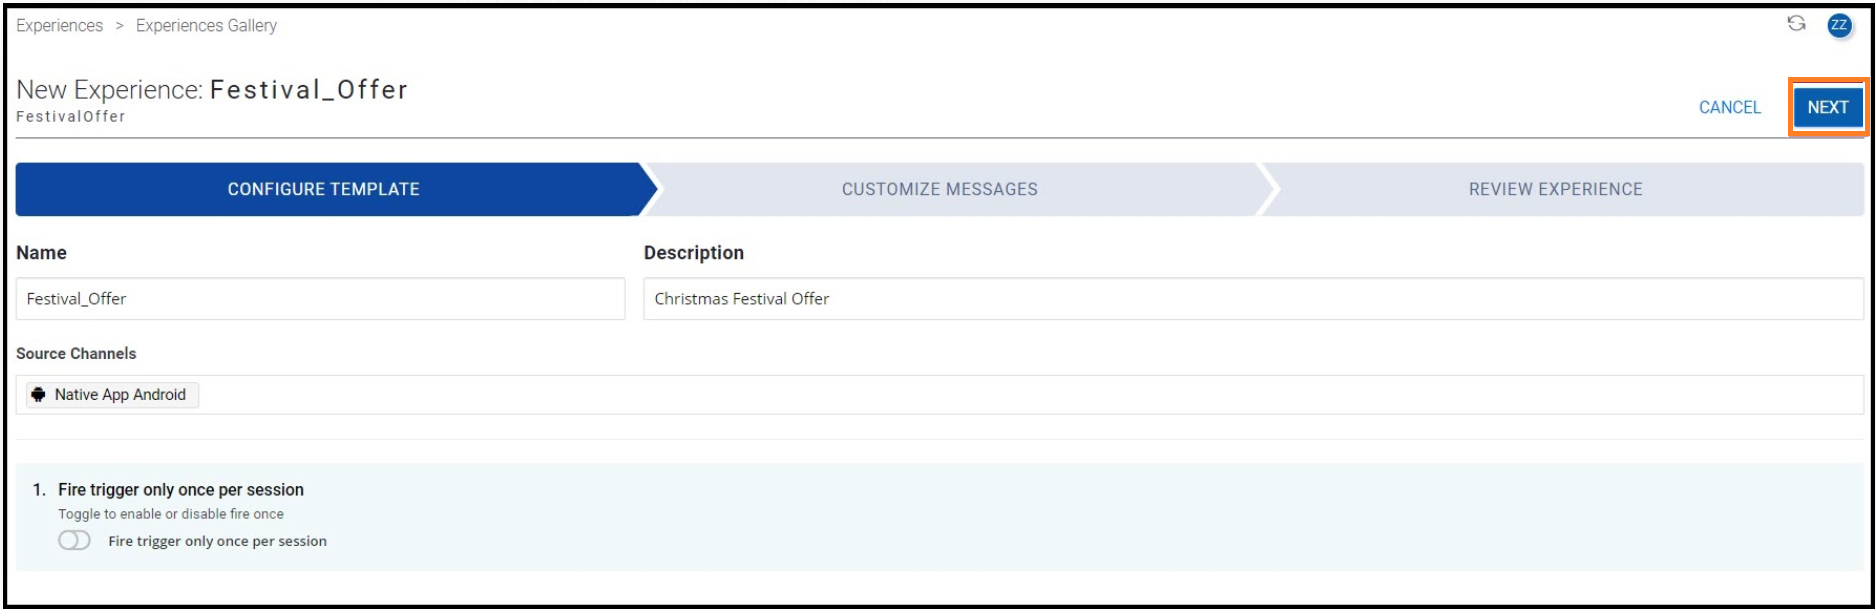
The CUSTOMIZE MESSAGES section is displayed.
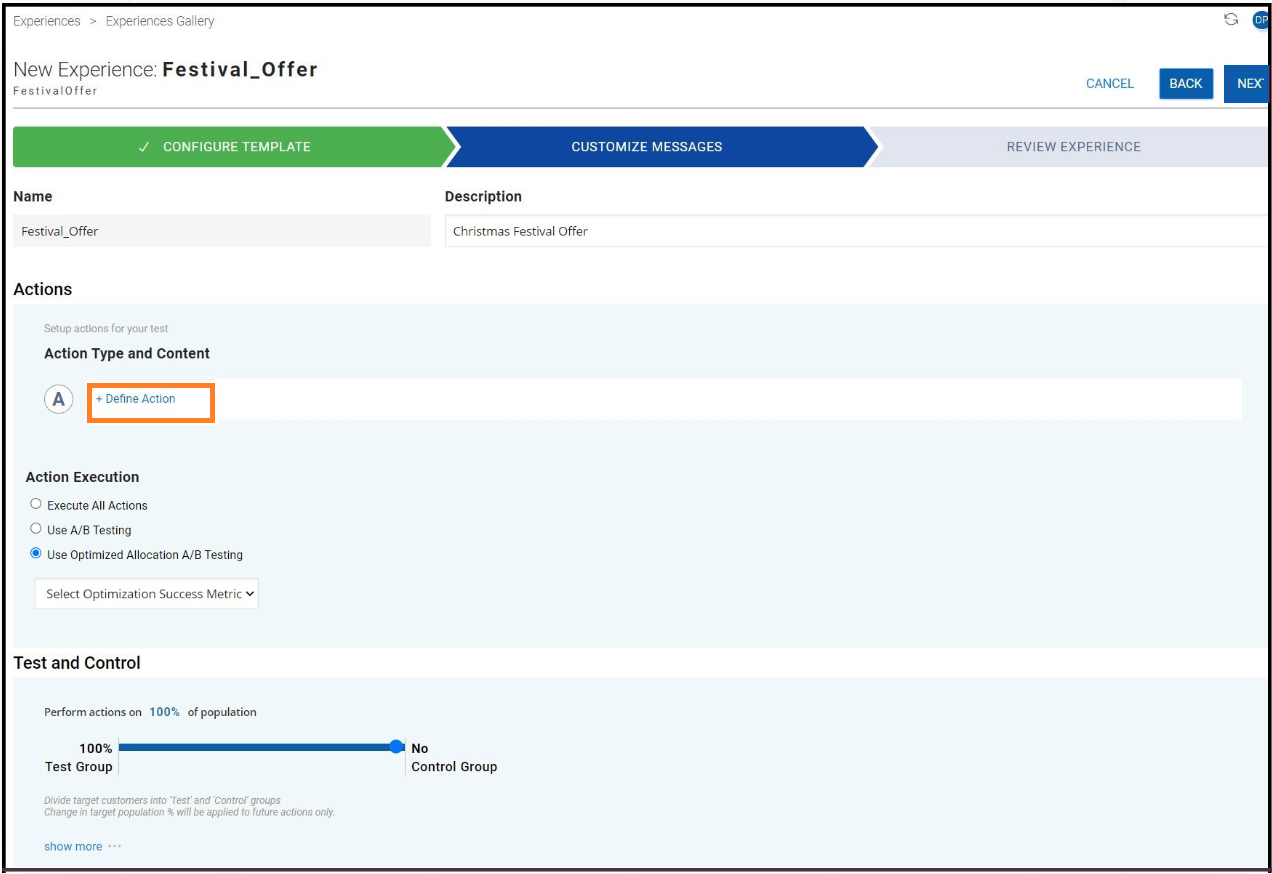
- In the CUSTOMIZE MESSAGES section, provide a combination of configurations using the following options.
Note: Please note selecting an Action is mandatory.
- Action Type and Content: Click Define Action to select the desired action template and content.
Note: In this example, we have selected Banner action.
An Action Editor window is displayed.
- Under Select Type, click Banner action and then click Next.

- Under Select Template, click the desired template from the preconfigured action templates.
Note: Here have selected Text Banner with Color Customizations as an example. [Working with T
Preconfigured Action Templates:
- Some preconfigured action templates can skip to the Chain an Action section.
- To create the content and the action template, refer to Working with Template.
- Click Next.

- Under Configure Template, configure the style of the template and then click Next.

- Under Select Content, select Provide a custom content in Action Content.
- Provide the content for experience in Custom Content Editor.
Note: You can view the action look and feel in the Action Preview field. - Click Next and then in Chain an Action, click Done.

The defined Action Type and Content is displayed on the Customize Message screen.
- To provide Action labels, click labels icon (
 ). An Action Labels dialog box displays.
14. Provide all the necessary information and click OK. The Page label and Position label will get displayed below the action.

Action Execution
* Action Execution: Configure any of the following:
- Execute All Actions: Select this option to execute all the actions.
- Use A/B Testing: A/B Testing is a method of comparing customer responses to two action variants in the same experience, A and B, and identifying which variant is more effective. Switch on the toggle to select the most effective actions and send them to the customers.
- Use Optimized Allocation A/B Testing: Optimized Allocation A/B Testing is a method where the traffic is automatically reallocated towards the winning action.

Test and Control
Test and Control group testing is a method of measuring the effectiveness of an experience by comparing the conversion rate of the customers who received the actions versus those who did not.In Test and Control, perform the following:
- Perform actions on 100% of population: Select the percentage of the population you want to target. Use the control bar to divide the target customer population into Test and Control groups to deliver actions.
- Test Group: Includes the customers that receive actions
- Control Group: Includes customers that do not receive actions
Click show more...
This link is to add customers who must always remain in Target or Control groups irrespective of the percentage of the customer population selected. This feature is only applicable when the target population is less than 100%. The following two pairs of fields appear. You can select the type of profile ID you want to provide and enter the corresponding value in the next field in a comma-separated format from the drop-down list.

Operation Time Window
In Operation Time Window set the time frame in which the triggered interactions operate. Use the following calendar and date picker:
- Start Time: Select the start date and time to initiate the operation of the triggered interaction. You can also enter the back/past date for the start date.
- End Time: Select the end date and time to stop the operation of the triggered interaction.

Note: Configuring the operation time is optional.
Conditions to Configure Operation TimeYou can apply any of the following conditions to set the operation time for the triggered interactions based on your requirements. Configure the start date, the end date, or both:
- If you configure only the start date and time, the triggered interaction is operational from the start time and stops only if the user manually suspends it.
- If you configure only the end date and time, the triggered interaction is operational as soon as it is published and stops when it reaches the end time.
- If you configure both the start time and the end time, the triggered interaction is operational during this configured time frame.
- If you do not configure the start and end time, the triggered interaction is operational immediately after it is published, and stops only if the user manually suspends it.
Target and Conversion
This section allows you to target your audience and improve conversion rates.
- Target to a specific group of customers only: Click the Add icon to add one or more segments.
- This interaction is successful if the customer enters any of the following groups: To add one or more segments, click the Add icon. Select segment window appears. Select the required customer segment and click Done.
If a customer performs an event that triggers the interaction, and if the criteria defined in the selected segment meets the customer's response, then the system adds the customer to the segment successfully. The interaction is marked as successful, and the Converted count of the interaction increases by one.

- Click Next.
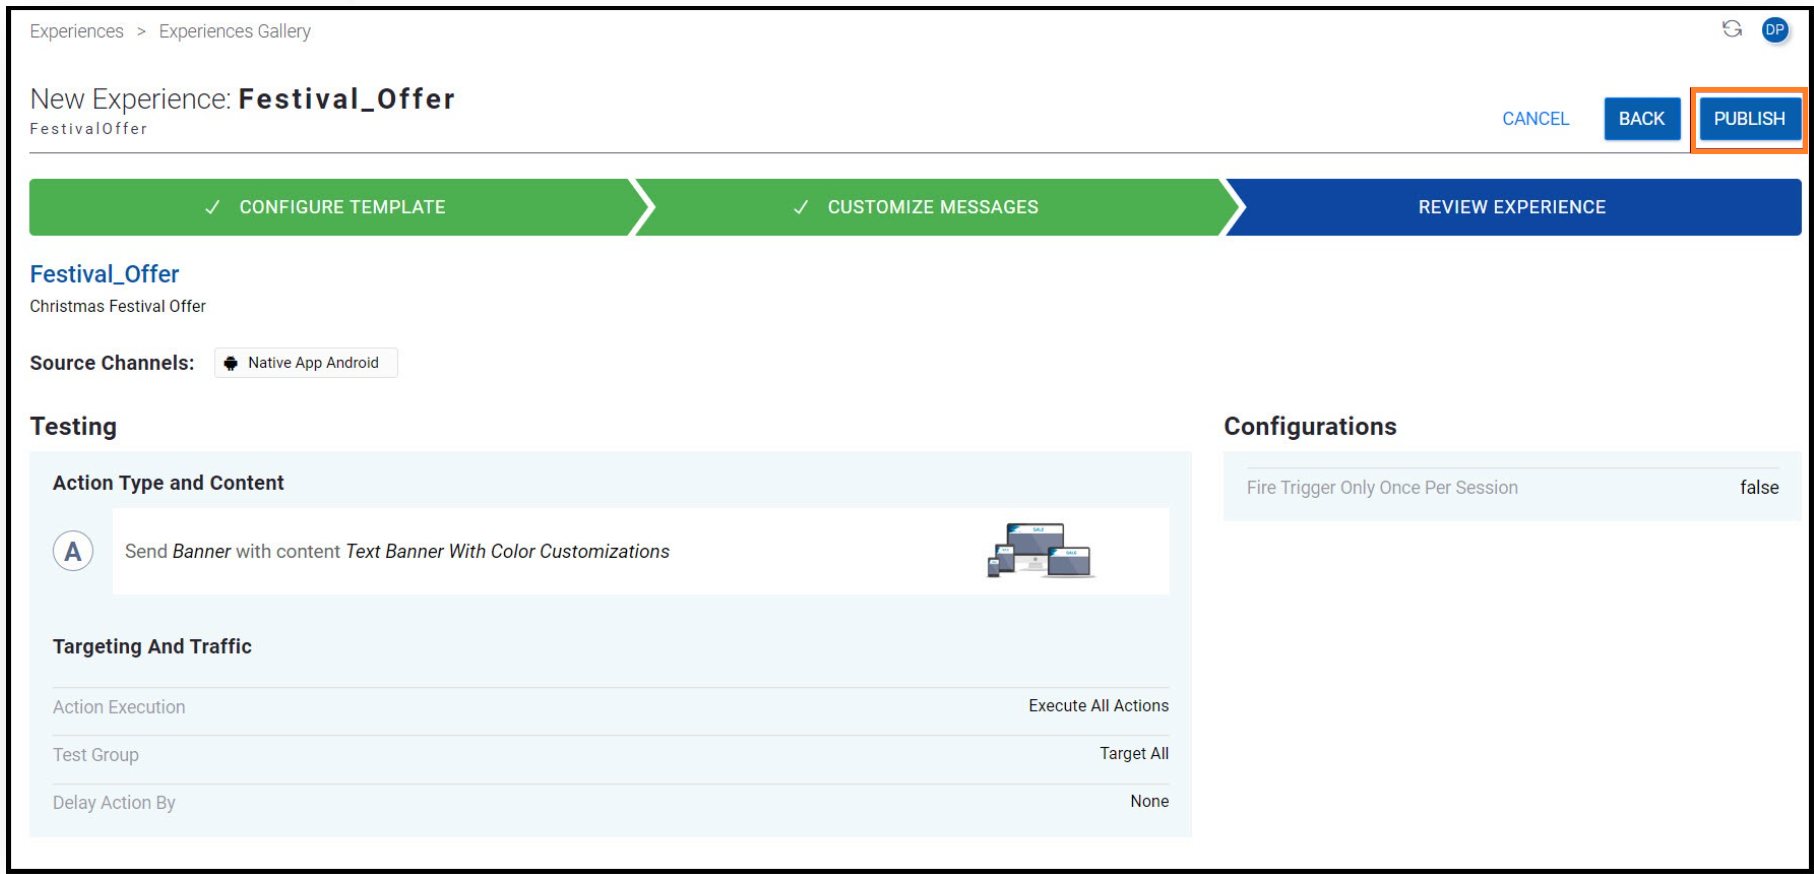
The REVIEW EXPERIENCE section is displayed.
- Review your configurations and actions, and click PUBLISH.
You can choose either of the following options to publish the experience:
- Publish: Publishes the experiences and delivers the action to the user's device.
- Publish As Silent: This allows you to publish the experience without delivering the action to the user's device.
When you publish the experience, an instance of this template is published and activated, and ready to be triggered by the incoming channel events.
NoteSession AI allows you to publish various instances of an experience using different versions of the experience template having different configurations.
Updated about 1 year ago