Creating Triggered Experiences
To create a Triggered Experience, follow the steps given below:
- In the Experiences menu, click the Triggered Experiences tab.
The list of all the Triggered Experiences is displayed. - To create triggered experiences, click Create New.
Create a Triggered Experiences window is displayed. - Click the desired type of action to be displayed on the user’s device.

TE flow displays the Targeting & KPIs tab screen to create new TE.
- Enter the name for the new Triggered Experience field.
Under the Targeting tab screen, provide the following information. - In Trigger, search and select the desired event-based trigger.
- In Segments, search and add one or more segments.
- In the Frequency field, select the type of frequency to target the users.
- In Measurement select the five Dashboard Header Metrics and Columns metrics that you want to track for experience in the TE performance dashboard
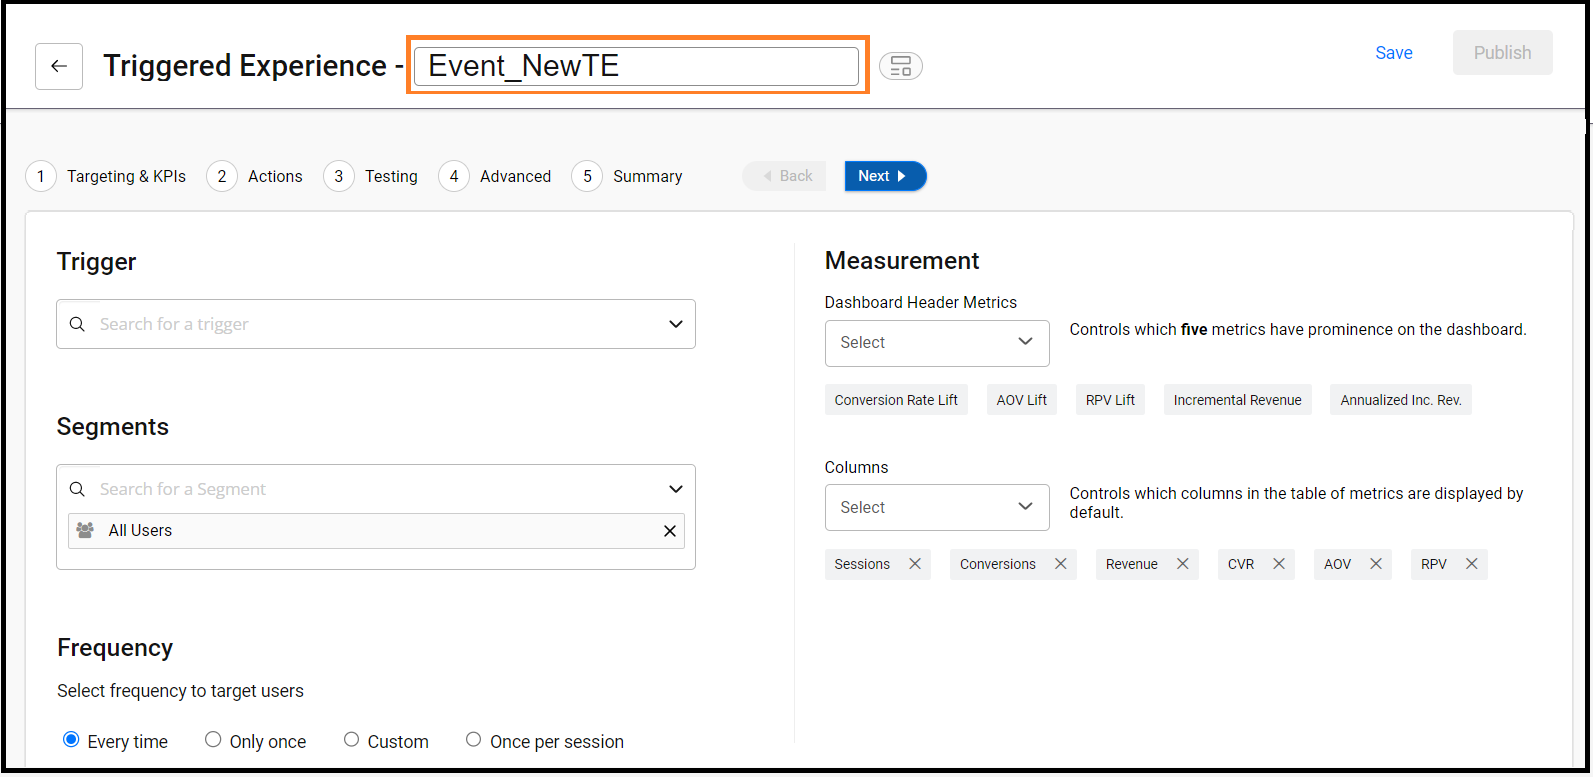
- Click Next.
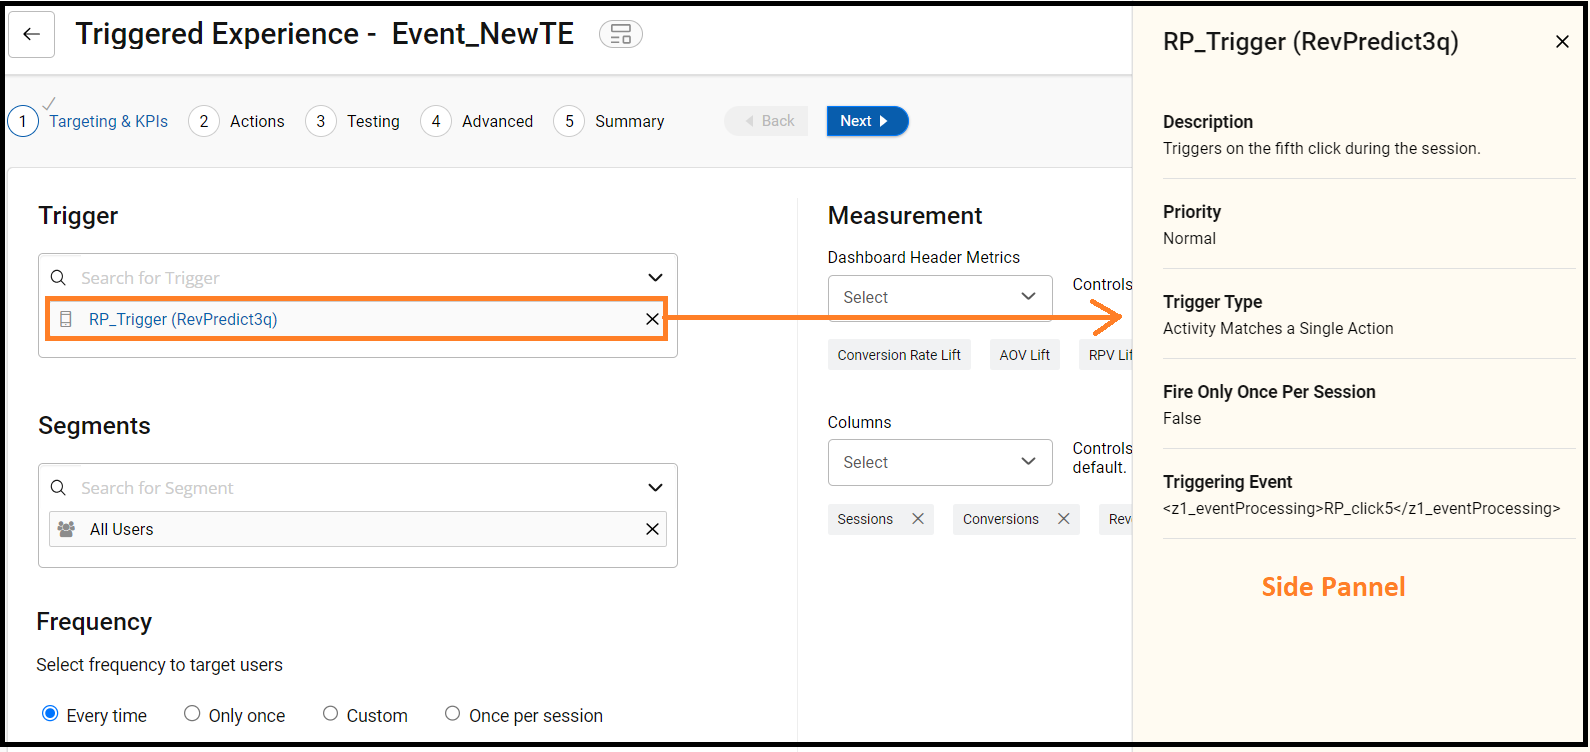
NoteClick the selected triggers or segment from the Trigger or Segments selection box, a side panel will open displaying all the configurations of selected trigger or segments.
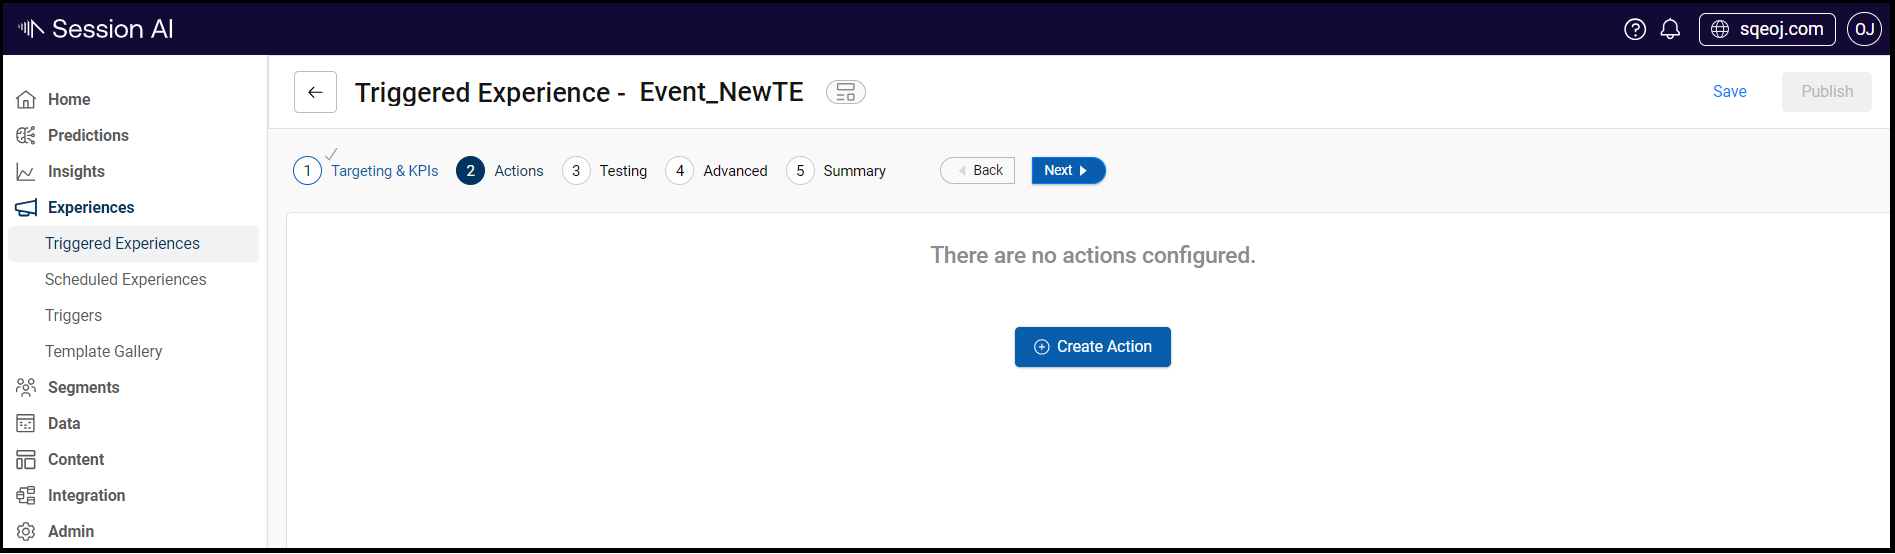
The flow displays the Actions tab screen. Click Create Action.
- Under Action Template, click
 icon. The drop-down list of all the templates will be displayed.
 - Assign a unique name for an action in the Action 1 text box.
- Select the desired template or scroll down to choose the template from the preconfigured Action Template.
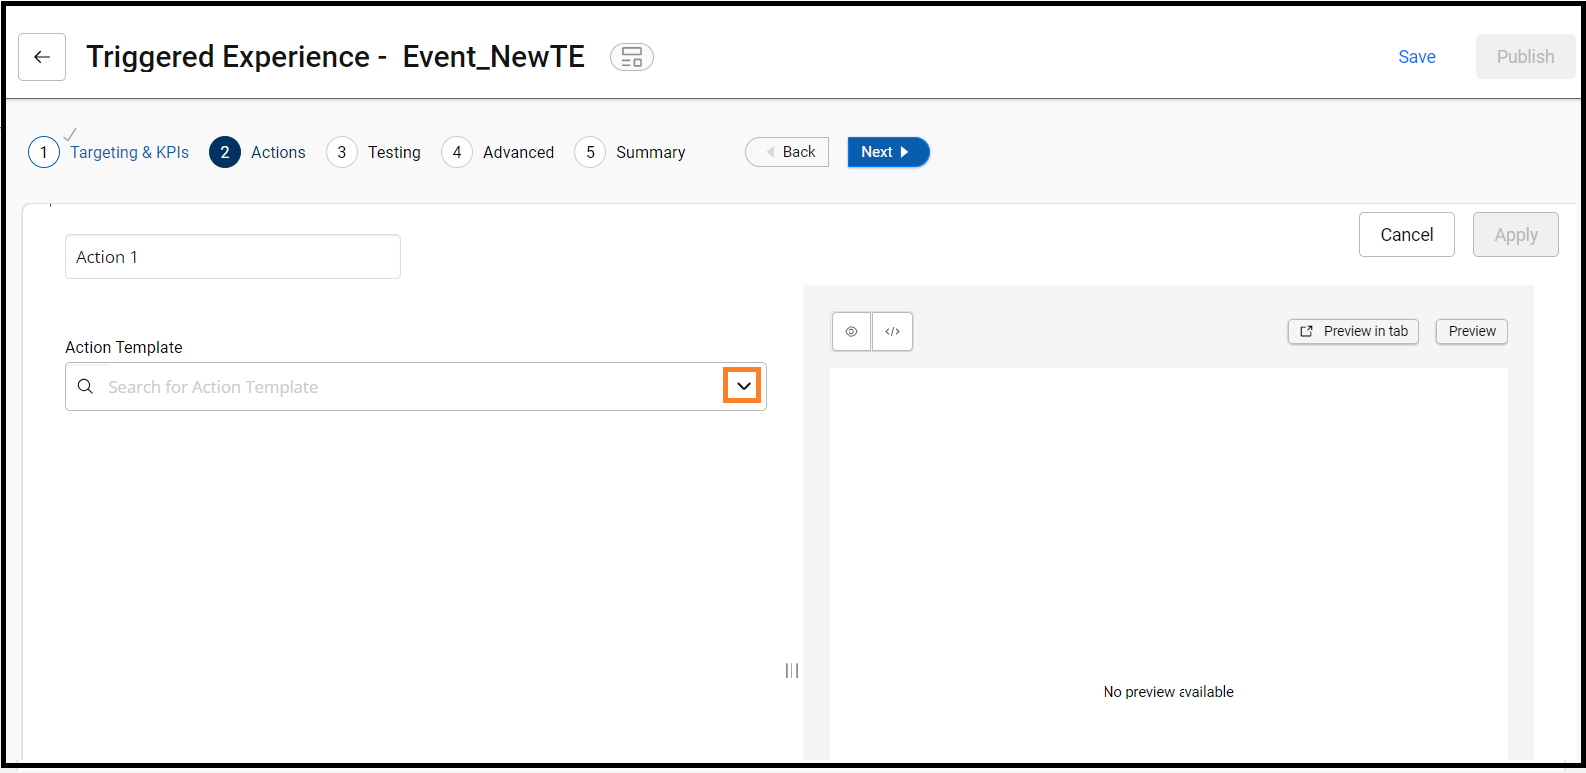
NoteThe selected Template is displayed in Preview in tab. Users can view the selected template in both the Preview and Code view.
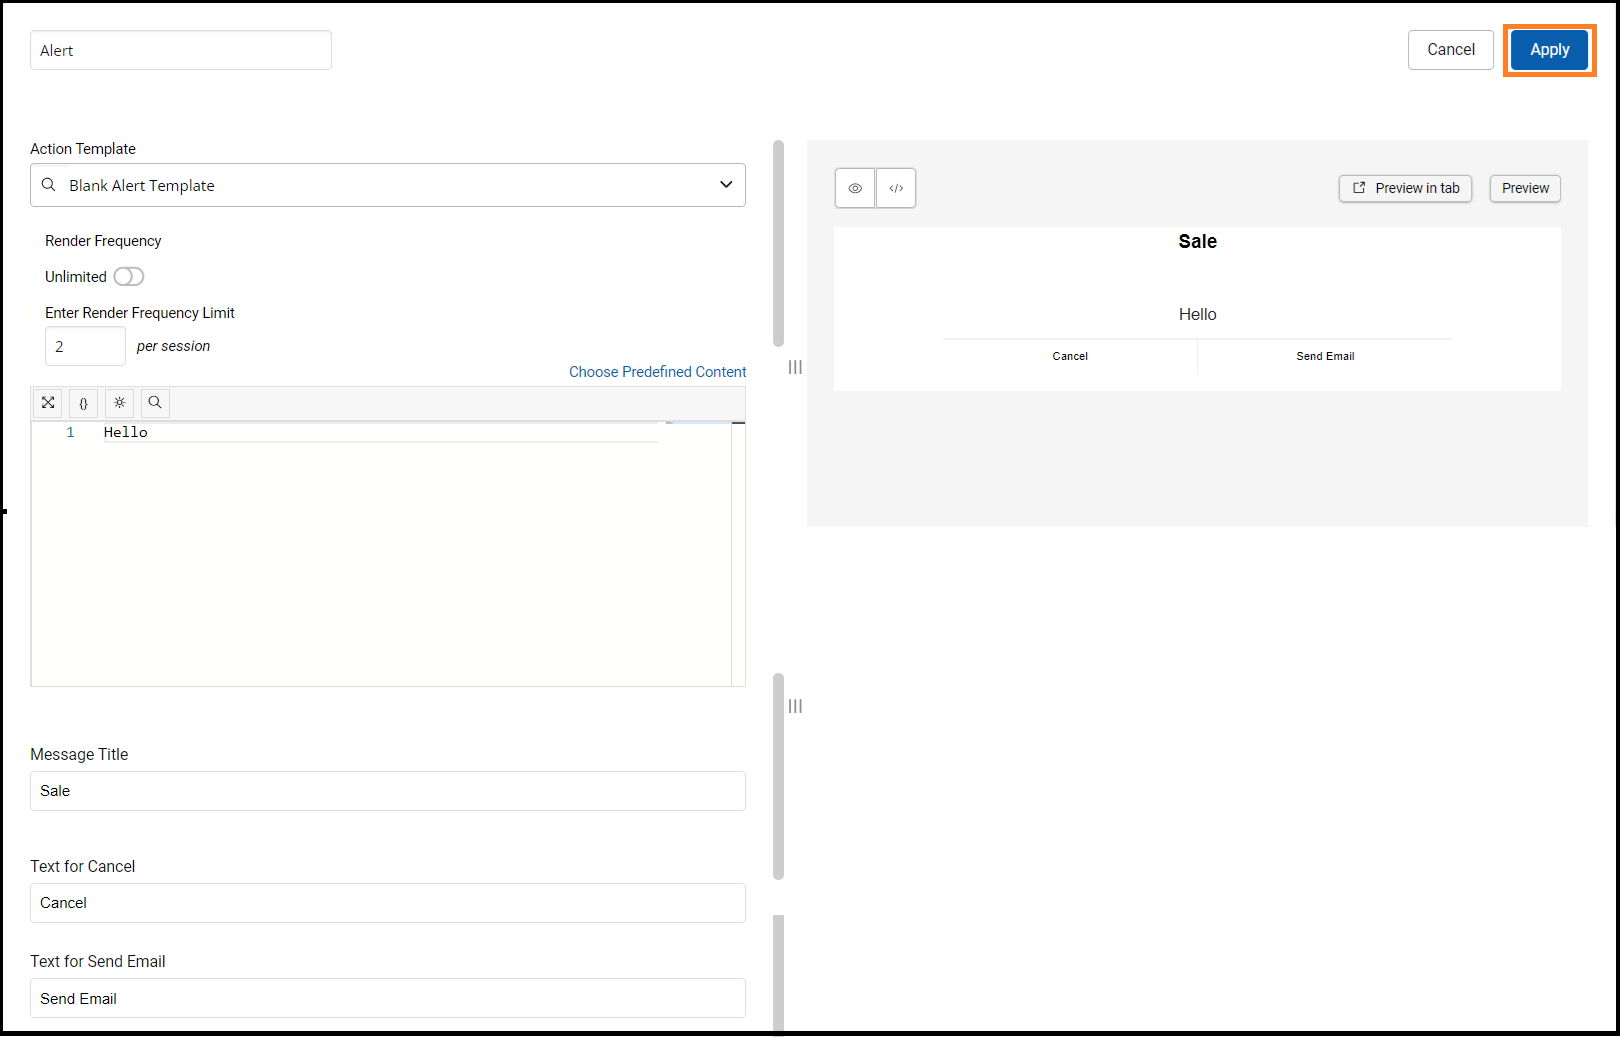
The selected template displays the configuration steps.
- Configure the template style and provide the content for experience in an Editor.
Note: You can view the action look and feel in the Action Preview field. - Set and Enter Render Frequency Limit per session.
InformationRender Frequency allows the users to configure the action level frequency for a TE. This determines how many times the widget would be rendered in a session.
'Render Frequency' is available for only TE actions like Banners, Fullscreen, and Alerts.
Note: By default Render frequency is selected and set to two per session.
- Click Apply to allocate the control, test group, and success metric.
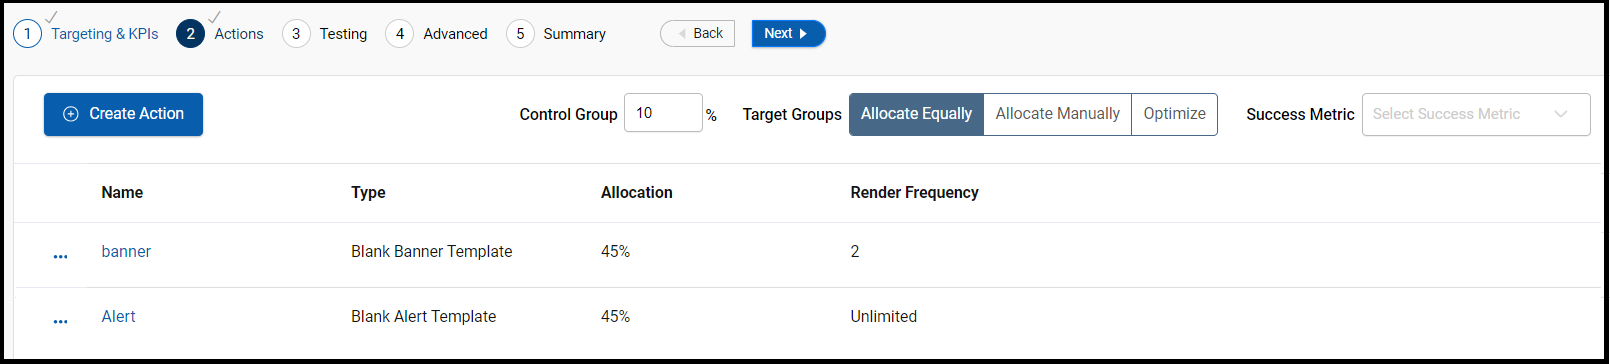
The screen displays all the actions with their allocation data.
Note: Target Groups section will be enabled if the experience has more than one action.
- Under Allocation of Visitors: Set the action's Control Group traffic.
- Control: Includes customers that do not receive actions. By default, the control traffic is set to 10%
- In Target Group select Allocate Equally to allocate the traffic equally between the actions, select Allocate Mannually to allocate a percentage of traffic for the action, or select Optimize to get the success metrics for the action.
InformationThis testing method is used for measuring the effectiveness of experience by comparing the conversion rate of the customers who received the actions versus those who did not. This helps you to determine the lift in conversion you get through a certain action by comparing conversion rates for those who received the action versus those who did not. Use the control bar to divide the target customer population into Test and Control groups to deliver actions.
Click  icon to perform the following activity:
- a. Edit to edit the action.
- b. Duplicate to make the similar action
- c. Delete to delete the action
- After providing all the necessary information, click Next.
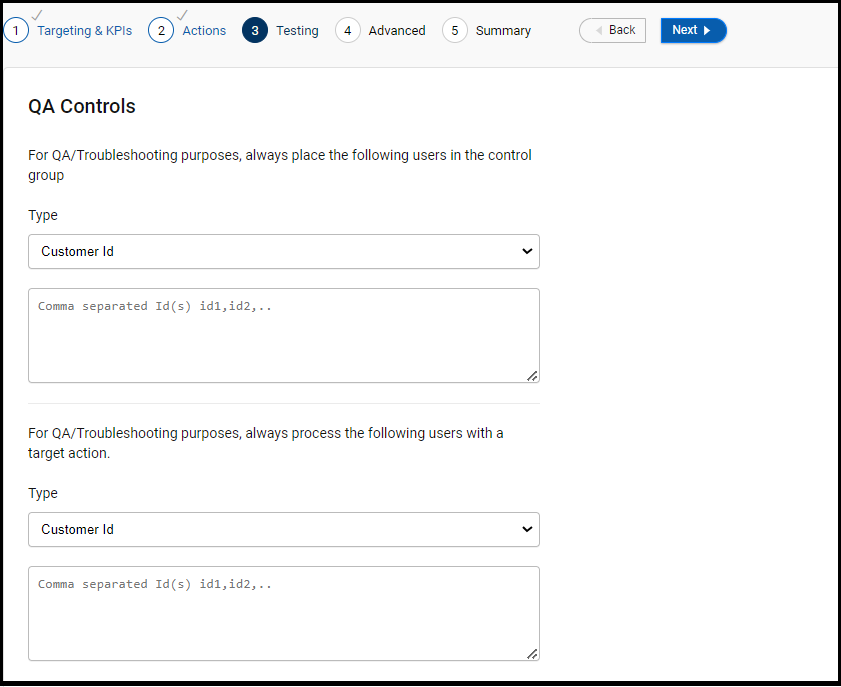
The flow displays the Testing tab screen.
- In the QA Controls section. The following two pairs of fields appear.
Here you can add customers who must always remain in Target or Control groups irrespective of the percentage of the customer population selected.
Note: This feature only applies when the target population is less than 100%. - Select the type of ID you want to provide from the drop-down list and enter the corresponding value in the next field in a comma-separated format.
- Click Save to save the experience as a draft or click Next.
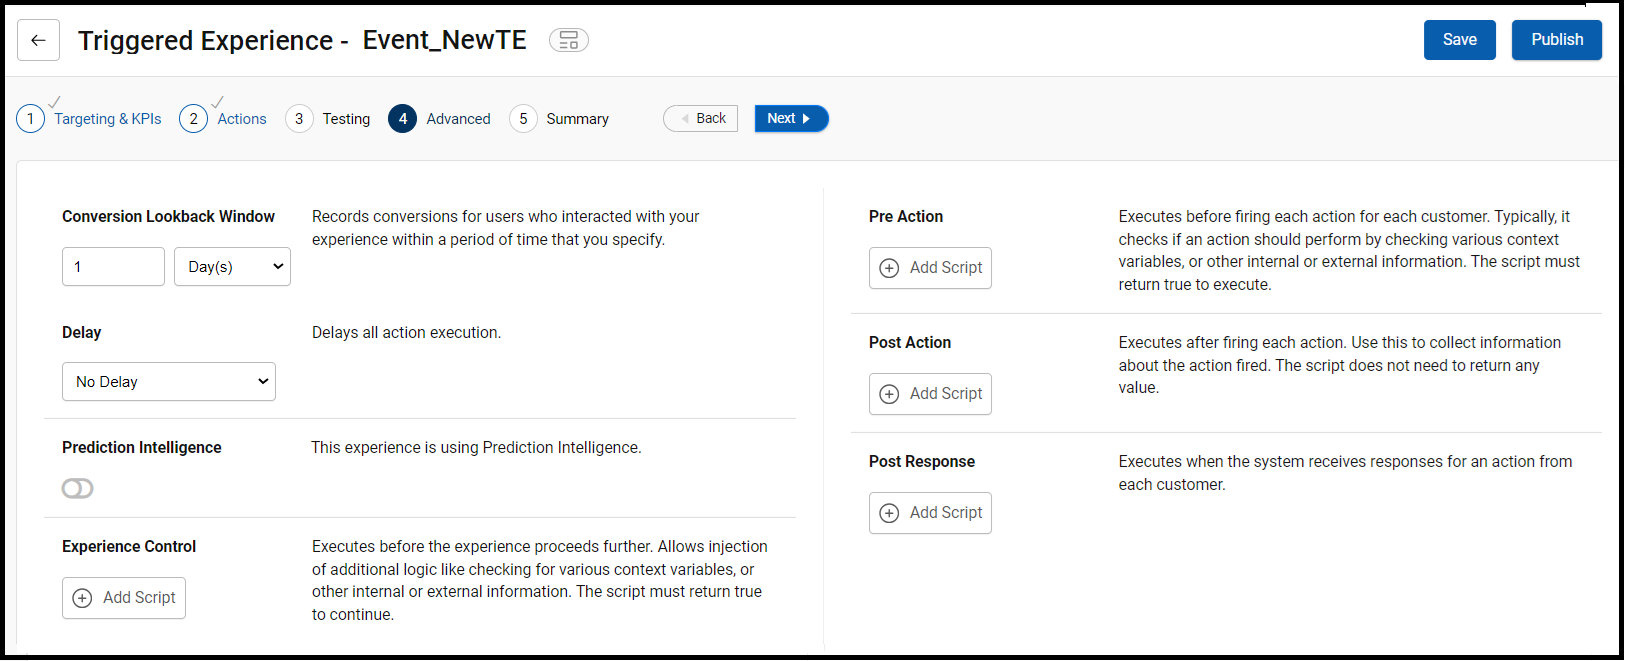
- The flow displays the Advanced section.
The advanced section helps to control the customer experience and measure the impact of interaction on the customers.
- Conversion Lookback Window: Click and specify the period to record the conversions for users who interacted with the experience within the selected time.
- Delay: Click the drop-down list and select the time for delaying the action execution.
- Experience Control: It allows you to configure logical checks such as context variables or other internal or external information to determine if the triggered interactions are eligible for further event processing. Click Add Script to specify the script based on business use cases.
- Click Add Script to specify Pre-Action Code to create an action script that runs before the execution of the actions for each customer.
- Click Add Script to specify Post Action Code to create an action script that runs after the execution of each action.
- Click Add Script to specify Post Response Code to create an action script that runs when the system receives responses for actions from each customer.
- Select the Prediction Intelligence to use the experience for prediction intelligence.
- After providing all the necessary information, click Next.
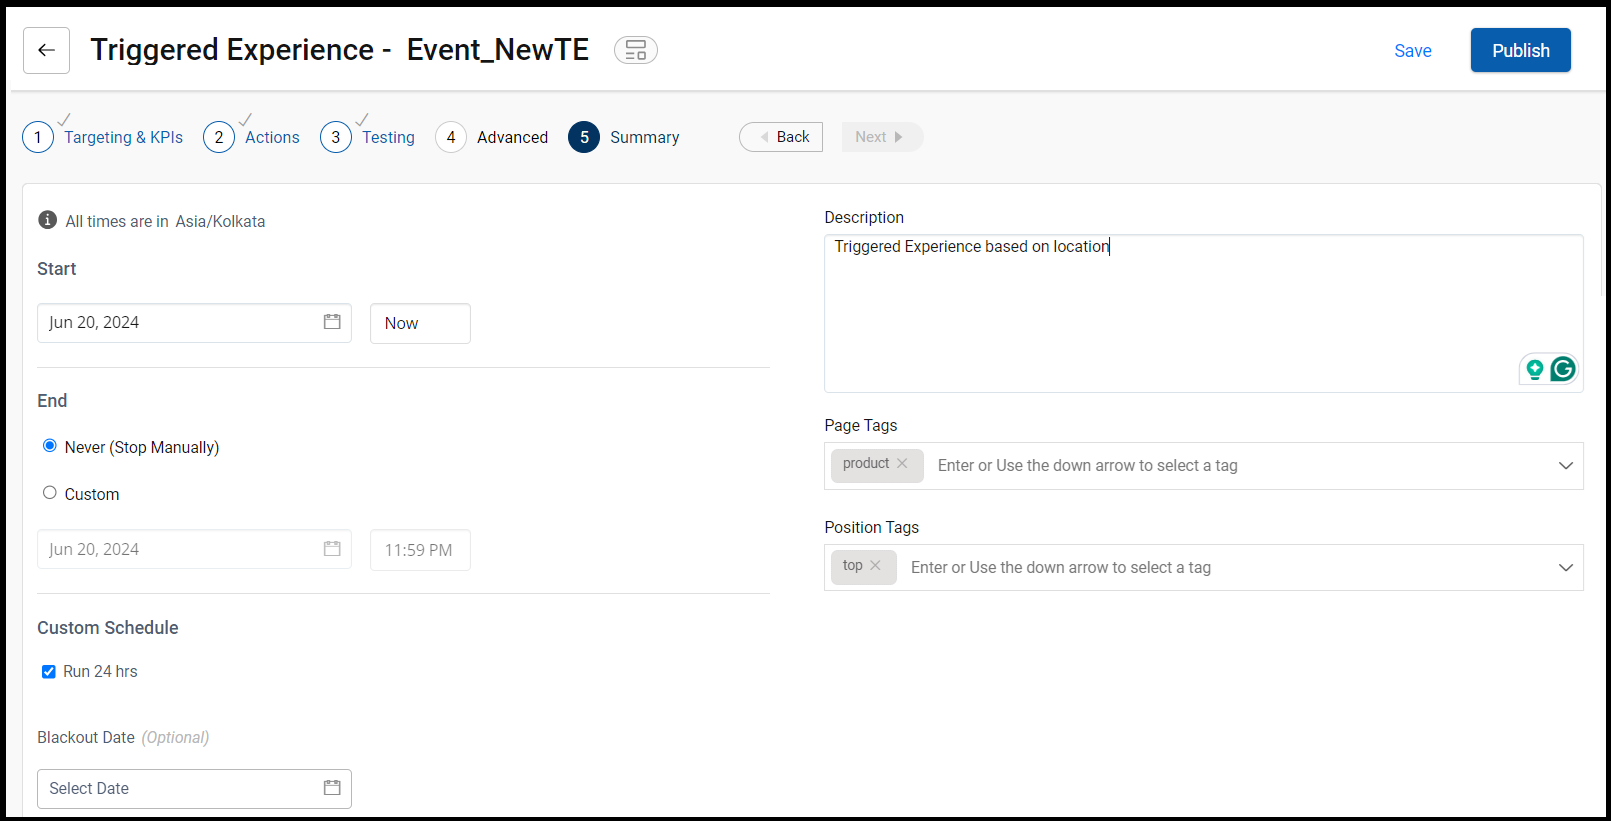
The flow displays the final step Summary tab screen.
- Schedule and set the time frame in which the triggered experience operates:
In this section, we can schedule or automate the triggered experience based on specific timings. The action will get triggered whenever the scheduled time arrives. We can schedule it daily or on weekends, immediately, or at a specific time.
Note: By default, the Start is scheduled at the date and time of creation. The End is selected as Never and the Run 24hrs is selected in the Custom Schedule option.
- Start Set the date and time to start the operation of the triggered experience interaction immediately on the same date as the default time after publishing an experience. Or set the date and time manually. By default, it displays the present date and current time.
- End: Select Custom to manually set the date and time to stop the operation of the triggered interaction. By default, it selected as Never
- Custom Schedule: This helps to schedule the triggered experience daily or on selected days. By default, it Run 24hrs is selected. De-select the Run 24 hrs option and manually select and set the days and times to initiate the operation of the triggered interaction.
- Blackout days: select the dates on which you don't want to initiate the interaction.
Conditions to Configure Operation TimeYou can apply any of these following conditions to set the operation time for the triggered interactions based on your requirements. Configure the start date, the end date, or both:
- If you configure only the start date and time, the triggered interaction is operational from the start time and stops only if the user manually suspends it.
- If you configure only the end date and time, the triggered interaction is operational as soon as it is published and stops when it reaches the end time.
- If you configure both the start time and the end time, the triggered interaction is operational during this configured time frame.
- If you do not configure the start and end time, the triggered interaction is active immediately after it is published, and stops only if the user manually suspends it.
- Enter the Description for the new TE.
- Add Page Tags and Position Tags. It provides the labels indicating the actions page and position. This helps to prioritize the experience
- You can add more than one label.
Note: Tags can be added only for Banners, Fullscreen, Push Notification, Alerts and Raw Data action type.
For more information about prioritizing triggered experiences, refer to the Prioritizing Triggered Interactions
- After providing all the necessary information, click Save to save the experience as a draft that can be published later. Or click Publish to publish the experience.