Managing Triggered Experiences
This section describes:
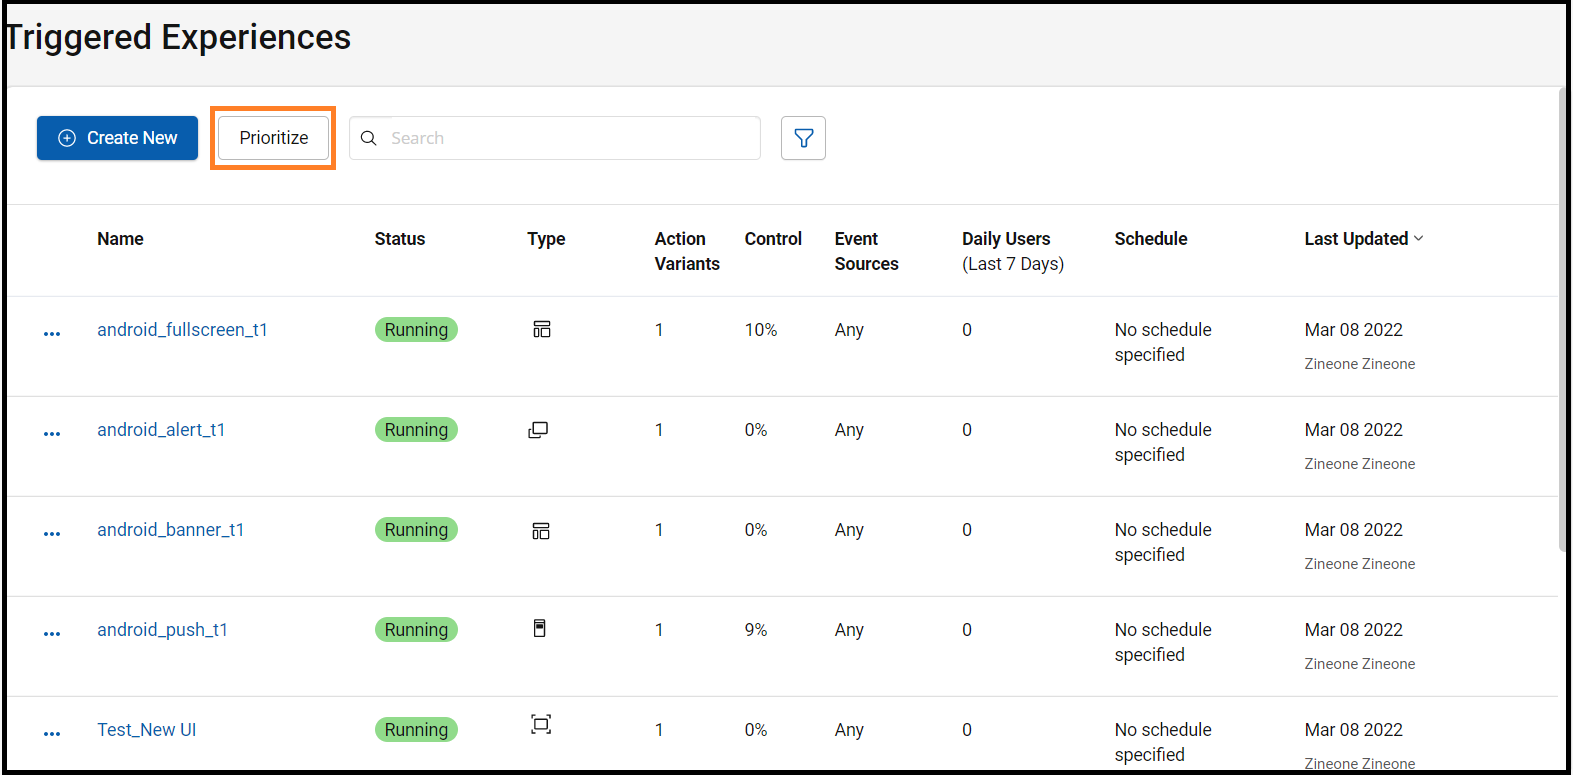
Viewing Triggered Experiences
- In the Experiences menu, click the Triggered Experiences tab.
A list of all the triggered experiences is displayed.
- Name: Name of the experience.
- Status: Displays the status of the experience. It can be in Ready, Running, Paused, Running Silent, Pause Silent, Completed, or Ready states.
- Type: Displays an icon-based representation of the action for the experience such as “Banner”, “Alert”, “Fullscreen”, “Raw”, “SMS”, “App Box”, “Push”, “Rest API”, “Script”.
Note: Hover over the icon to view the name of the action type. - Action Variants: Displays the number of actions defined for the experience.
- Control: Displays the percentage of the control group set for the experience.
- Event Source: Displays the selected event source for the experience.
- Daily Users: Displays average unique daily users processed by the experience over the last 7 days.
- Schedule: It displays the schedule details (started from which date and time) for both running and paused experiences.
- Last Updated: Displays the date and time when the experience was last updated and the name of the user who made the last update.
Note: This field is sortable. Click to sort experiences by date.
- Click
 icon to perform the following activity:
- a. To View Dashboard of the experience
- b. To View Configuration and edit the experience
- c. To view Audit Trail and know detailed information about the experience.
- d. To Clone an existing experience (Trigger Experience Template instances are not cloneable)
- e. To copy the TE journey ID, click Copy ID to clipboard
- f. To Pause if the experience is in “Running” or “Running Silent” status.
- g. To Start if the experience is in “Pause” or “Pause Silent” status.
- h. To Delete the experience

Note:Use the Filter
to filter the experiences based on different categories.
WarningDeleting an experience also deletes all the supportive artifacts (such as triggers, events, segments, etc.) referenced in it.
Updating Experience Instances Version
Session AI allows you to update your experience instances to the latest version of the experience templates. You can check and update the instances.
Note:If any latest version of the experience templates is available, then only the CHECK UPDATES button is seen on the screen.
- In the Experiences menu, click the Triggered Experiences tab.
- Click the CHECK UPDATES located in the top-right corner of the screen.

The Version Migration window displays number of upgradable instances and the latest available versions of the template:
- TEMPLATE: Name of the template.
- UPGRADABLE INSTANCES: Displays the total number of experience instances that can be updated to the latest version of the template.
- AVAILABLE VERSION: Displays the latest available version of the template.
- DESCRIPTION: Displays the description of the template.
- ARROW BUTTON (
 ): Click the arrow.
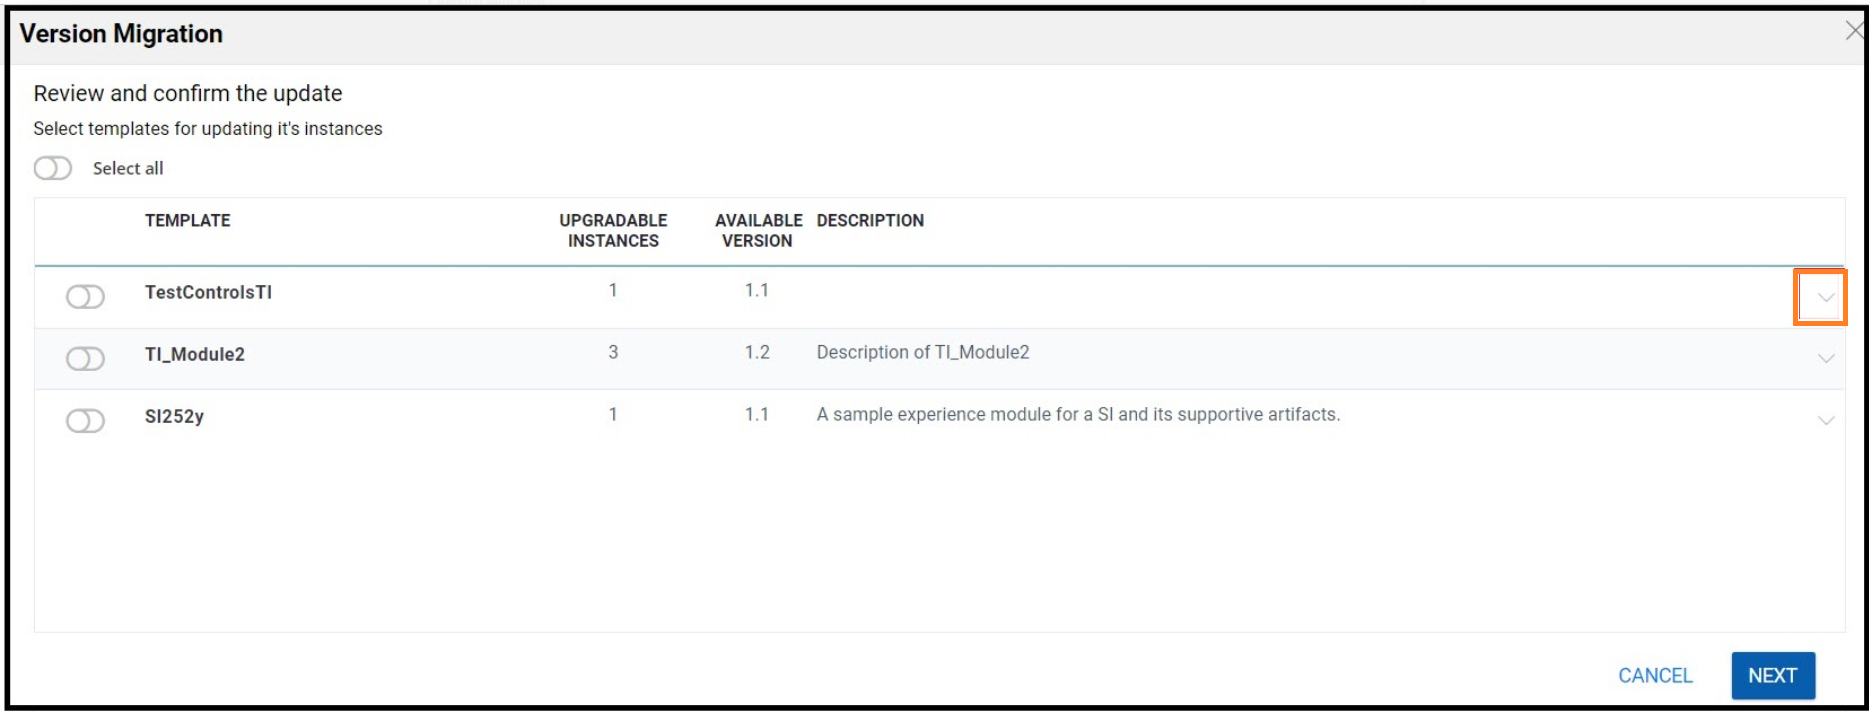
Following information about the current version of the instances will get displayed.
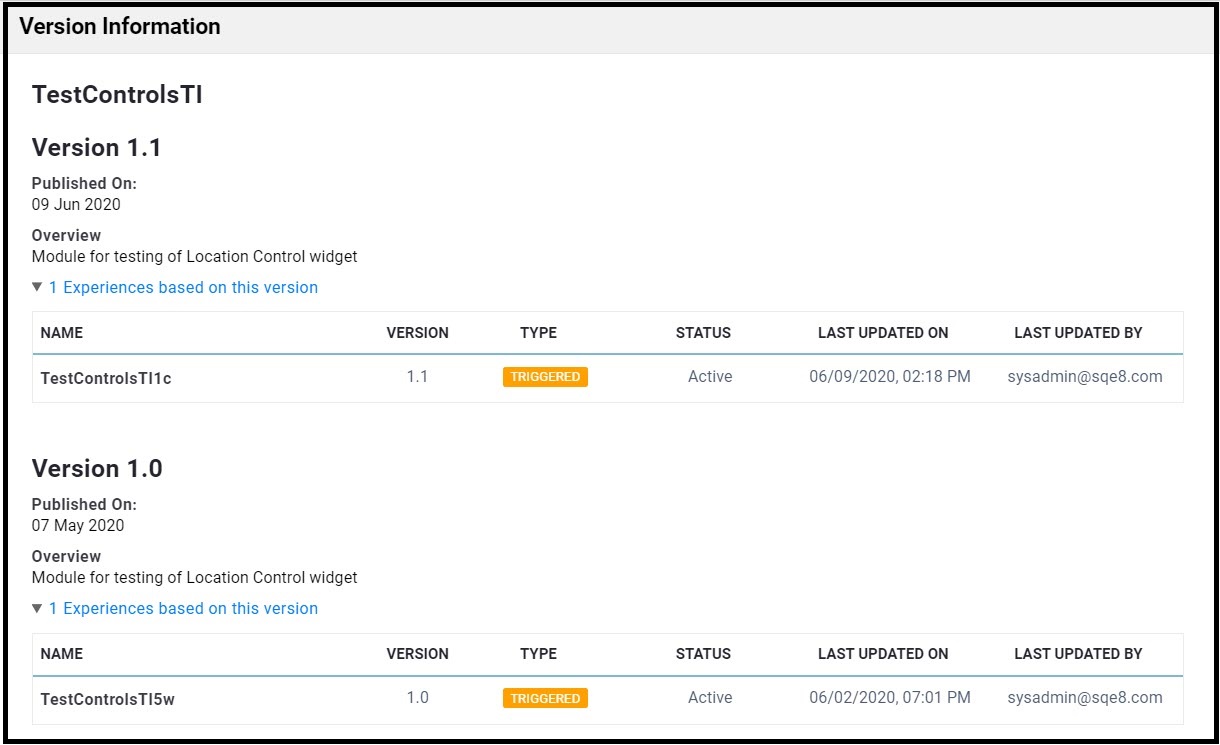
- Click Version Info to view details of all the available versions of this template and all the instances created using each version.

The Version Information window appears.
- To update the instances, you can perform either of the following and click NEXT:
- Select all the upgradable instances.
- Select the desired upgradable instance.
- Click DONE.
You can also update particular instances from the list view on the All Channels screen. A link to update the instance to the latest version appears below the schedule details. The following is a sample screenshot that displays update to v1.1 link.

Guidelines for Versioning the Experience Templates
- You cannot add and delete artifacts (such as triggers, events, segments) in the new version.
- You cannot modify Event Mapping references.
- You can add configurable parameters. Ensure you provide default values only, and the existing instance operates accurately with the default values.
- You can delete configurable parameters. Ensure to remove all the references of the deleted parameters from the template.
- You can perform any logical modifications (Experience Control Script, Pre-action Code, Post-action Code, Action Response Code). Ensure that the modifications do not impact the existing instance.
Prioritizing Experiences
Triggered experiences can be prioritized to avoid conflicts over multiple messages that may occur due to global message constraints or the page and position where the messages are displayed. To prioritize your experiences, you can easily drag and drop the items, and when the screen displays a large number of experiences, you can also apply filters based on the page and position to narrow the experience view.
- In the Experiences menu, click the Triggered Experiences tab.
- Click the Prioritize located on the top-left side of the screen.
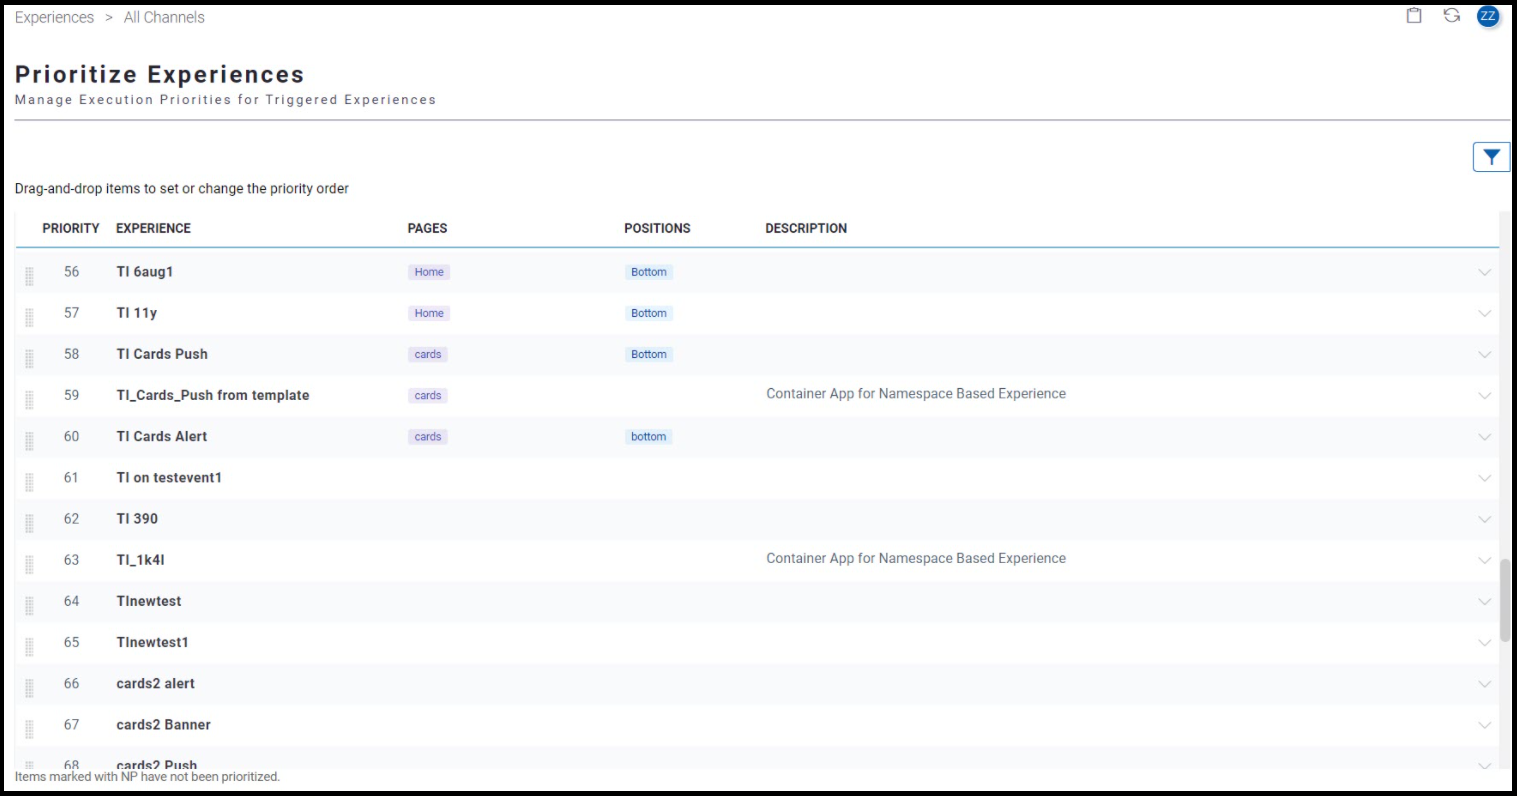
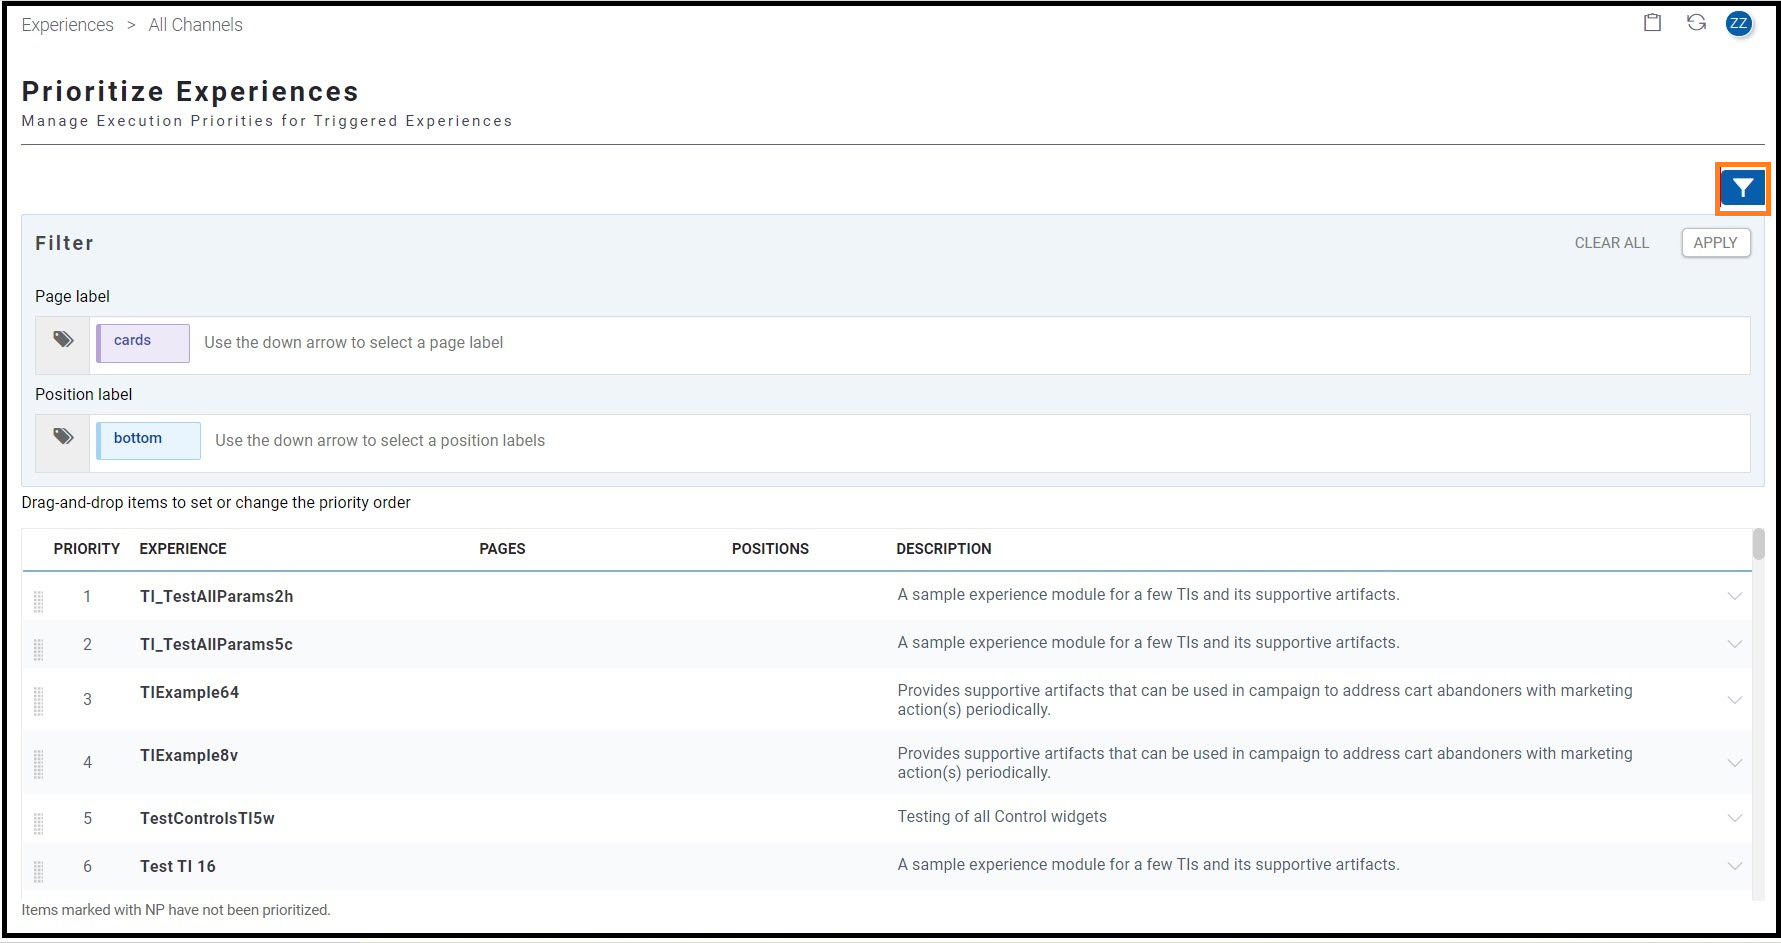
The Prioritize Experiences screen appears. You can directly drag and drop the experiences or apply filters before prioritizing.
- To add the Page and Position filters, use the Filter icon. Remember that the filtering criteria are optional, however, if you plan to use it, adding the Page label is mandatory.
Note
- In order to apply the Page and Position labels in the filter, ensure that you add these labels for actions during experience creation or after execution.
- On the Page label field, you can add only one-page label. The Page label is mandatory.
- Labels can be added only for Banners, Fullscreen, Push Notification, Alerts, and Raw Data.
- Labels are case-sensitive
- Click Apply. The following filtered list of experiences appear for the provided labels.
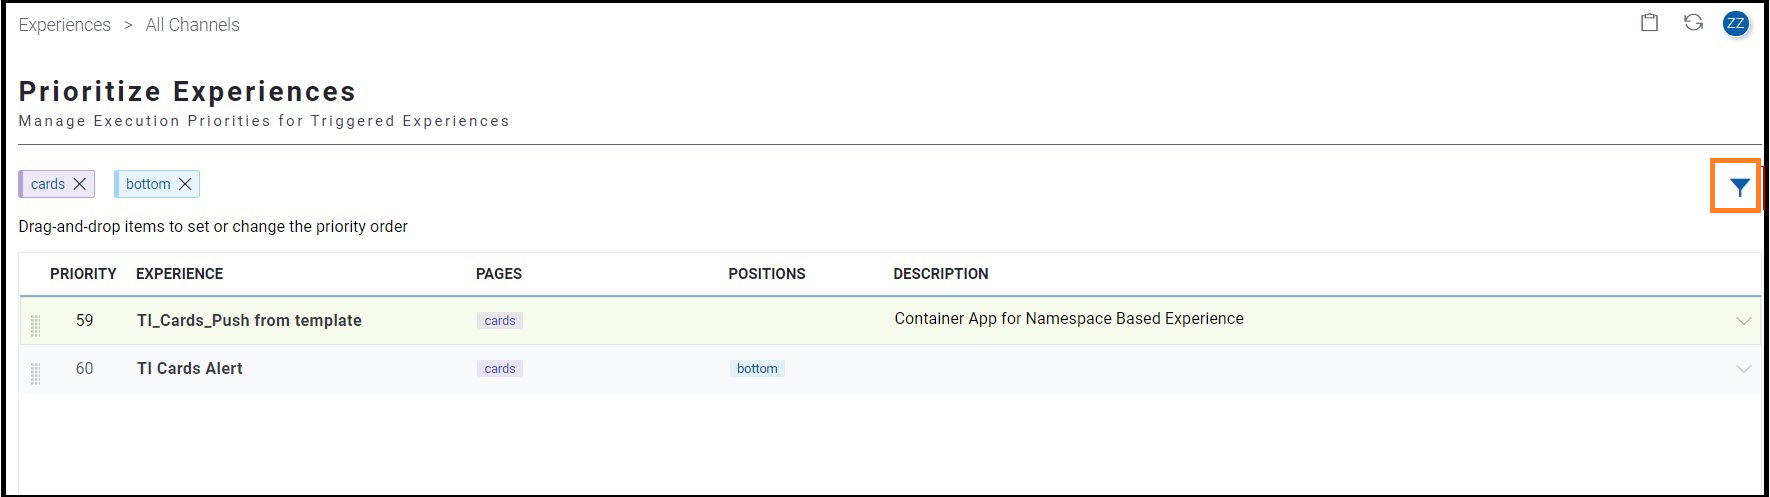
- You can prioritize the experiences from the filtered list also. Move the mouse pointer to the leftmost column, and drag and drop the experiences to set the priority. NP indicates that the interaction has not been prioritized.
NoteAny prioritization made to a filtered list affects the global priority.
- Click the Arrow (
 ) icon to view more details such trigger, action name, type, pages and position about each experience.

Triggered Interaction PrioritizationTriggered Interactions that are triggered by the same event are executed based on their prioritization. For example, let's say there are three triggered interactions in the following order: TI1, TI2, and TI3, where 1 is the highest order. In this case, the system executes TI1 first, and so on. However, the customer can control the execution of the triggered interaction using the Experience Control Script feature.
Updated about 1 year ago