Configuring Single Sign-on (SSO)
Session AI allows you to authenticate Session AI platform users in your namespace through any third-party identity provider of your choice. The users who log in to the Session AI platform are redirected to the identity provider (IDP) for authentication.
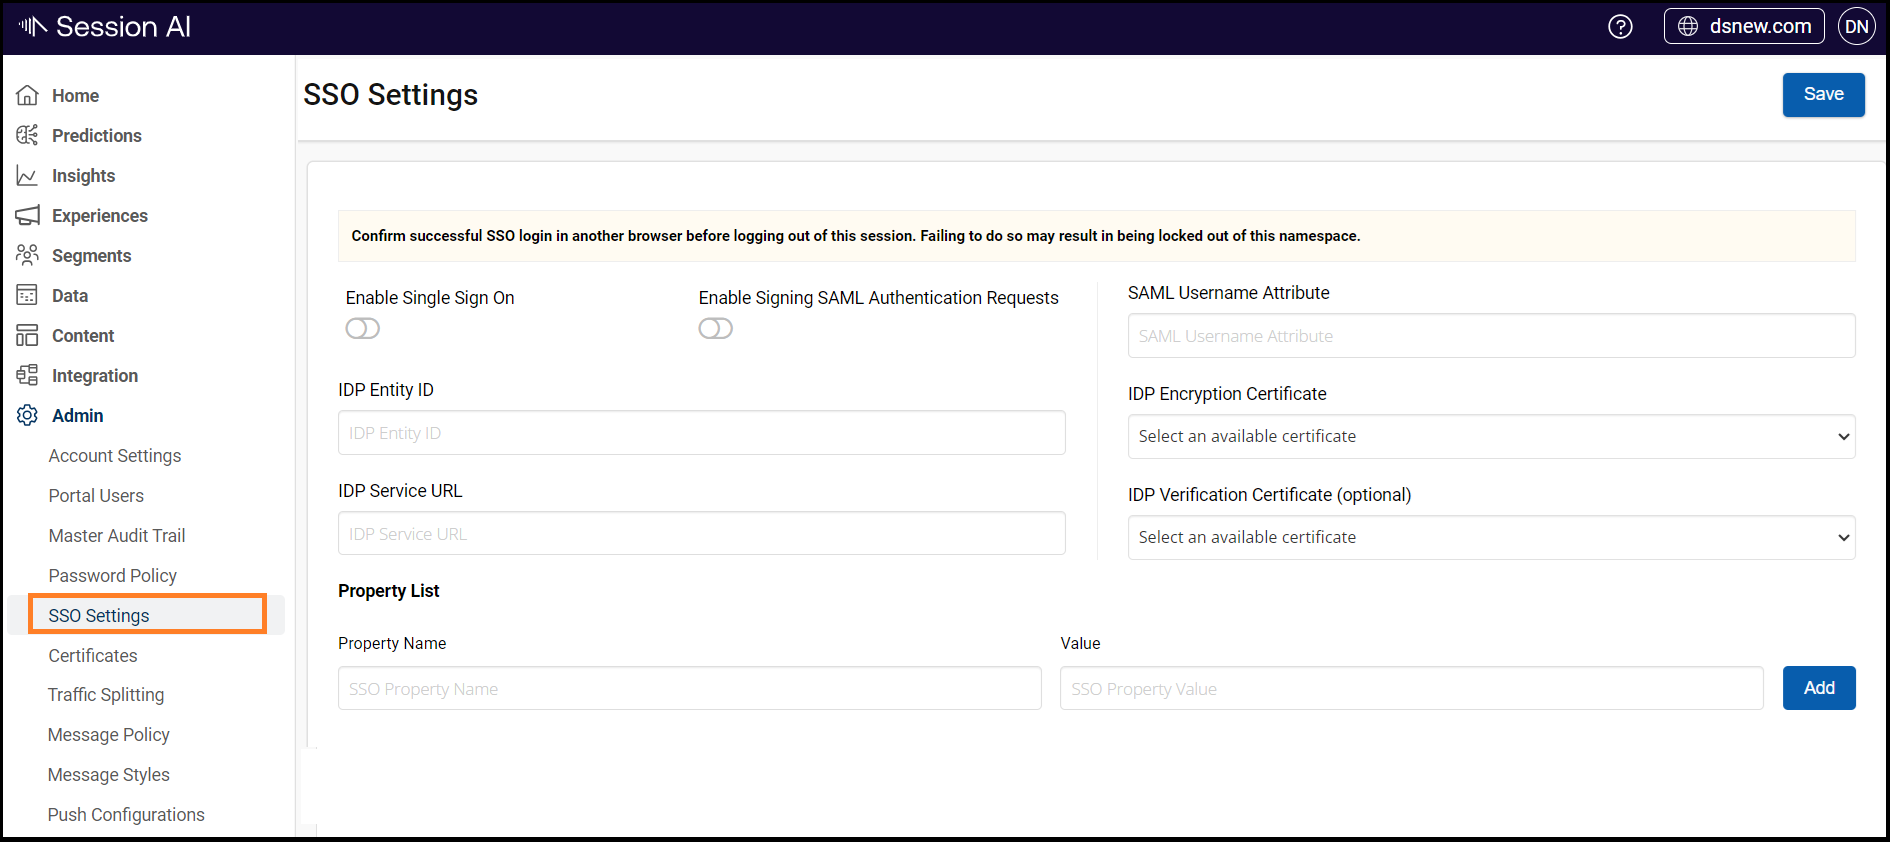
The Configure SSO Settings screen provides settings to enable third-party authentication for your Session AI account and configure Identity Provider (IDP) information like the URL, entity ID, etc., generated while registering the IDP Services.
Note:You can use any Identity Provider (IDP) service that supports Security Assertion Markup Language (SAML) 2.0.
- In the Admin menu, click the SSO Settings tab.
The Configure SSO Settings screen appears.
- Configure the following IDP details to your Session AI account:
- Enable Single Sign-On: Switch on the toggle to enable single sign-on for your namespace.
- IDP Entity ID: Enter the IDP entity ID.
- IDP Service URL: Enter the IDP service URL.
- SAML Email Attribute: Enter the Security Assertion Markup Language (SAML) email attribute.
- IDP Encryption Certificate: Select the IDP encryption certificate. Ensure that you first upload the certificate to your Session AI account using the CERTIFICATES tab under System Settings. For more information about configuring certificates, refer to the Configure Certificates section.
- IDP Verification Certificate (optional): Select the IDP verification certificates.
- Other SSO Properties: Add other SSO properties, if required.
- Click Save to save the changes.
Updated about 1 year ago