Creating Data Services
A Data Service is a server-side object in the Session AI platform, which is used to get/post data from a defined service that is external to the Session AI platform. The defined service could be an HTTP POST, HTTP GET, or a custom service. These services are automatically invoked by the platform when they are referenced in any server-side code.
The Data Services feature allows you to create the following types of data service instances.
Creating HTTP POST Call
- In the Data Streams menu, click the Data Services tab.
- Click the CREATE DATA SERVICES located in the upper-right corner.
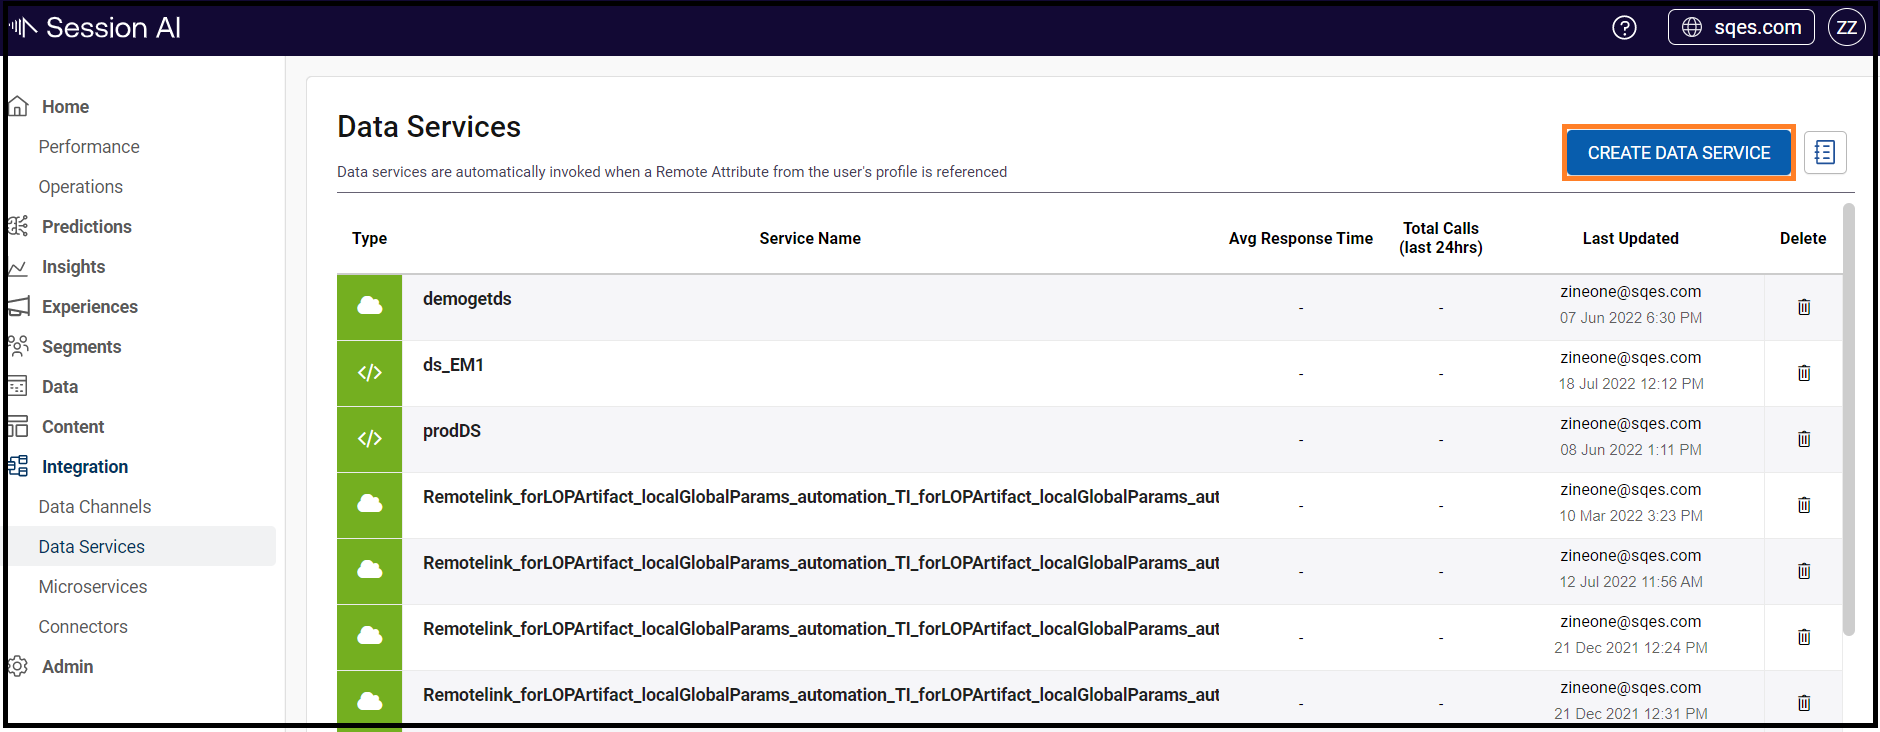
The system displays the types of data services.
- Click HTTP POST.

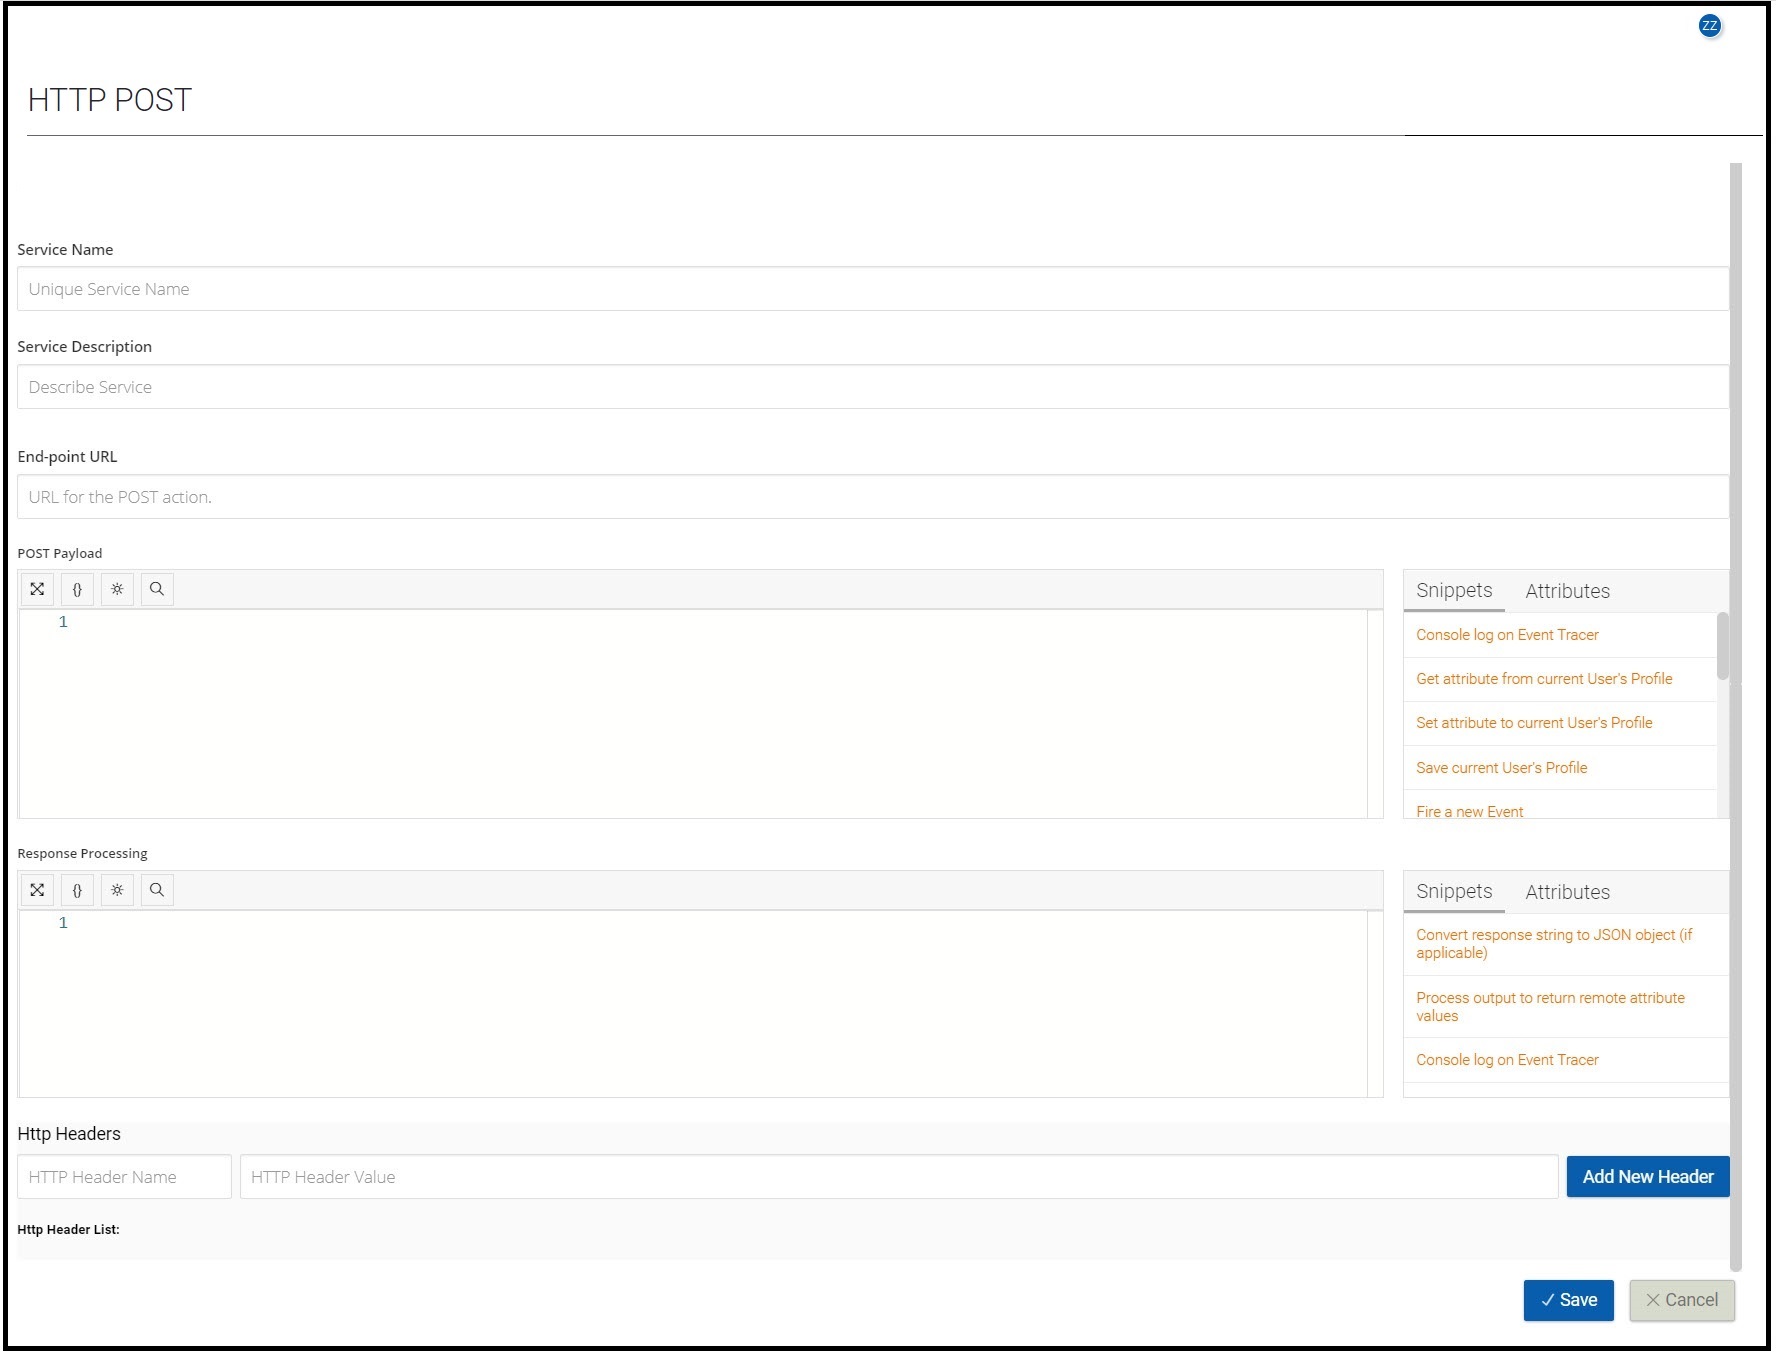
The following screen appears.
- Provide the following details:
-
Service Name: Name of the data service.
-
Service Description: Description of the data service.
-
End-point URL: Enter the endpoint URL.
-
POST Payload: Create the payload body of the HTTP POST request.
-
Response Processing: Create the syntax of the response body.
-
Http Headers: Add additional parameters in the HTTP header request and click Add New Header. It should be in key-value pair.
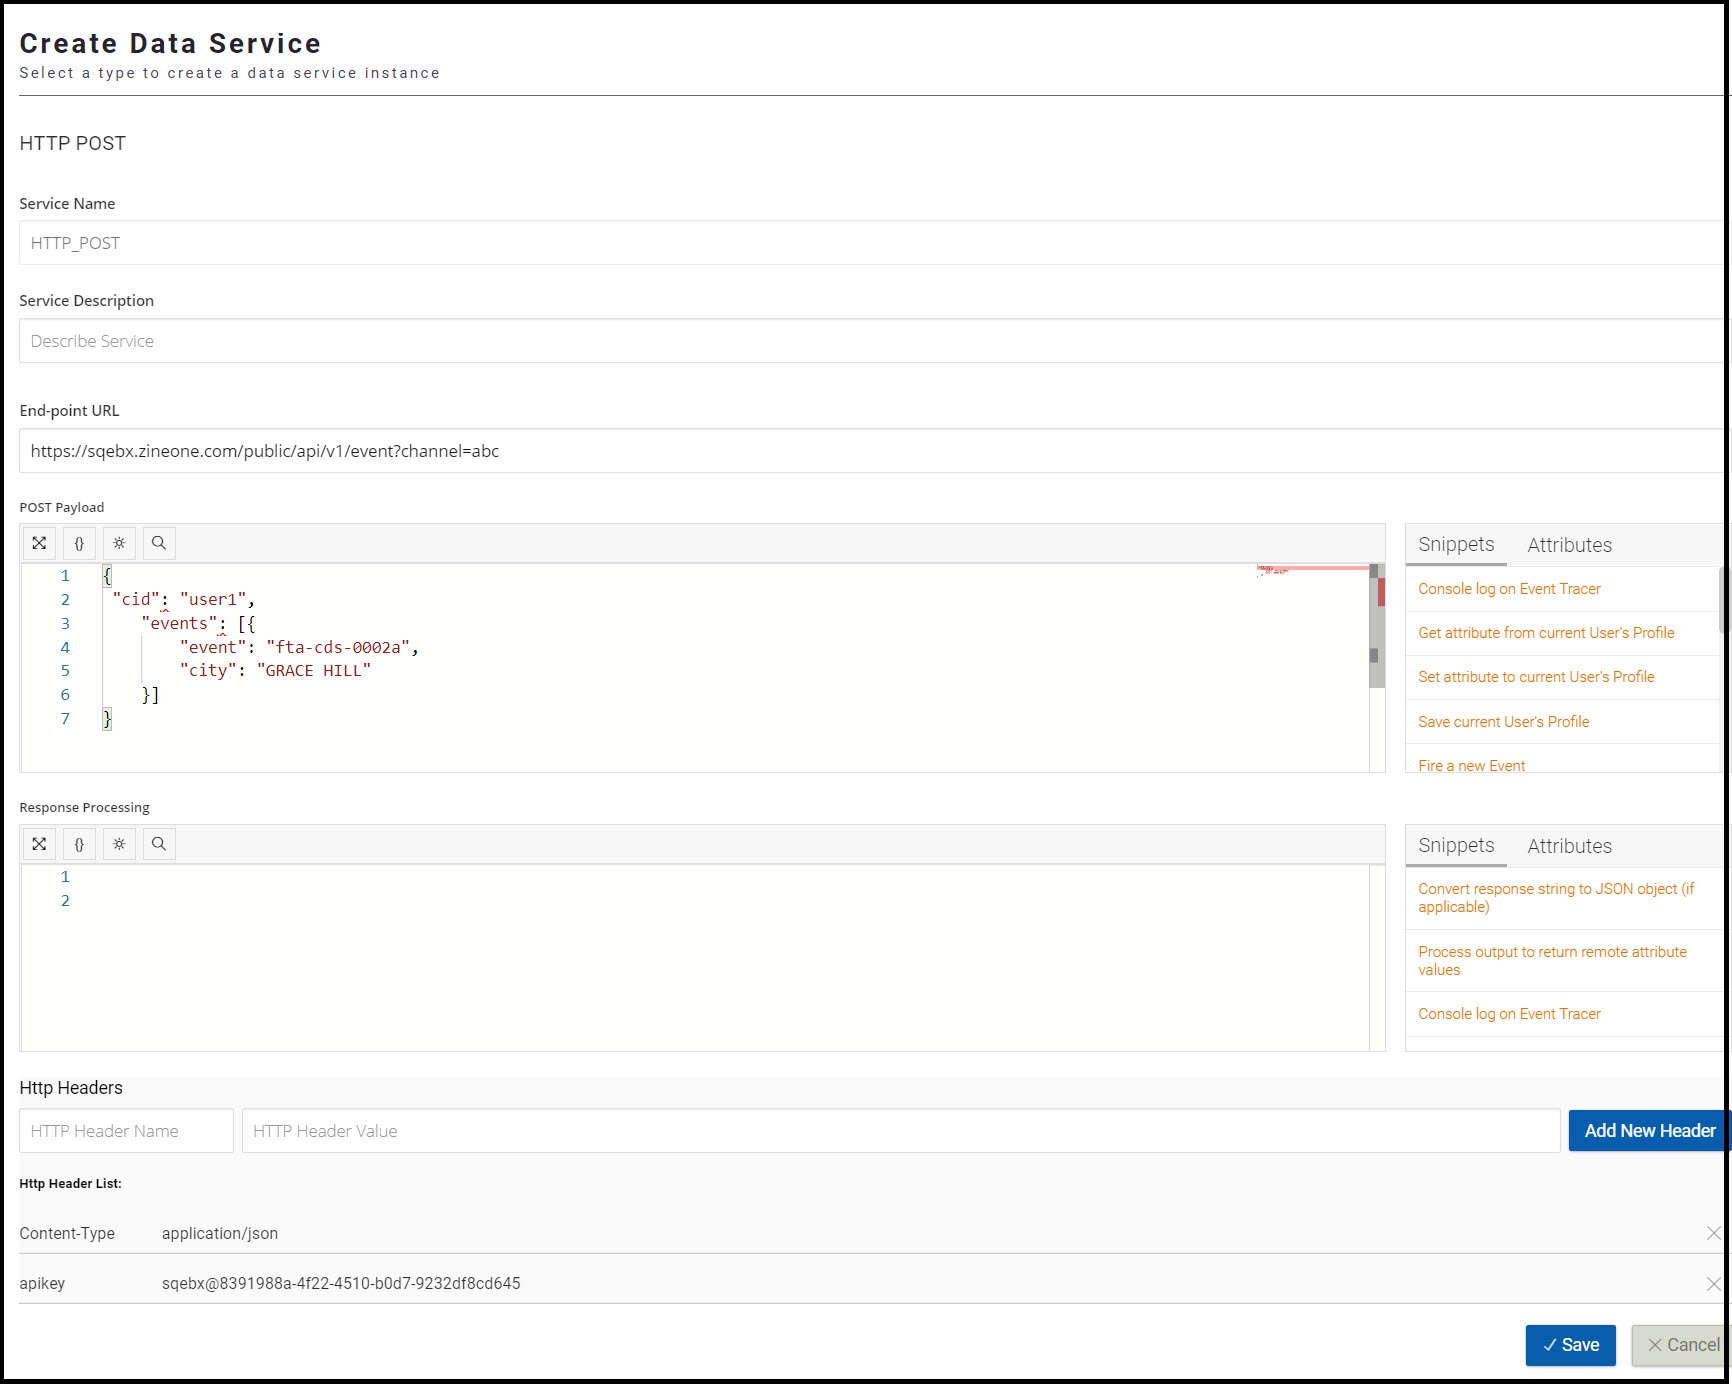
Example:- HTTP Header Name is Content-Type
- HTTP Header Value is application/json
- Click Save.
The following is a sample HTTP POST-Data Service.
Creating HTTP GET Call
- On the Data Services screen, click the CREATE DATA SERVICES button located at the upper-right corner.
The system displays the types of data services. - Click HTTP GET.
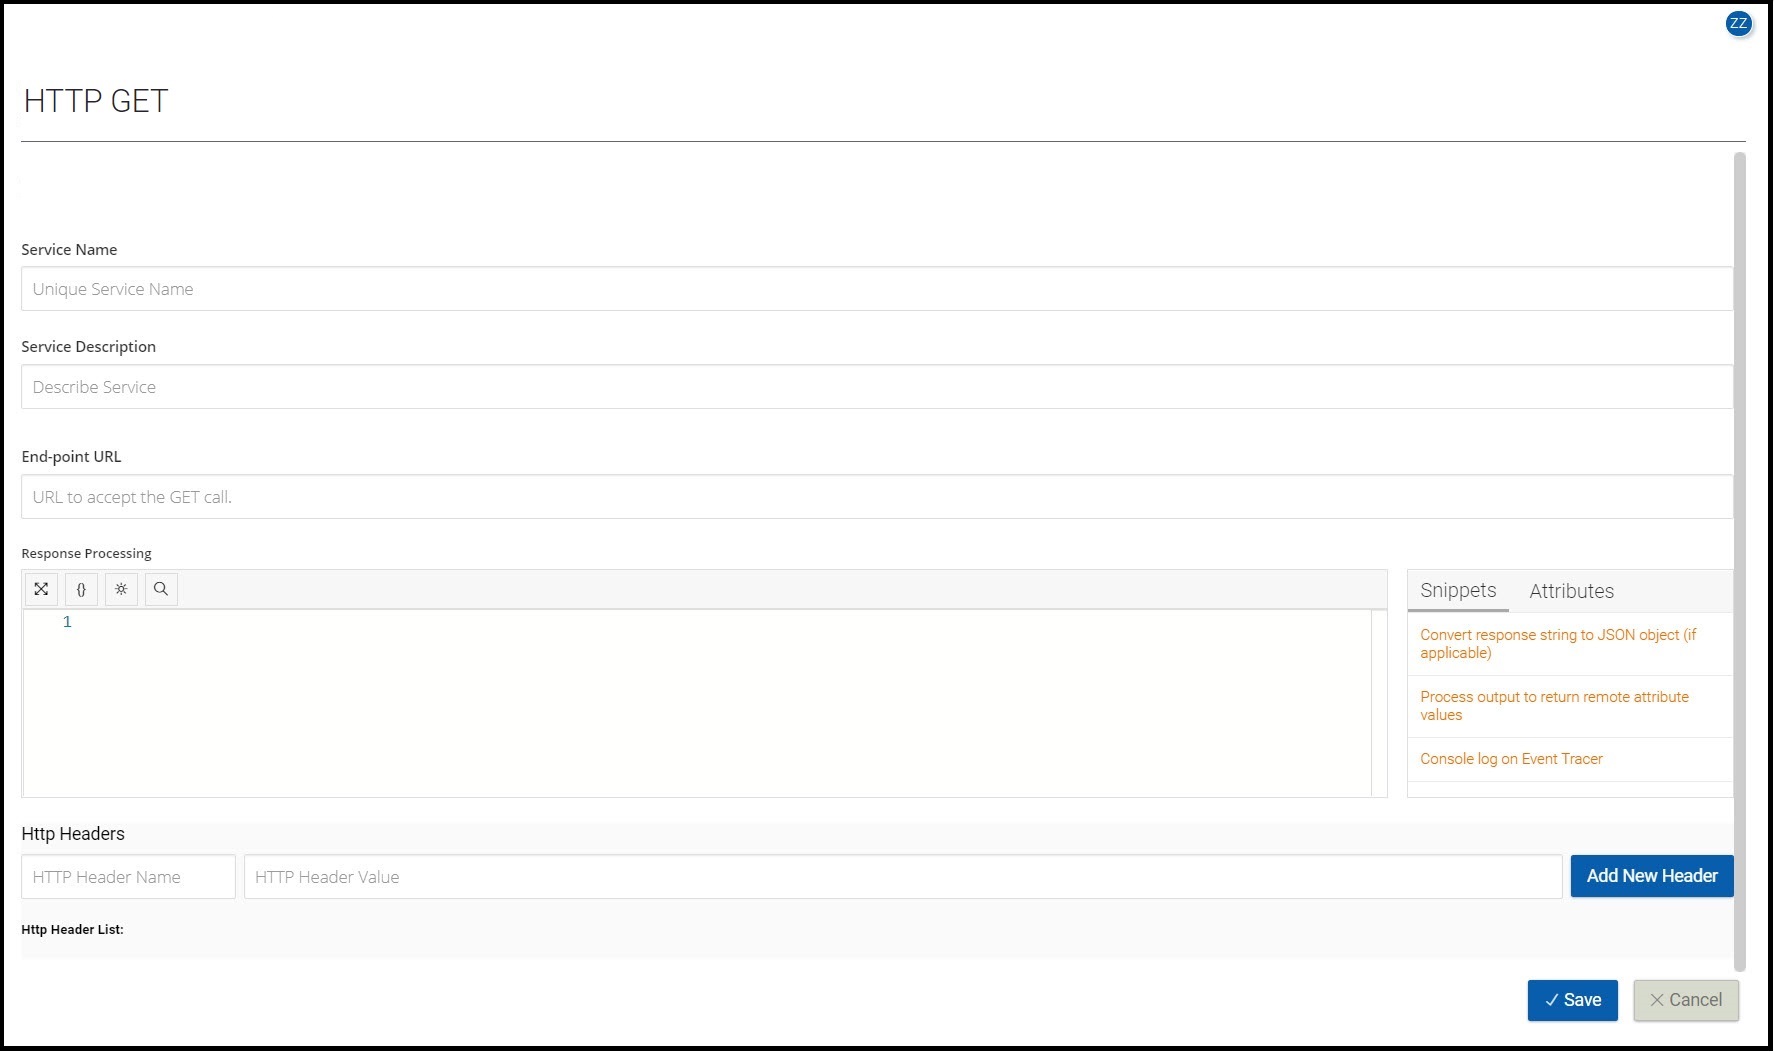
The following screen appears. - Provide the following details:
- Service Name: Name of the data service.
- Service Description: Description of the data service.
- End-point URL: Enter the endpoint URL.
- Response Processing: Create the syntax of the response body.
- Http Headers: Add additional parameters in the HTTP header request and click Add New Header. It should be in key-value pair.
Example:- HTTP Header Name is apikey
- HTTP Header Value is 8391988a-4f22-4510-b0d7-9232df8
- Click Save.
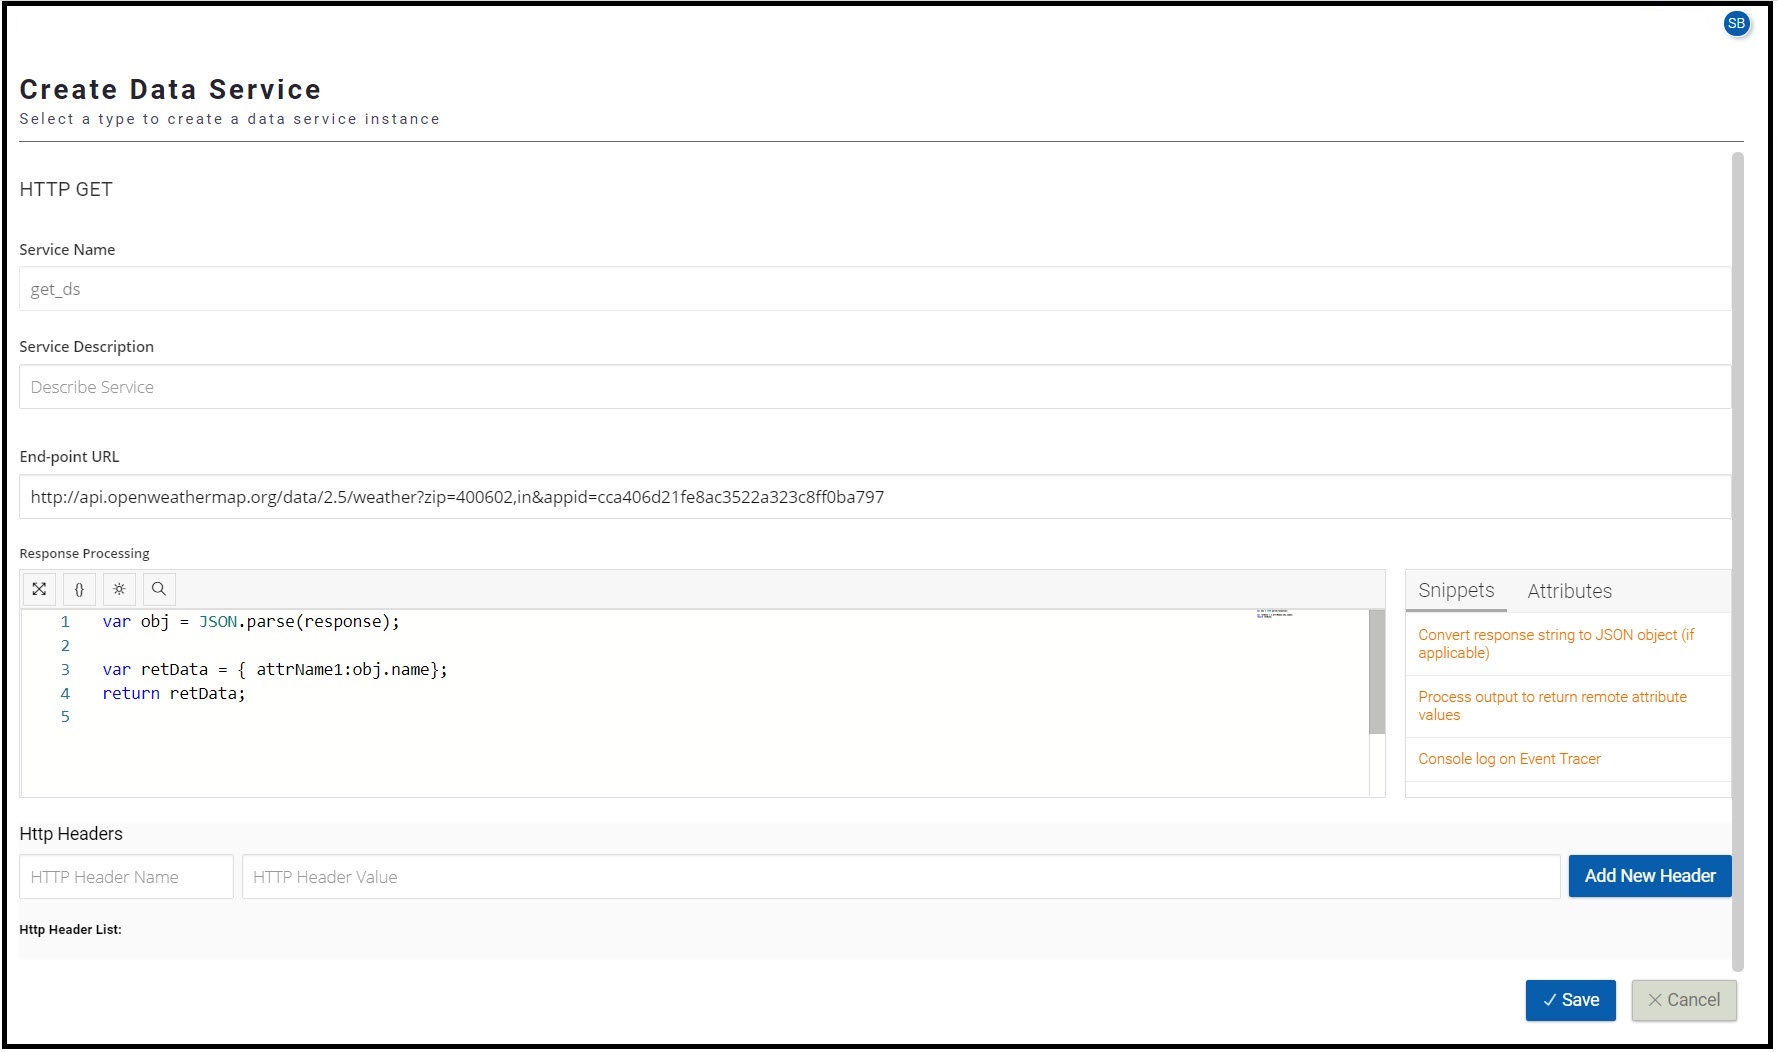
The following is a sample HTTP GET Data Service.
Creating Trusted Agent Query
- On the Data Services screen, click the CREATE DATA SERVICES button located at the upper-right corner.
The system displays the types of data services. - Click Trusted Agent.
The following screen appears. - Provide the following details:
- Service Name: Name of the data service.
- Service Description: Description of the data service.
- Object Query: Name of the object to query.
- Query: URL query string to query the object.
- Click Save.

Creating Custom Service
- On the Data Services screen, click the CREATE DATA SERVICES button located at the upper-right corner.
The system displays the types of data services. - Click Custom Service.
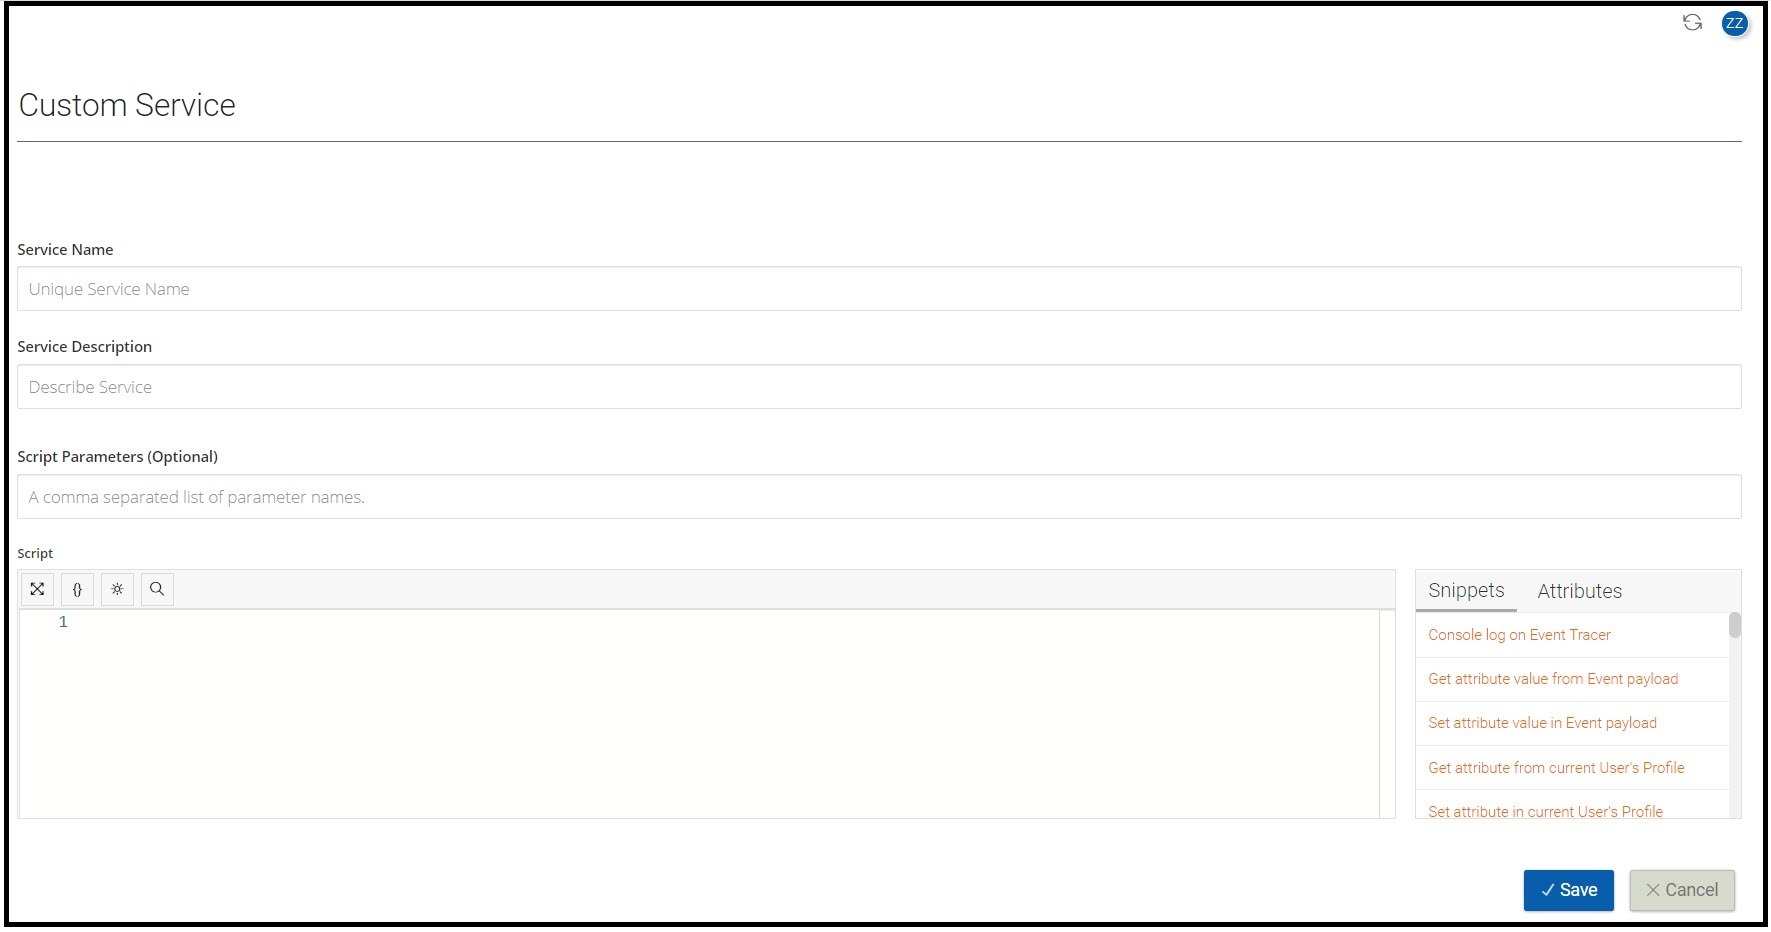
The following screen appears. - Provide the following details:
- Service Name: Name of the data service.
- Service Description: Description of the data service.
- Script Parameters (Optional): A comma-separated list of parameter names.
- Script: Use the editor to write the script.
- Click Save.
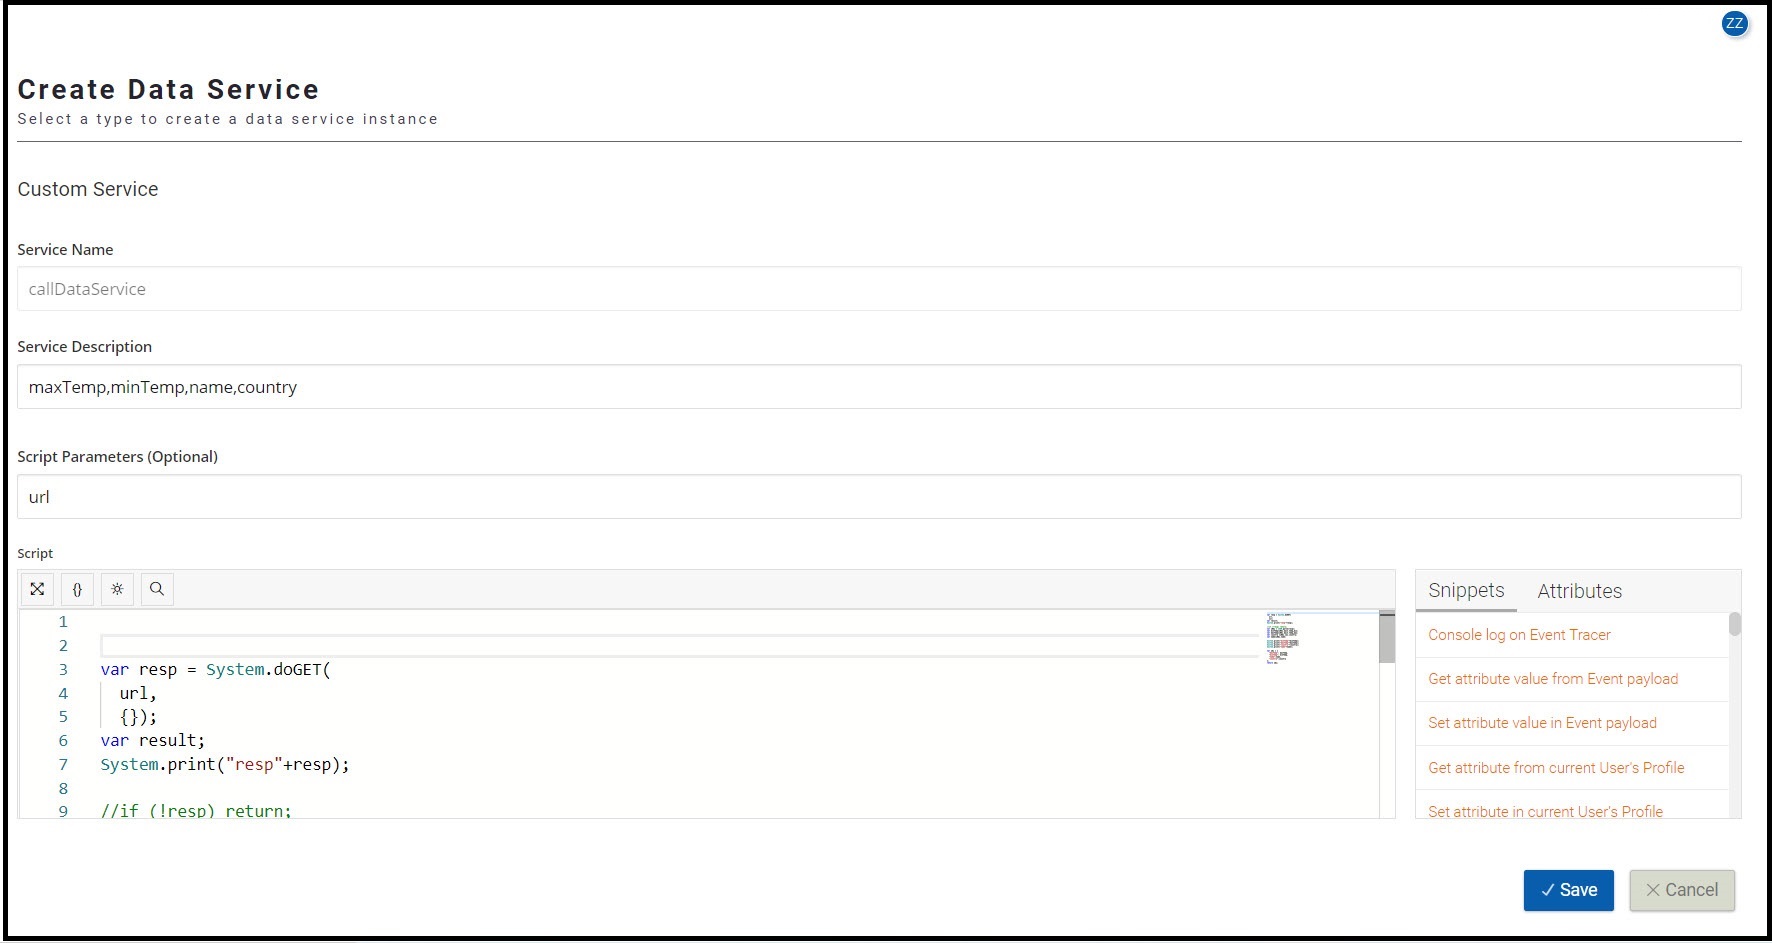
The following is a sample of Custom Data Service.
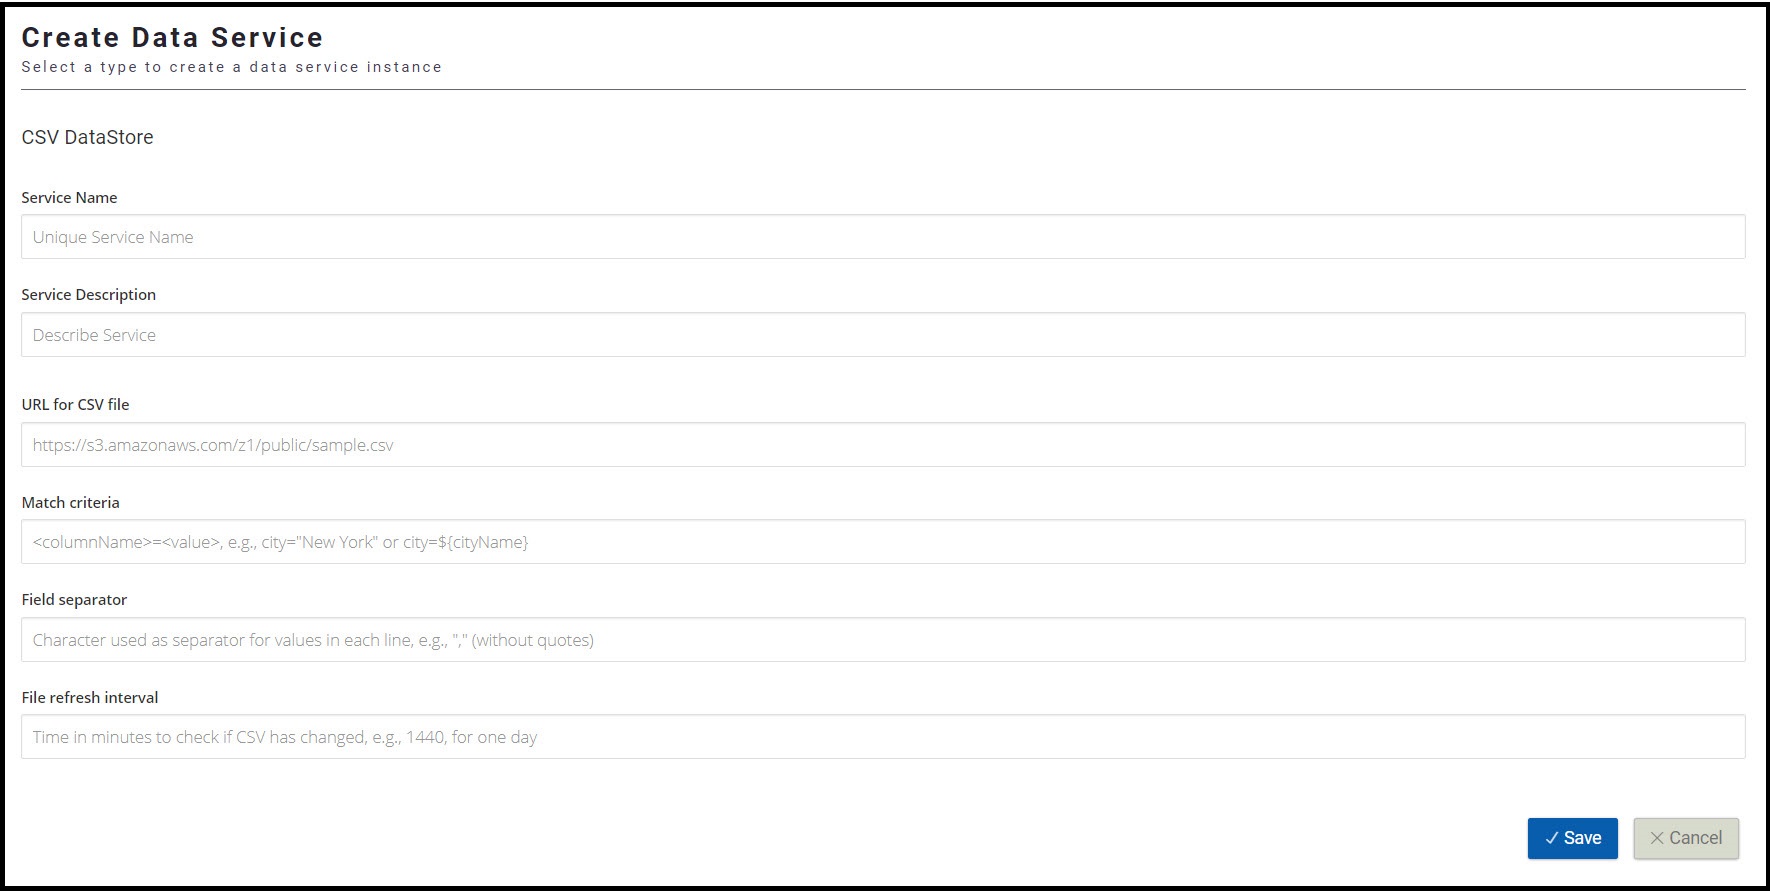
Creating CSV Data Store
Use this data service to retrieve data from a CSV file.
- On the Data Services screen, click the e CREATE DATA SERVICES button located at the upper-right corner.
The system displays the types of data services. - Click CSV DataStore.
The following screen appears. - Provide the following details:
- Service Name: Name of the data service.
- Service Description: Description of the data service.
- URL for CSV file: Location of the .csv file. For example, https://{domain}/z1/public/sample.csv.
- Match criteria: Extracts values from the CSV where the column matches the given criteria. For example, city=${cityName}.
- Field separator: Character used as a separator for values in each line. For example, ",".
- File refresh interval: Time interval in minutes at which the CSV file is refreshed.
- Click Save.