Creating Scheduled Experiences
To create scheduled interaction, follow the steps given below:
- In the Experiences menu, click the Scheduled Experiences tab.
The list of all the scheduled experiences is displayed. - To create a new Scheduled Experience, click Create New.
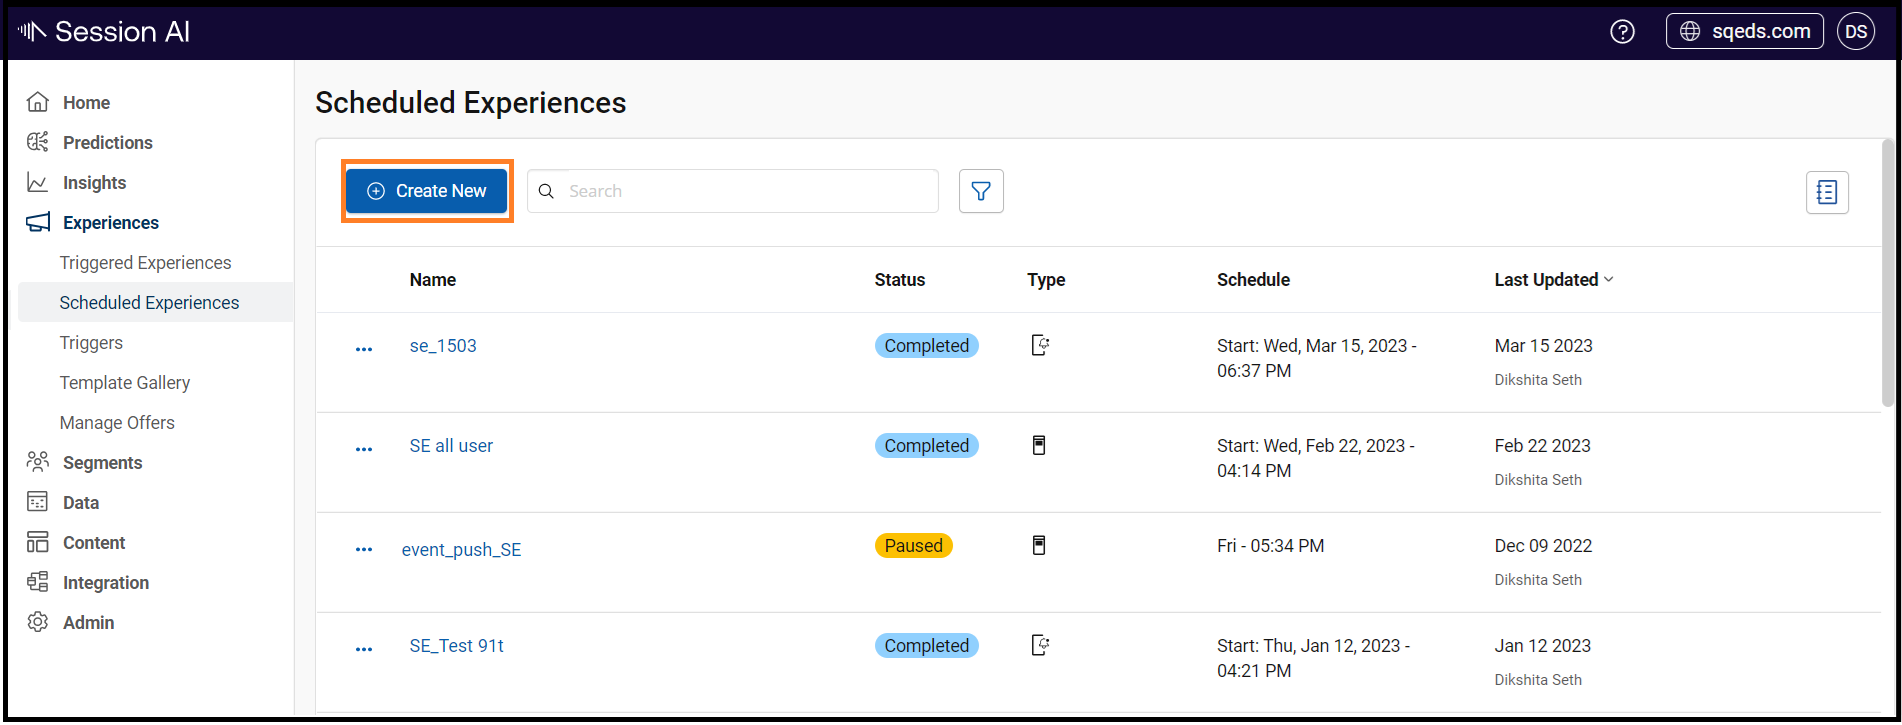
Note:By default, only those scheduled experiences which are active are displayed in the list. Delete the Active filter to view all the scheduled experiences.
SE flow displays the Targeting tab screen to create a new scheduled experience
- Enter the name for the new Scheduled Experience field.
Under the Targeting tab screen, provide the following information. - In Segments, search and add one or more segments.
- After selecting the Segments, click Next.
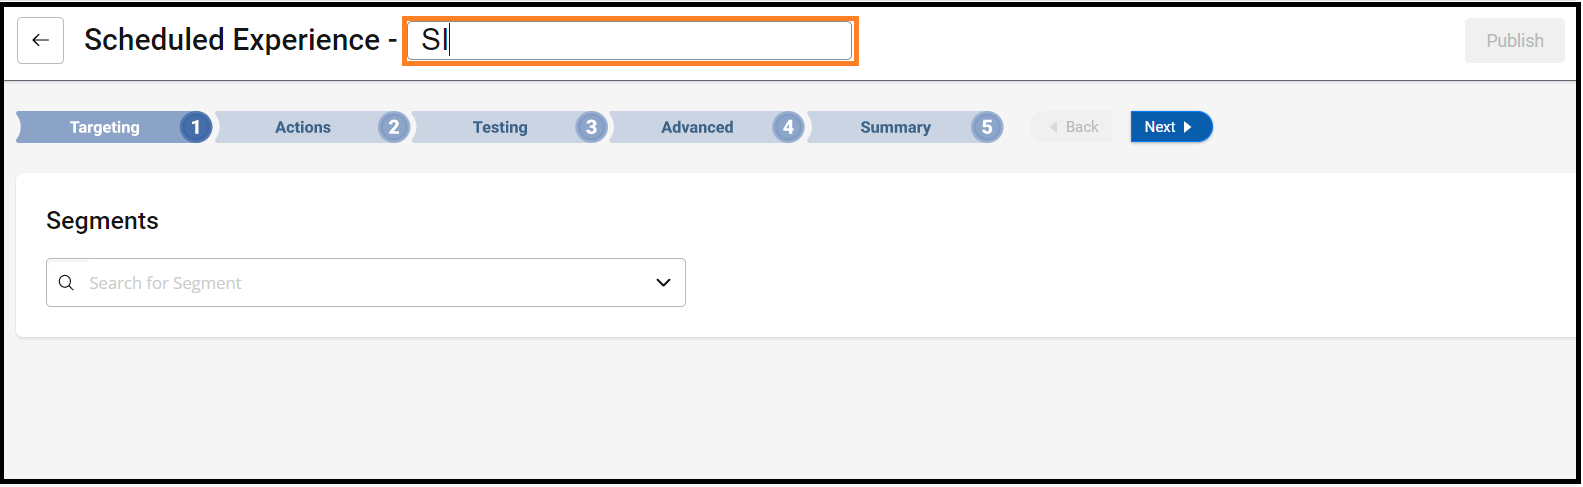
NoteClick the selected segment from the Segments selection box, and a side panel will open displaying all the configurations of selected segments.

The flow displays the Actions tab screen.
- Under Action Template, click
 icon. The drop-down list of all the templates will display.
 - Assign a unique name for an action in the Action 1 text box.
- Select the desired template or scroll down to choose the template from the preconfigured action templates.

NoteThe selected Template is displayed in the Preview tab. Users can view the selected template in both the Preview and Code view.
The selected template displays the configuration steps.
- Configure the style of the template and provide the content for experience in Editor.
Note: You can view the action look and feel in the Action Preview field. - After providing all the necessary information, click Next.

The flow displays the Testing tab screen.
- In the Delivery section, select any of the following:
- Execute All Actions
- Use A/B Testing: A/B Testing is a method of comparing customer responses to two action variants in the same experience, A and B, and identifying which variant is more effective. Switch on the toggle to select the most effective actions and send them to the customers.
- Under Allocation to Control Group set the Control group traffic for the action.
- Use the QA Control section to divide the target customer population into Test and Control groups to deliver actions.
- Test Group: Includes customers that receive actions
- Control Group: Includes customers that do not receive actions
- Click Save to save the experience as a draft or click Next.

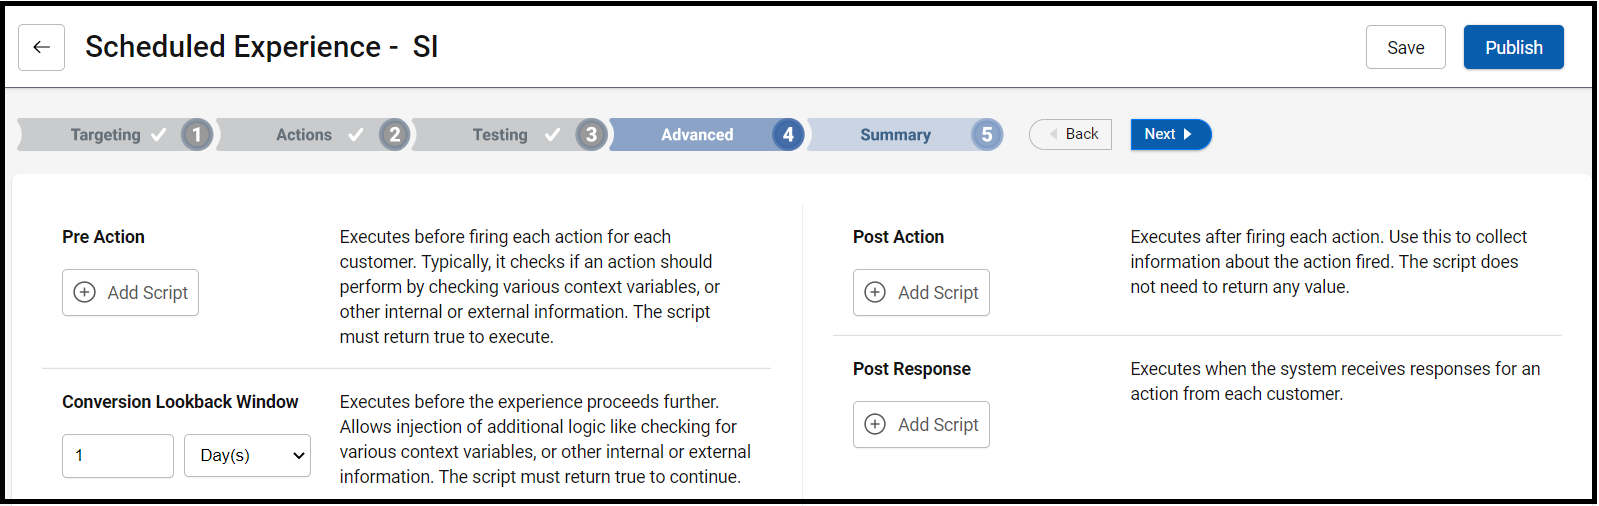
The flow displays the Advanced section.
- The advanced section helps to control the customer experience and measure the impact of interaction on the customers.
The pre or post-action script settings appear.
- Click Pre Action to create an action script that runs before the execution of the actions for each customer.
- Click Post Action to create an action script that runs after the execution of each action.
- Click Action Response to create an action script that runs when the system receives responses for actions from each customer.
- Click Conversion Lookback Window to specify the time period to record the conversions for users who interacted with the experience within the selected time period.
- After providing all the necessary information, click Next.
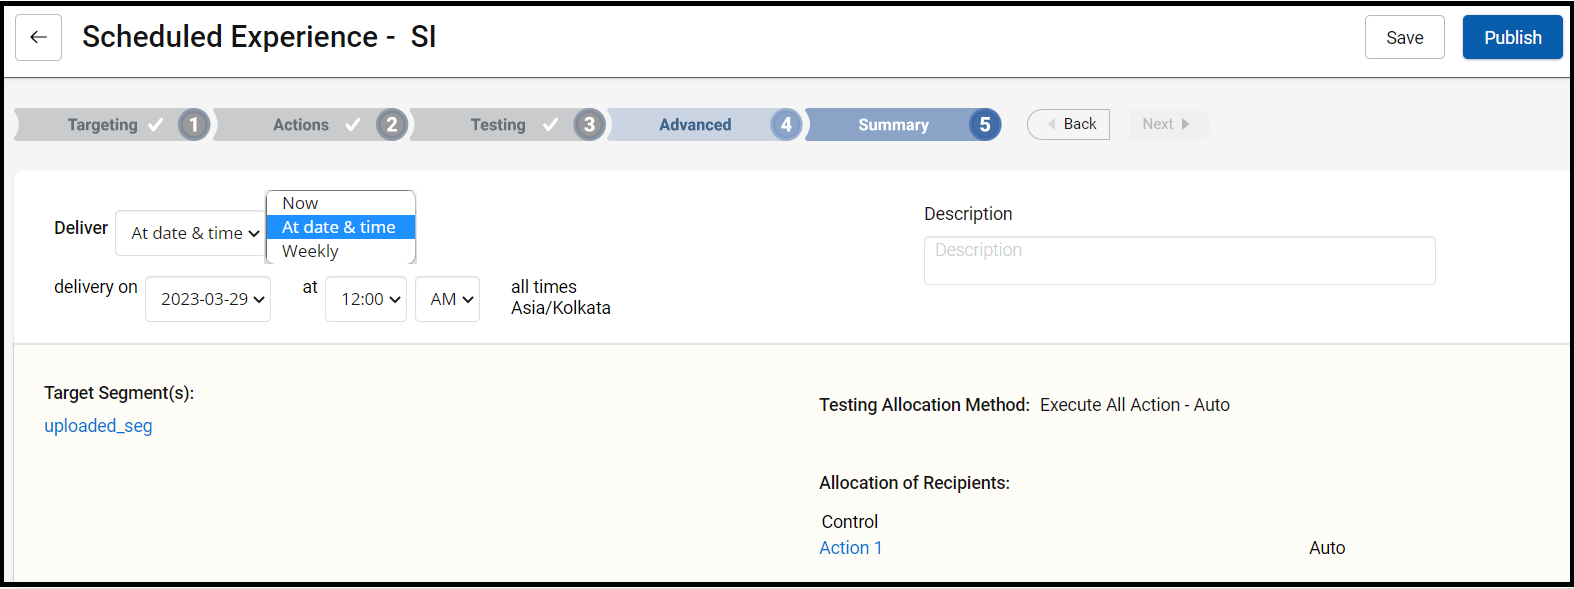
The flow displays the final step Summary tab screen.
- Enter the Description for the new schedule experience.
- In the Deliver field, you can either run the experience Now or schedule an action At date & time, or Weekly.
- After providing all the necessary information, click Save to save the experience as a draft that can be published later. Or click Publish to publish the experience.
Daylight savings timezoneIn the case of daylight savings timezone, adjust the time when daylight savings time change.
Updated about 1 year ago