HTML5 SDK
This section describes:
Downloading HTML5 SDK
Generating HTML5 API Keys
Configuring HTML5 SDK
Managing HTML5 SDK Tags
Configuring HTML5 SDK Properties
Download HTML5 SDK
Before performing any setup, download and integrate the SDK with your web application.
To download the SDK, follow the steps given below:
- In the channel screen, click HTML5 SDK.
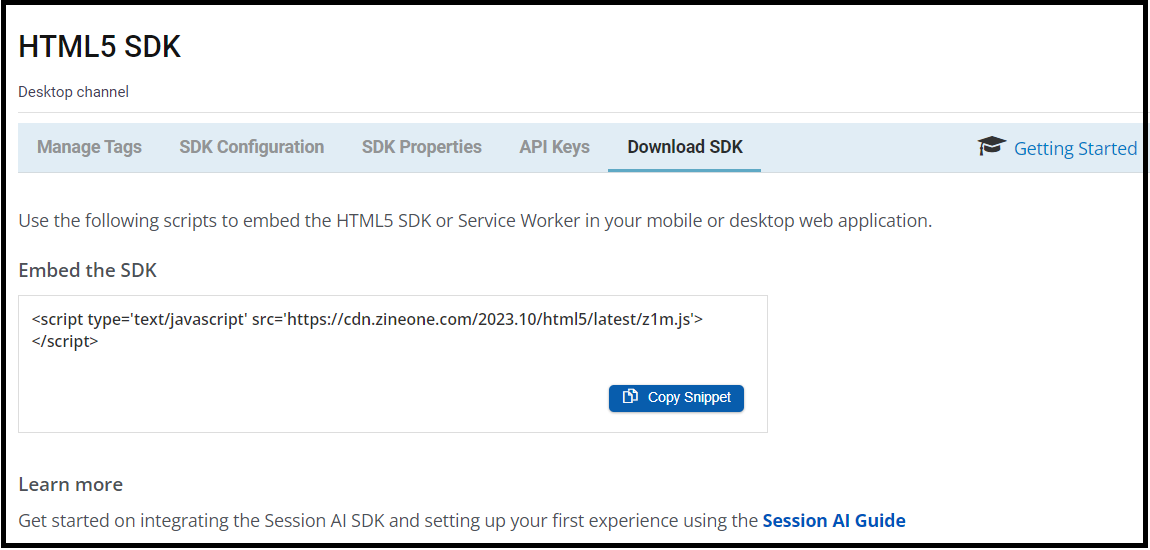
The HTML5 SDK screen will be displayed - Click the Download SDK tab.
- To embed the SDK and the service worker file in your web application, copy the following scripts:
- Under Embed the SDK, click Copy Snippet.
Note:To know more about integrating HTML5 SDK in your web application, view Developer's Guide
HTML5 API Keys
Session AI allows you to create API keys valid only for the selected channel.
- In the HTML5 SDK screen, click the API Keys tab.
- Click the GENERATE API KEY located in the upper-right corner.
A new API key with the system-generated name will be displayed.

Note:
- A newly created API key will be in an Active state.
- To deactivate the API key, click the Deactivate button.
- To delete the API key, click the Delete button.
- To copy the API key, click Copy API Key.
- To change the name of an API key, click the system-generated API name.
The API Key dialog box will be displayed. - Enter the unique name in the Application Name field.
- Click OK. The API key will be renamed.

HTML5 SDK Configuration
Configuring the SDK allows you to track the geolocations of the customers and return when they enter and exit the geofence that you defined in the Session AI platform.
To set Geofence location, refer to the Add and Manage a Location Channel section.
Session AI allows you to get the customer's location, by enabling this option. You can also disable the URL parameter capture which means that the SDK will not track the information. You can provide the service worker path for Web Push Notifications to the customer's device.
To enable Web Push Notifications, you need to do several setups such as Server Setup, Service Worker file Setup, and Client Setup.
To configure the HTML5 SDK, follow the steps given below:
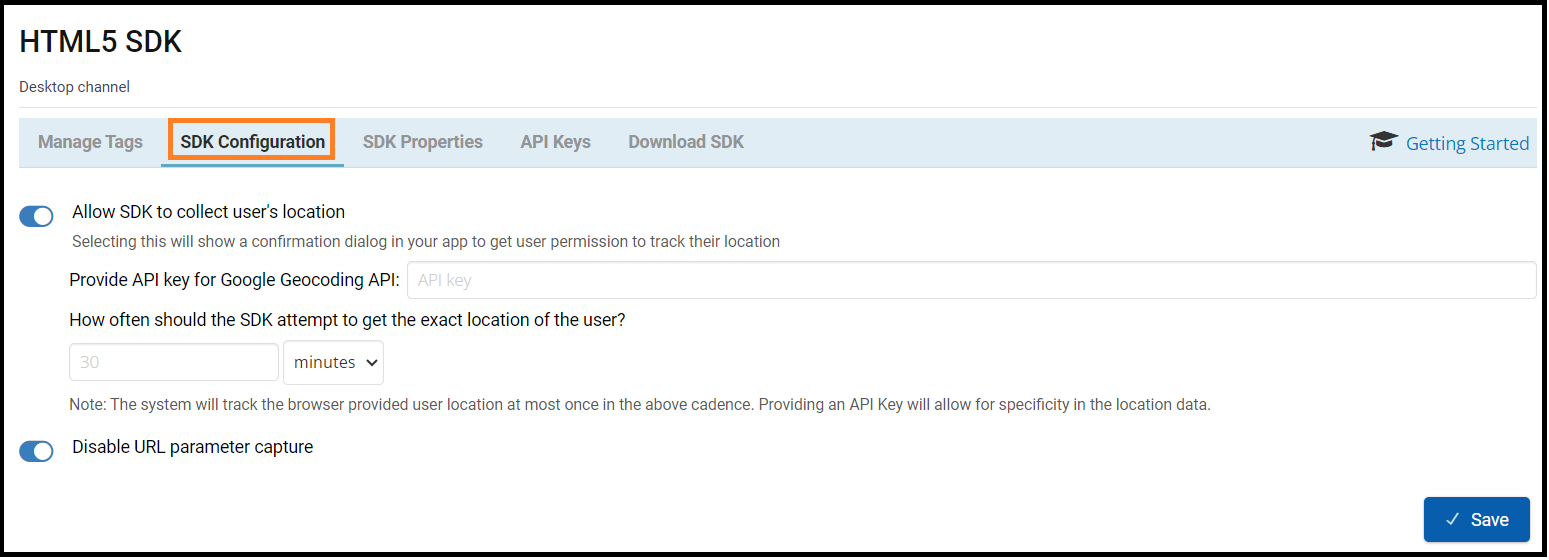
- In the HTML5 SDK screen, click the SDK Configuration.
Configure the following settings:
- Enable Allow SDK to collect user's location toggle to track customer's location.
- Enter your Google's Geolocation API key in the Provide API key for Google Geocoding API field.
- Enter the appropriate time as per the selected duration unit in How often should the SDK attempt to get the exact location of the user?.
- Enable Disable URL parameter capture toggle to stop the SDK from tracking the information in the page URL when it is sending data to the backend.
- Click Save.
Managing HTML5 SDK Tags
Session AI platform provides the Tag Management feature that enables dynamic instrumentation of events in your channel application without having to change the application code or redeploy it.
A tag is a code snippet that is sent to the web page and activated on a defined triggering event in the application, such as DOM events, a page load/unload, etc. When the event is triggered on the application web page, the tag defined for that trigger is executed, and it sends its event payload to Session AI Cloud.
To define a tag in the Session AI platform, you should provide the Tag Name, Tag Trigger, Tag Action, and Tag Payload, which is the event associated with the Tag Action. To activate a newly created tag, it should be published in the Session AI platform.
The purpose of tag configuration is:
- To push events to Session AI Cloud through a DOM event.
- To execute scripts for DOM manipulation and/or invoke other APIs from the Session AI HTML5 SDK.
To manage HTML5 SDK tags, follow the steps given below:
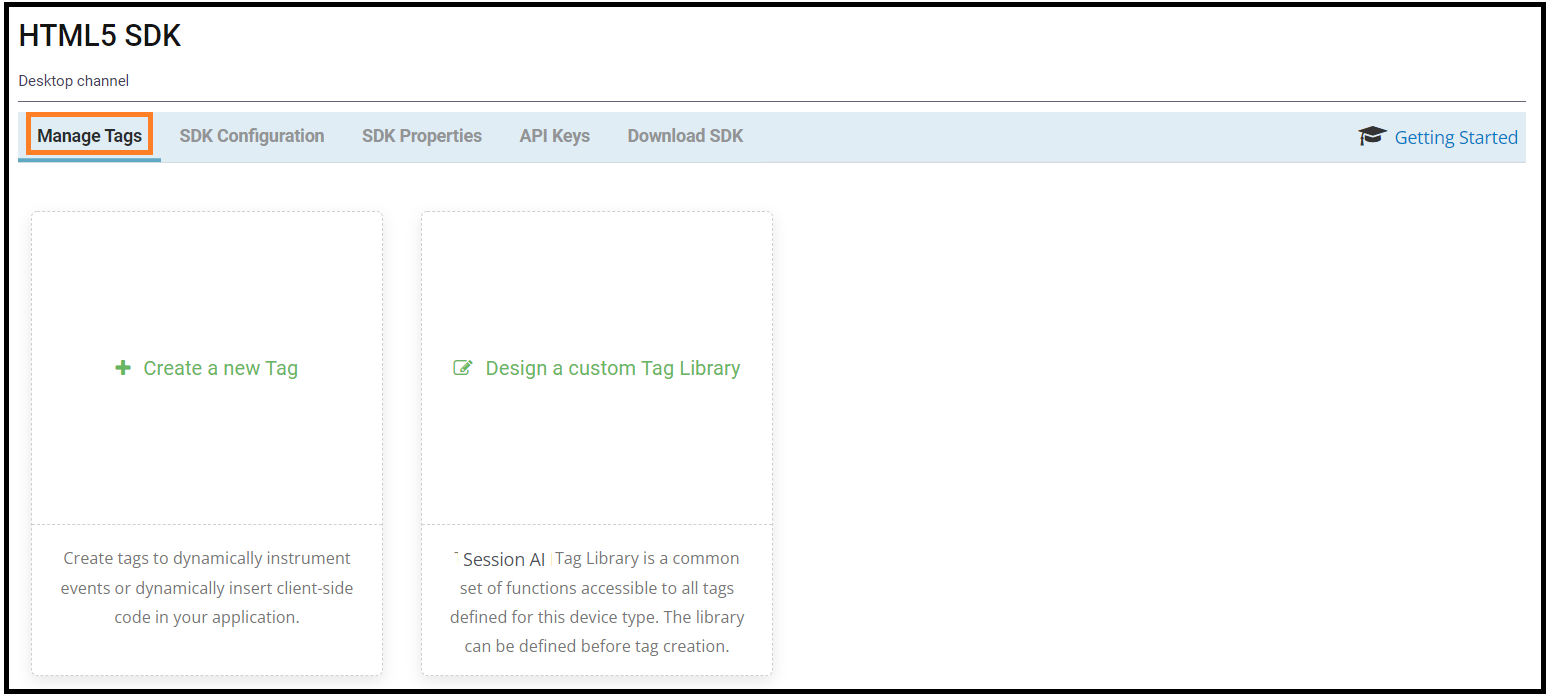
- In the HTML5 SDK screen, click Manage Tags.
- In the Manage Tags tab, the screen displays the following option:
- Create a new Tag
- Design a custom tag Library
Create a new Tag
(I) To create a tag, click Create a new Tag.
The settings to create a new tag screen will be displayed.
(II) Provide the following details:
- Tag Name: Enter the unique tag name to get easily identified.
- Tag Trigger: It defines when the SDK should execute this tag on the device. Each option is a DOM event on which the tag’s actions are performed.
Based on Tag Trigger options, the settings vary:- On Click: To be used when the developer wants to trigger tag action with the click of a button or any DOM element. Identify the DOM element by providing a unique ID, CSS class name, or a Query Selector.
- On Value Changed: To be used when the developer wants to trigger tag action on the value change of any
<input>element. Identify the DOM element by providing a unique ID, unique CSS class name, or a Query Selector. - On Page Load: To be used when the developer wants to trigger tag action on a specific page load or all pages. A page name is derived from the URL.
- On Page Unload: To be used when the developer wants to trigger tag action on a specific page unloads or when all pages unload. A page name is derived from the URL.
- On Value Changed in Data Layer: To be used when the developer wants to trigger the Tag action when there is a change in a data attribute stored in the application's data layer.
- Tag Action - Select the appropriate tag action.
Note: Based on Tag Trigger options, the settings vary.- Send event to Session AI Cloud: The event can be sent to the Session AI server without having to instrument the page. This is equivalent to using the SDK’s API “Session AI.pushEvent()”. To help construct the event’s payload if any, there are four kinds of variables that can be used.
- As Constant: A variable whose value is static and not privy to change can be sent as “constant”. For example, pageName="addToCart", category="shoes" .
- As Computed: A variable containing a valid HTML DOM expression or Javascript expression. For example, document.getElementById(“searchTxtBox”).value, navigator.appName + “ “ + navigator.appVersion.
As defined in data layer: A variable that has been pushed to the Session AI Data Layer object in the web page's source code. To do this, the developer needs to instrument the following API in their code:
Session AI.addData("param_name", "param value");
Thereafter, the variable param_name can be accessed at any point in time as an event parameter later on. For example, customerId, membershipType, itemInBag, itemPrice, loanAmount, etc.
As defined in data layer: The event object being referred to here is the Event interface representing any event in the DOM. In the Session AI platform Tag context, all of them are user-generated such as mouse or keyboard events. The properties and methods of the event interface can then be used to populate the event parameters with any value from the existing DOM. - Client-Side Code: You can execute any valid Javascript expression and/or call Session AI’s HTML5 SDK APIs to communicate with Session AI Server.
Client-side scripting gives a developer the ability to do DOM manipulation, computations, accessing global variables residing inside the page, and many more, without having to tweak the code.
- Send event to Session AI Cloud: The event can be sent to the Session AI server without having to instrument the page. This is equivalent to using the SDK’s API “Session AI.pushEvent()”. To help construct the event’s payload if any, there are four kinds of variables that can be used.
(III) Click Save.

Design a custom Tag Library
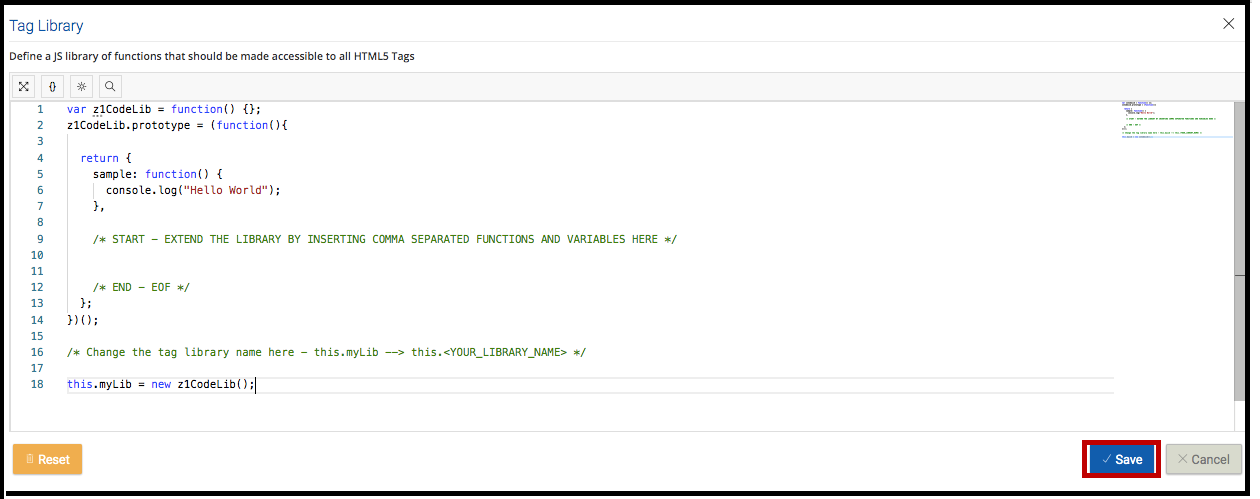
Tag Library is a module for holding all functions you want to execute before any Tags are used. The functions in your Tag Library can also be called individually from any of the Tag scripts.
To design a tag library follow the steps given below:
(I) In HTML screen, in Manage Tags tab, click Design a custom Tag Library.
A Tag Library window will be displayed.
(II). Add your required functions and then click Save.
Note: Below given image displays a sample for Tag Library script.
After creating Tags, the newly added tag appears in the list of tags.
- To publish all active tags, click Publish Tags located in the upper-right corner.
Once published, it's delivered to the native application whenever the SDK connects to the Session AI server. - On the HTML5 SDK Tags screen, set this configuration:
- In the list of added tags, switch on the Activation toggle to set the status of the tag as Active OR Inactive.
- To copy the content of a tag, click the Copy icon.
- To perform further changes in the library tag code, if necessary, click Tag Library.

HTML5 Tag Management
- For more information about managing the HTML5 SDK tags, refer to the HTML5 Tag Management topic in the Session AI Developer's Guide.
- By default, the status of the newly created tag is Active.
icon indicates that the tag is not published. Publish a tag to deliver it to the integrated native application.
- Click the Delete icon to delete the tag permanently. Tags marked with this
icon are deleted tags. Click Publish Tags to remove the deleted tag from the system.
Configuring HTML5 SDK Properties
Session AI provides various out-of-the-box properties that can be used to configure the HTML5 SDK.
The Session AI platform allows you to set values for the desired properties of the HTML5 SDK to match your app design and requirements.
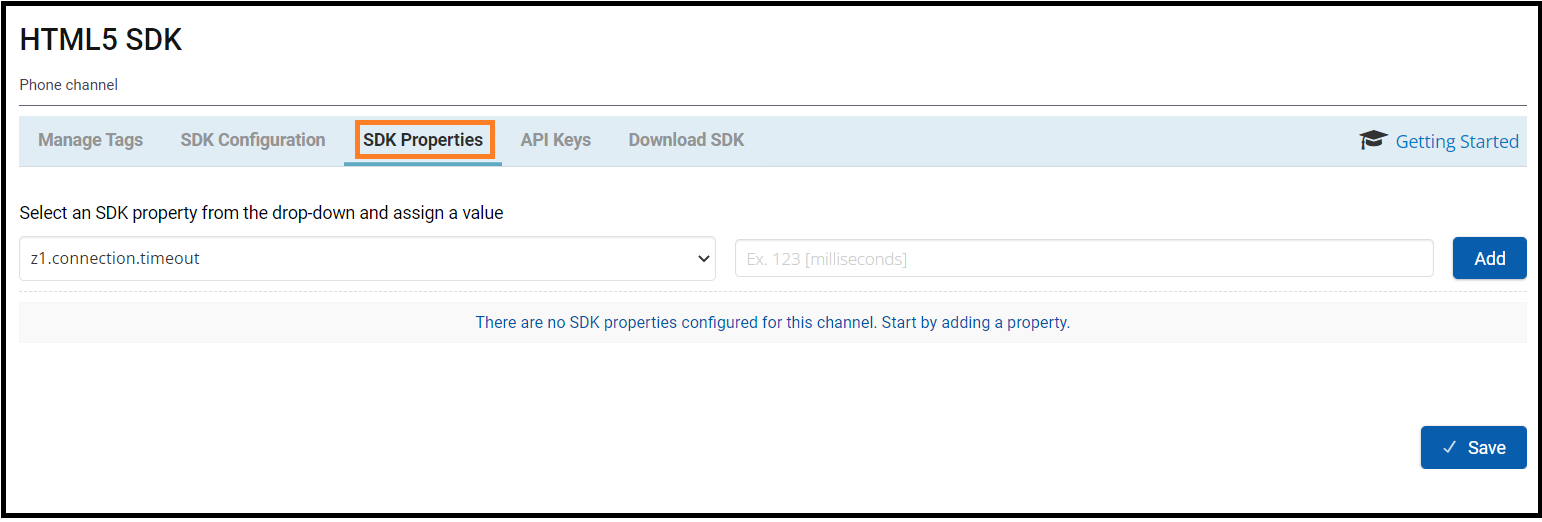
- On the Phone screen, click HTML5 SDK and click the SDK Properties tab.
The screen displays the following settings. - Under Select an SDK property from the drop-down and assign a value, perform the following:
- Property: Select the appropriate property name.
- Property Value: Enter the appropriate property value.
- Click the Add button. You can add one or more properties.
The HTML5 SDK Properties tab displays the newly added property.
- Click Save to set the changes.